sudo apt update
sudo apt install linux-headers-$(uname -r) -y
sudo apt install -y wireguard
sudo su -
cd /etc/wireguard
wg genkey | tee privatekey | wg pubkey > publickey
chmod 600 *
cat privatekey
cat publickey
exit
Execute this command:
sudo nano /etc/wireguard/wg0.conf
Change the private key to the correct value for your system.
[Interface]
Address = 192.168.100.1/24
ListenPort = 51194
PrivateKey = IOmxxxxxxxxxxxxxxxxxxxxxxxxxxxxxxxxxxxxxO0M=
SaveConfig = true

Save the file with Ctrl+X, Y, Enter.
Execute these commands:
sudo systemctl enable wg-quick@wg0
sudo systemctl start wg-quick@wg0
sudo ss -nau

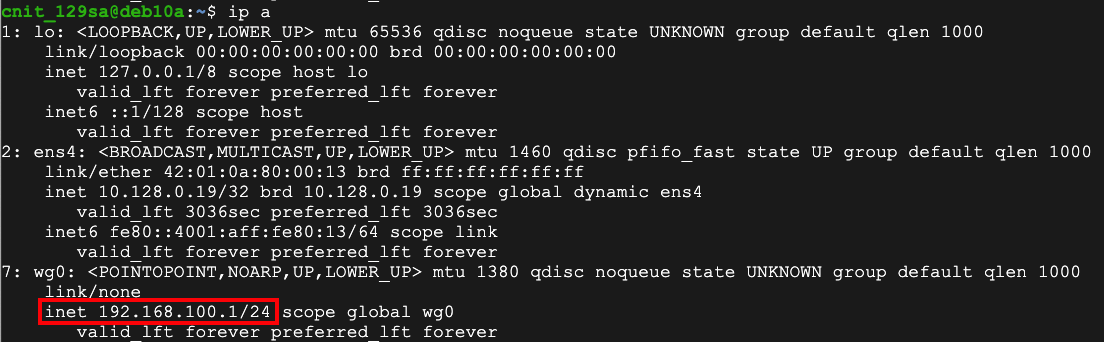
Execute this command:
ip a
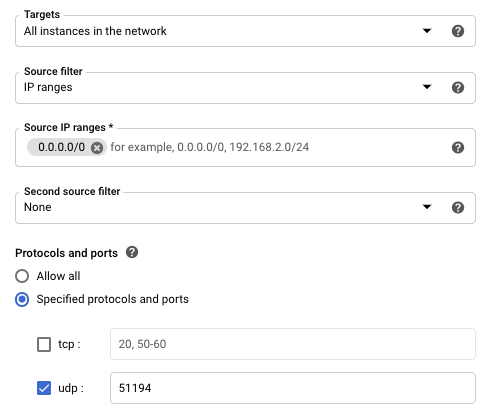
At the top center, click "CREATE FIREWALL RULE".
Enter these values, as shown below.
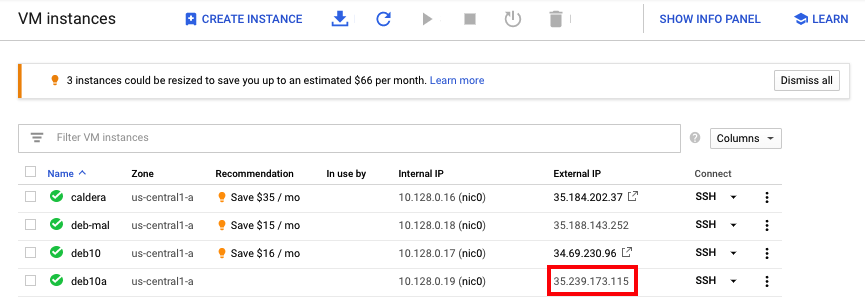
Find your server's public IP address, as shown below.
Make a note of it. You'll need it to configure your client.
In the WireGuard window, at the lower left, click the down-arrow next to "Add Tunnel" and click "Add empty tunnel...".
Enter a Name of GoogleCloud.
Add these lines below the automatically generated PrivateKey, as shown below.
You will have to change the EndPoint IP to your Google Cloud public IP and the PublicKey to your Linux server's wireguard public key.
Address = 192.168.100.2/24
[Peer]
EndPoint = 35.239.173.115:51194
PublicKey = oUaxxxxxxxxxxxxxxxxxxxxxxxxxxxxxxxxxxxxxIUk=
AllowedIPs = 192.168.100.0/24
PersistentKeepalive = 20
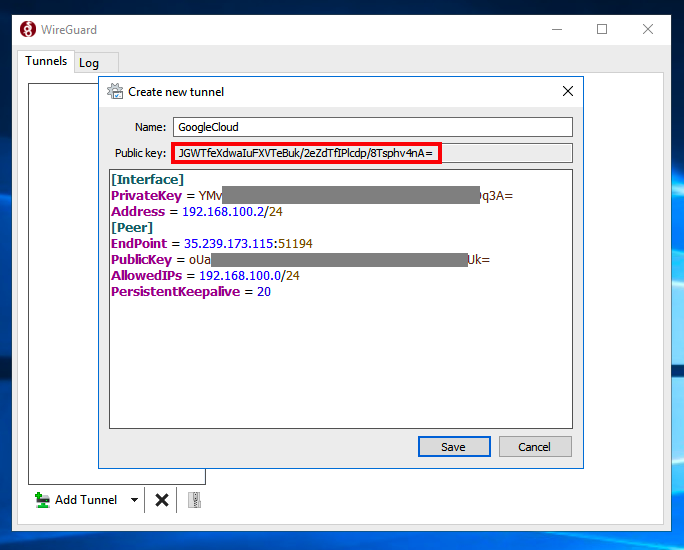
Click Save.
Click Activate.
sudo systemctl stop wg-quick@wg0
sudo nano /etc/wireguard/wg0.conf
[Peer]
PublicKey = JGWxxxxxxxxxxxxxxxxxxxxxxxxxxxxxxxxxxxxx4nA=
AllowedIPs = 192.168.100.2/32
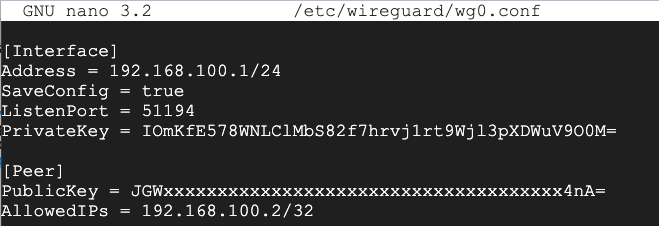
Save the file with Ctrl+X, Y, Enter.
Execute these commands:
sudo systemctl enable wg-quick@wg0
sudo systemctl start wg-quick@wg0
Flag H 240: Keepalive (15 pts)
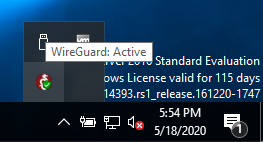
On your Windows machine, in the lower right, click the up-arrow and click the Wireguard icon, as shown below.
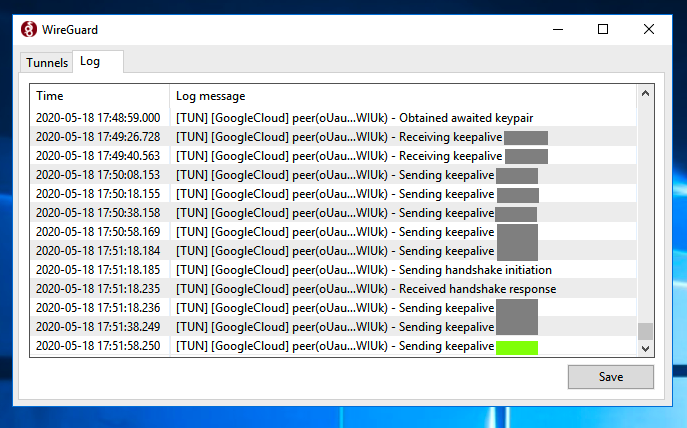
In the WireGuard window, click the Log tab.
Find a line beginning with "Sending keepalive".
The flag is covered by a green rectangle in the image below.
Posted 5-18-2020
More explicit client instructions added 6-8-2020