For best results, use two PCs: one for Nox and one for Kali.为获得最佳效果,请使用两台PC:一台用于Nox,另一台用于Kali。
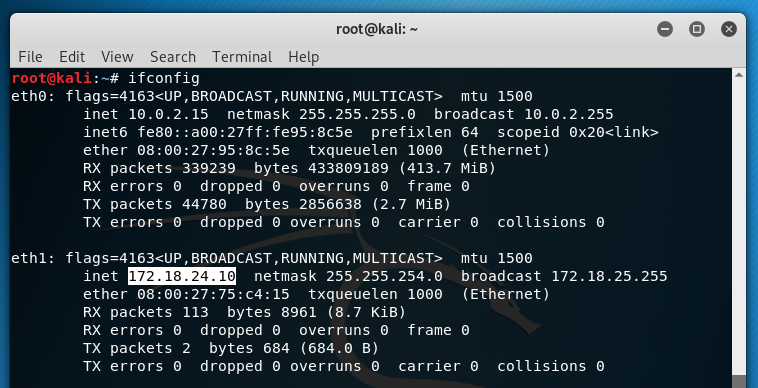
On Kali, in a Terminal, execute this command:在Kali上,在终端中执行以下命令:
ifconfig使用ifconfig
Using VirtualBox使用VirtualBox
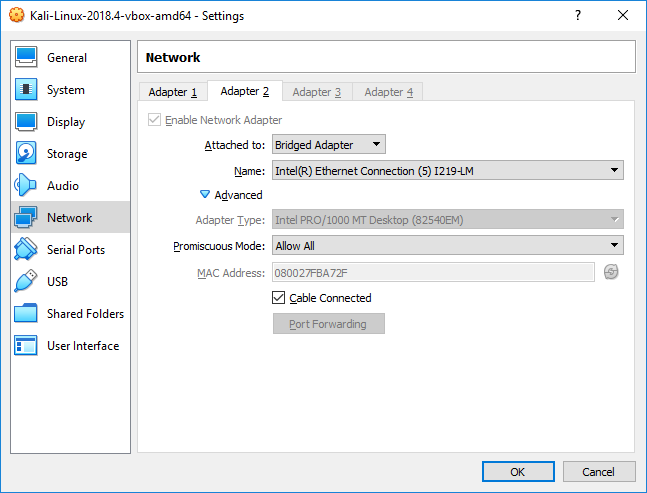
If your Kali is in Virtualbox, you need to shut down your virtual machine and configure Adapter 2 as shown below.如果您的Kali位于Virtualbox中,则需要关闭虚拟机并配置Adapter 2,如下所示。
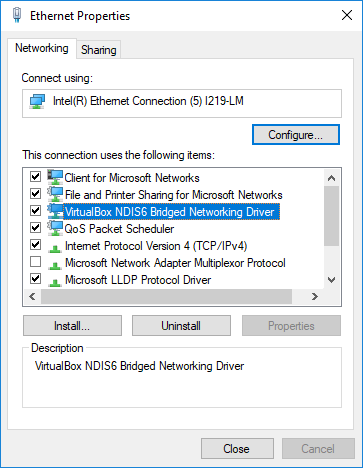
If you cannot connect to any adapters, and all the "Name" options are grayed out, you need to install the "VirtualBox NDIS6 Bridged Networking Driver. To do that, open Network Connections, and the Properties of your Ethernet adapter. Click Install, Service, "Add...", "Have Disk...", "Browse...", and browse to "C:\Program Files\Oracle\VirtualBox\drivers\network\netlwf\VBoxNetLwf.inf" Install the driver, as shown below.如果无法连接到任何适配器,并且所有“名称”选项都显示为灰色,则需要安装“VirtualBox NDIS6桥接网络驱动程序。为此,请打开”网络连接“和”以太网适配器的属性“。单击”安装“,服务,“添加...”,“有磁盘...”,“浏览...”,然后浏览到“C:\ Program Files \ Oracle \ VirtualBox \ drivers \ network \ netlwf \ VBoxNetLwf.inf”安装司机,如下图所示。
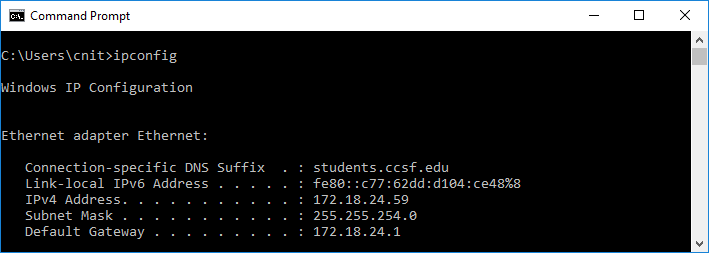
On your Windows host system, execute this command:在Windows主机系统上,执行以下命令:
ipconfig IPCONFIG
On my system, it was Ethernet , as shown below.在我的系统上,它是以太网 ,如下所示。
In the "Network settings" section, click the blue install link, as shown below.在“网络设置”部分中,单击蓝色安装链接,如下所示。

A box pops up saying "Bridge connection driver installed successfully".弹出一个框说“已成功安装桥接连接驱动程序”。 Click Ok .单击确定 。
In "System settings", click " Enable network Bridge mode ", as shown below.在“系统设置”中,单击“ 启用网桥模式 ”,如下所示。
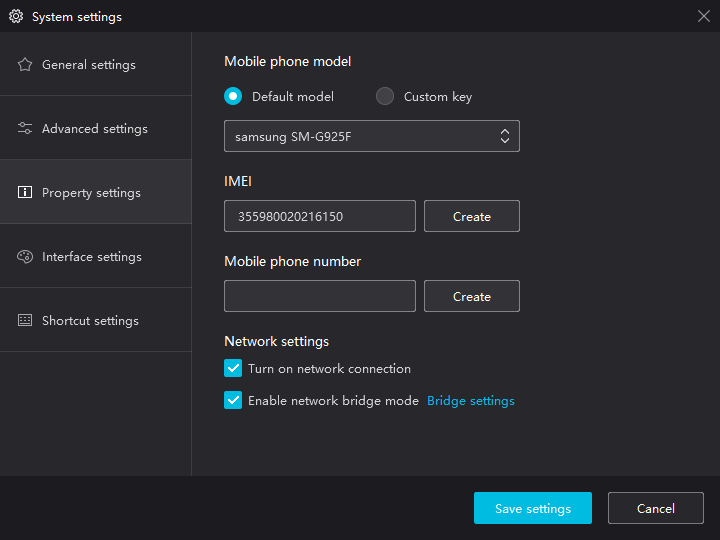
Click : Save settings ". Click " Restart now ".单击: 保存设置 “。单击”立即重新启动 “。
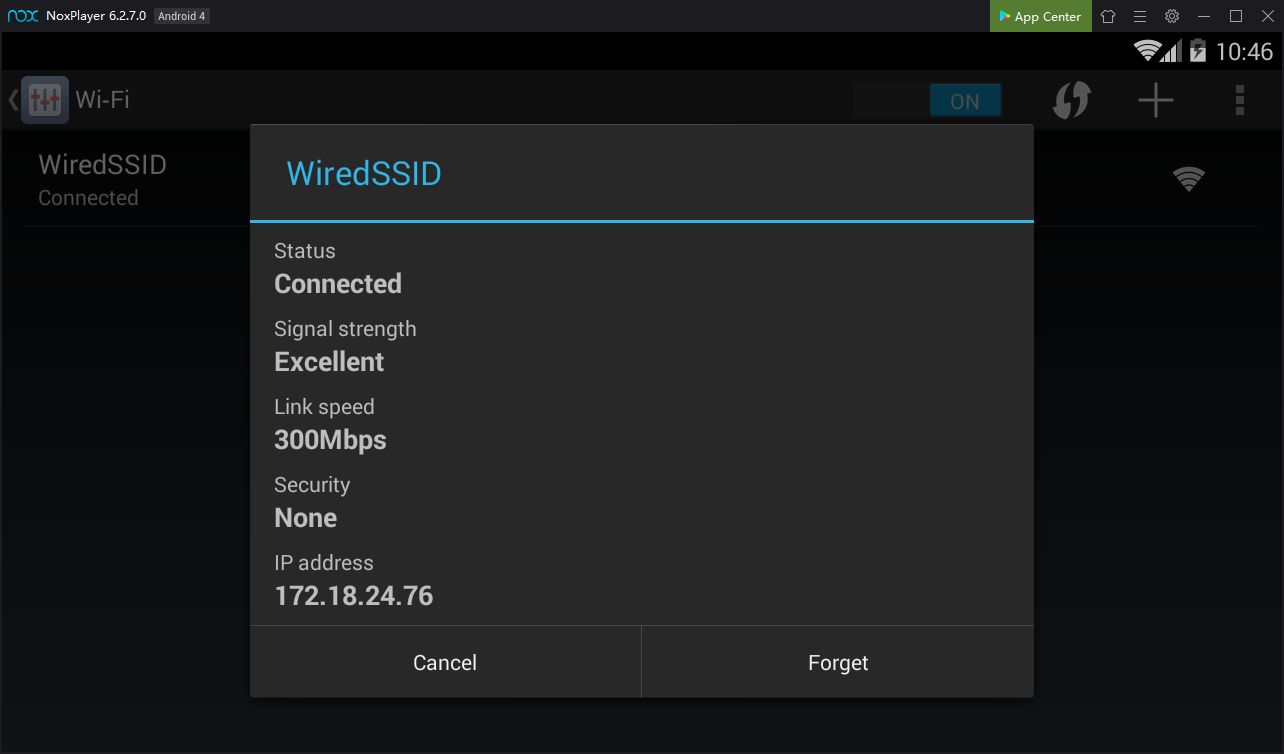
Click Tools , Settings , Wi-Fi .单击工具 , 设置 , Wi-Fi 。
Point to WiredSSD .指向WiredSSD 。 Hold down the left mouse button until a box pops up.按住鼠标左键直到弹出一个框。 Click " Connect to network ".单击“ 连接到网络 ”。
Click WiredSSD .单击WiredSSD 。 You see your Nox machine's IP address, as shown below.您会看到Nox机器的IP地址,如下所示。 Make a note of it and click Cancel .记下它,然后单击“ 取消” 。
Scroll to the bottom and click " About tablet ".滚动到底部,然后单击“ 关于平板电脑 ”。
Scroll to the bottom and click the " Build number " seven times, as shown below.滚动到底部,然后单击“ 内部版本号 ”七次,如下所示。
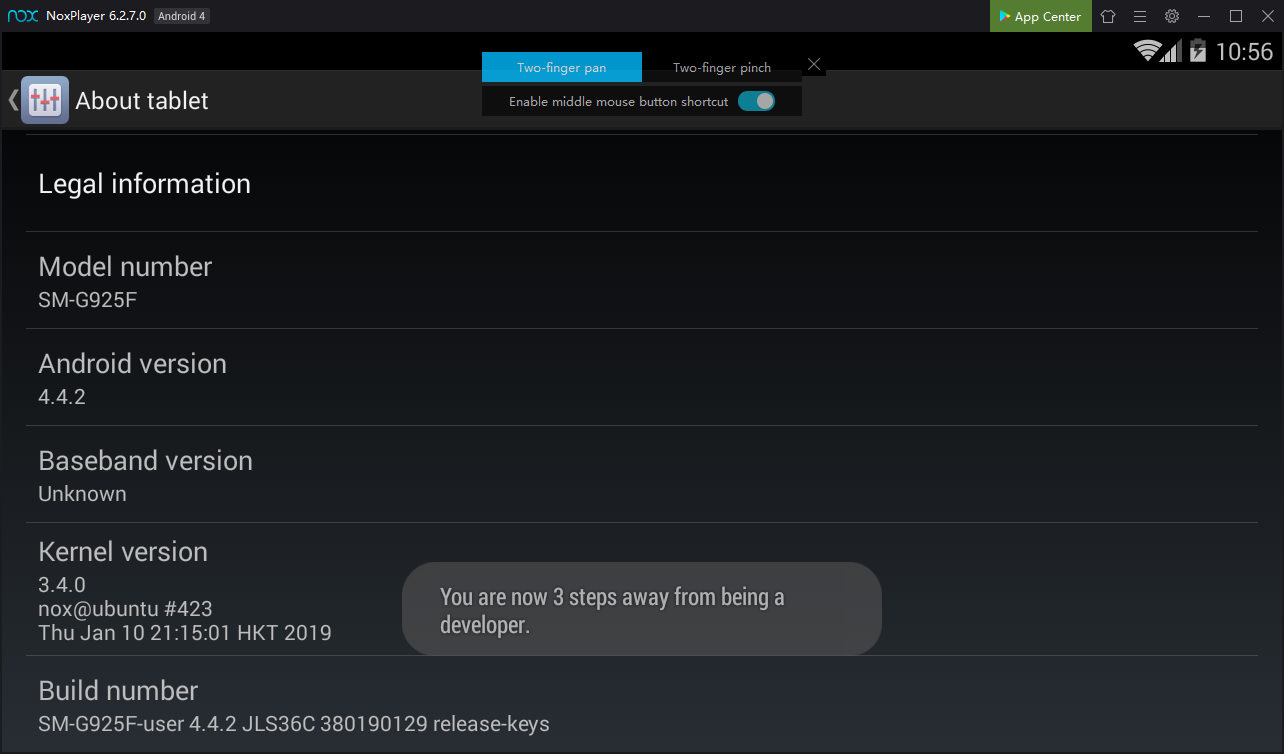
When you click it enopugh times, a box pops up saying "You are now a developer!".当你点击它时,会弹出一个框,上面写着“你现在是开发人员!”。
At the top left, click the back-arrow.在左上角,单击后退箭头。
Click " Developer Options "点击“ 开发者选项 ”
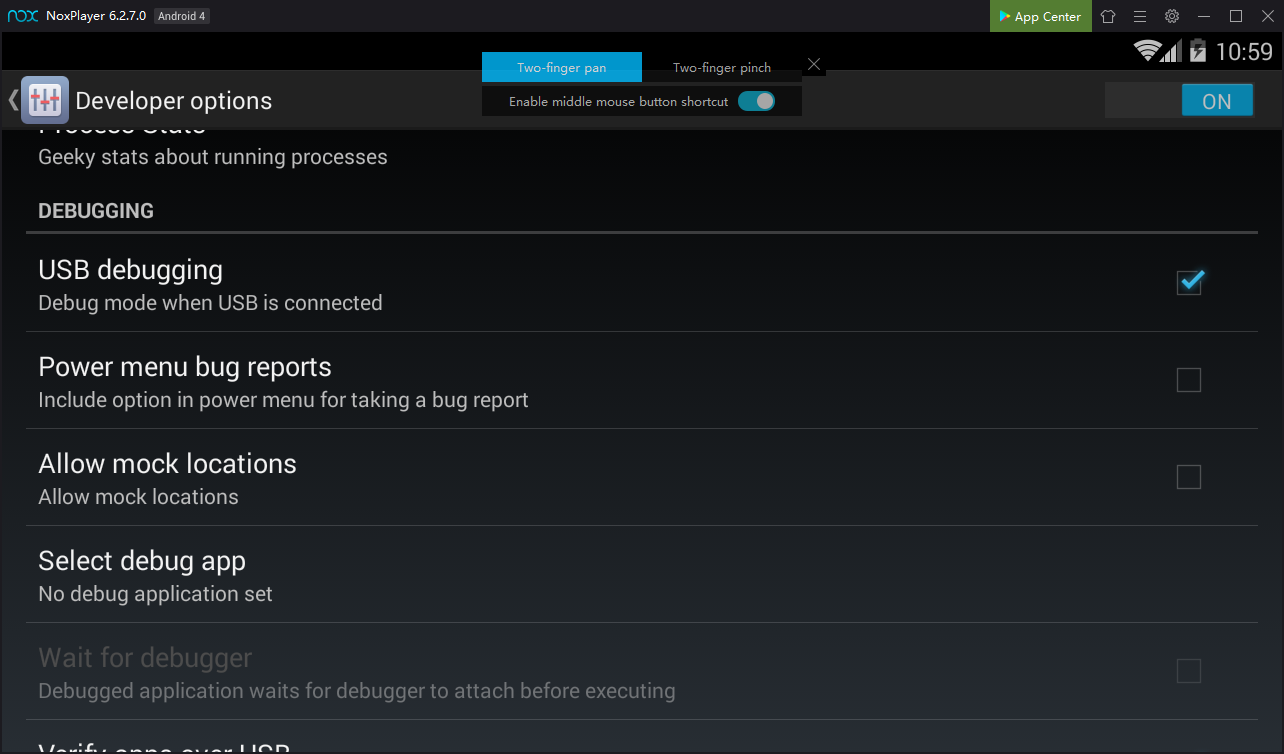
Scroll down and find the " USB Debugging " option, as shown below.向下滚动并找到“ USB Debugging ”选项,如下所示。
Click the " USB Debugging " and click OK .单击“ USB调试 ”,然后单击“ 确定” 。 USB debugging is now enabledf, \as shown below. USB调试现已启用f,\,如下所示。
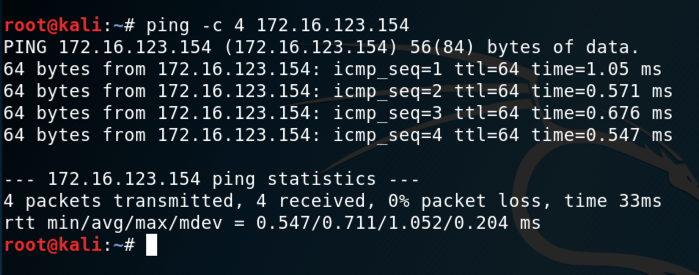
ping -c 4 172.18.24.76 ping -c 4 172.18.24.76
If you don't, you need to troubleshoot your networking before proceeding.如果不这样做,则需要在继续之前对网络进行故障排除。
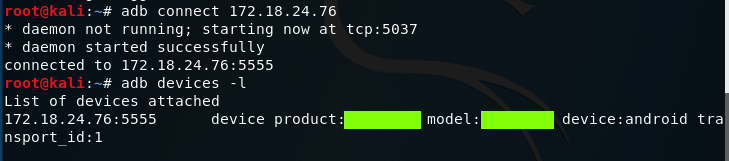
apt update apt更新
apt install android-tools-adb -y apt安装android-tools-adb -y
adb connect 172.18.24.76 adb connect 172.18.24.76
adb devices -l adb devices -l
You should see your Genymotion device in the "List of devices attached", as shown below.您应该在“附加设备列表”中看到您的Genymotion设备,如下所示。
Troubleshooting故障排除
If you see an error message saying "E: Could not get lock /var/lib/dpkg/lock-frontend - open (11: Resource temporarily unavailable)", restart your Kali machine.如果您看到一条错误消息“E:无法获取锁定/ var / lib / dpkg / lock-frontend - 打开(11:资源暂时不可用)”,请重新启动Kali计算机。
Find the product number, covered by a green box in the image below.找到下面图片中绿色框所示的产品编号。