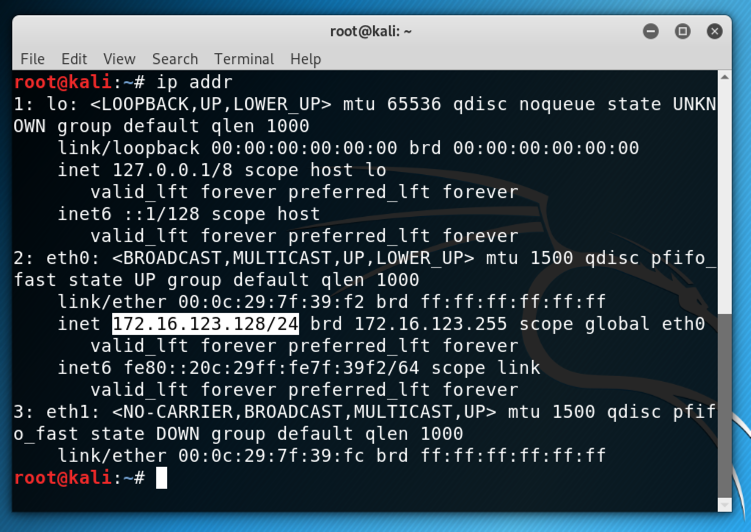
On Kali, in a Terminal, execute this command:在Kali上,在终端中执行以下命令:
ip addr ip addr
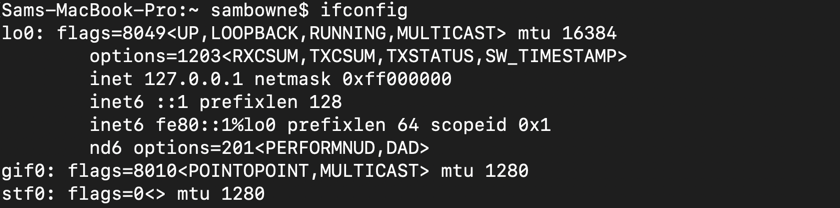
If you are using Mac OS, execute this command:如果您使用的是Mac OS,请执行以下命令:
ifconfig使用ifconfig
On my system, it was vmnet8 , as highlighted in the image below.在我的系统上,它是vmnet8 ,如下图所示。

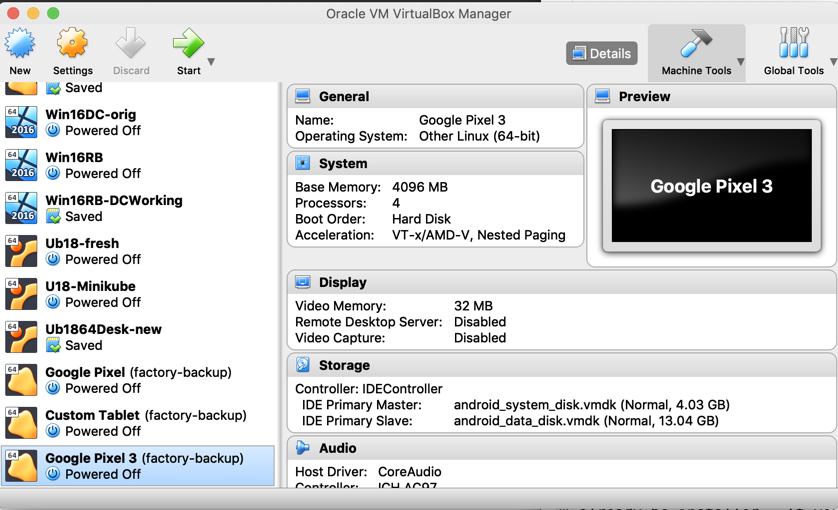
Launch VirtualBox.启动VirtualBox。 If you are using a Mac, you may have to intall VirtualBox first from:如果您使用的是Mac,则可能必须先从以下位置安装VirtualBox:
https://www.virtualbox.org/wiki/Downloads https://www.virtualbox.org/wiki/Downloads
In VirtualBox, click to select your "Google Pixel 3" device, as shown below.在VirtualBox中,单击以选择“Google Pixel 3”设备,如下所示。 Click Settings .单击设置 。
On the Network tab, the first Adapter is set to "Host-only", as shown below.在“ 网络”选项卡上,第一个适配器设置为“仅主机”,如下所示。 Don't change anything here--this adapter is reuired for Genymotion.不要在这里改变任何东西 - 这个适配器是为Genymotion需要的。
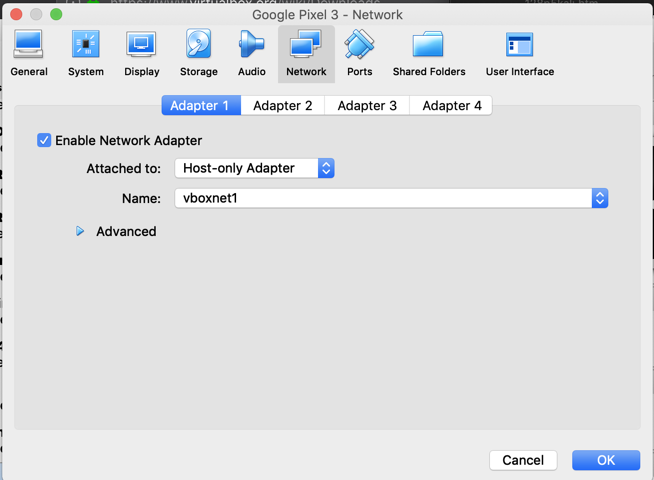
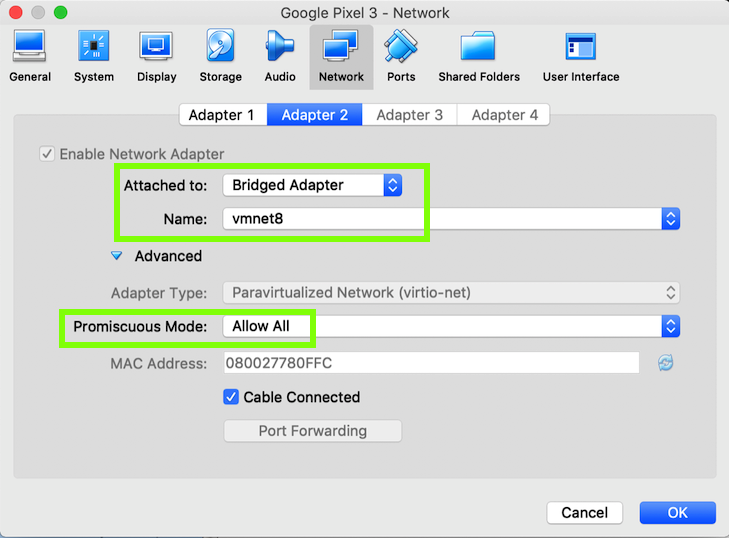
Click the " Adapter 2 " tab.单击“ 适配器2 ”选项卡。 Set this adapter to Bridged and connect it to the host adapter Kali is using, as shown below.将此适配器设置为Bridged并将其连接到Kali正在使用的主机适配器,如下所示。
Click Advanced and allow " Promiscuous Mode ", as shown below.单击“ 高级”并允许“ 混杂模式 ”,如下所示。
Click OK .单击确定 。
Troubleshooting故障排除
After this networking adjustment, you must always start VMware before Genymotion.在进行此网络调整后,您必须始终在Genymotion之前启动VMware。 Otherwise Genymotion will give an error and tell you to open Virtualbox to adjust the networking.否则Genymotion会给出错误并告诉您打开Virtualbox来调整网络。
Open Settings .打开设置 。
In Settings, click " Network & internet ".在“设置”中,单击“ 网络和Internet ”。
Click Wi-Fi .点击Wi-Fi 。
Click AndroidWiFi .单击AndroidWiFi 。
Click Advanced .单击高级 。
In the "Network details" screen, at the top right, click the Pencil icon.在“网络详细信息”屏幕的右上角,单击铅笔图标。
In the "Proxy" field, click the down-arrow.在“代理”字段中,单击向下箭头。
Click None .单击“ 无” 。
Then click Save .然后单击“ 保存”
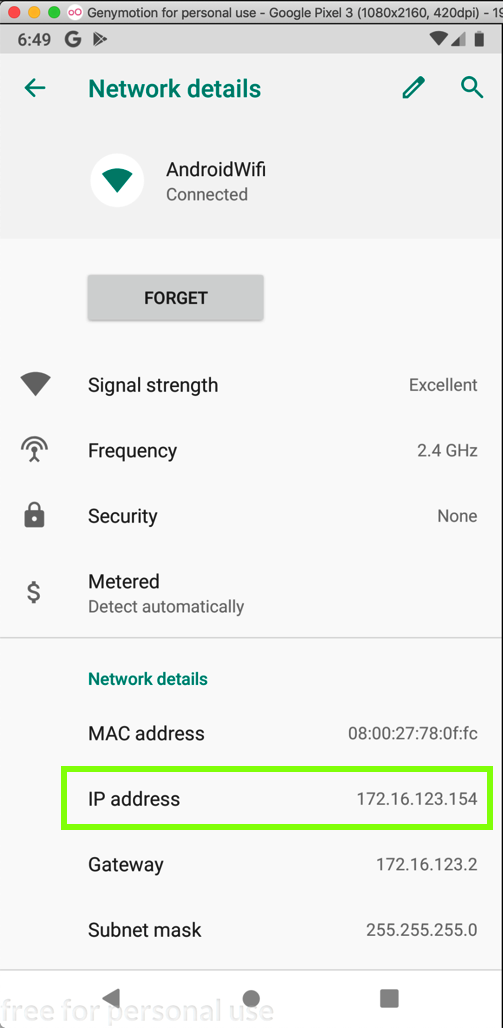
Find your IP address, as shown below.找到您的IP地址,如下所示。 It should be on the same subnet as Kali.它应该与Kali在同一子网上。
Make a note of it--you will need it below.记下它 - 你需要它在下面。
Scroll to the bottom and click System .滚动到底部,然后单击“ 系统” 。
Click Advanced , " Developer Options "单击高级 ,“ 开发人员选项 ”
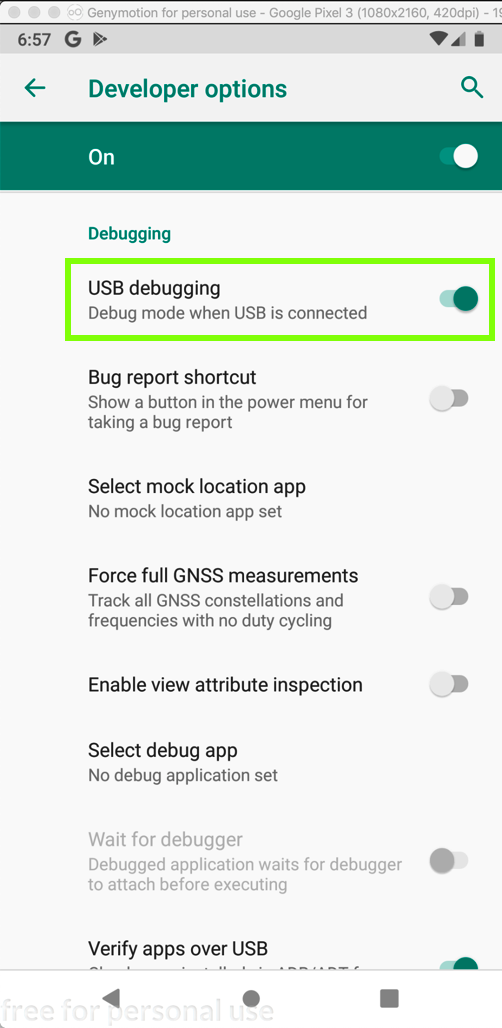
Scroll down slowly to find the " USB Debugging " option, as shown below.慢慢向下滚动以找到“ USB Debugging ”选项,如下所示。
Click the " USB Debugging " and click OK .单击“ USB调试 ”,然后单击“ 确定” 。 The slider should turn green, as shown below.滑块应变为绿色,如下所示。
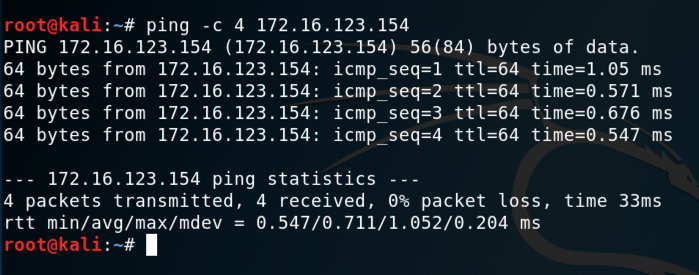
ping -c 4 172.16.123.154 ping -c 4 172.16.123.154
If you don't, you need to troubleshoot your networking before proceeding.如果不这样做,则需要在继续之前对网络进行故障排除。
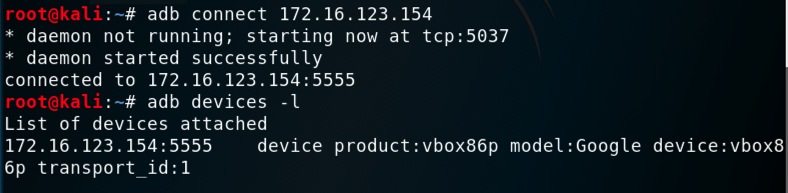
apt update apt更新
apt install android-tools-adb -y apt安装android-tools-adb -y
adb connect 172.16.123.154 adb connect 172.16.123.154
adb devices -l adb devices -l
You should see your Genymotion device in the "List of devices attached", as shown below.您应该在“附加设备列表”中看到您的Genymotion设备,如下所示。
Troubleshooting故障排除
If you see an error message saying "E: Could not get lock /var/lib/dpkg/lock-frontend - open (11: Resource temporarily unavailable)", restart your Kali machine.如果您看到一条错误消息“E:无法获取锁定/ var / lib / dpkg / lock-frontend - 打开(11:资源暂时不可用)”,请重新启动Kali计算机。
You should see a root shell on the Android device, with the Linux version information.您应该在Android设备上看到一个带有Linux版本信息的root shell。adb shell adb shell uname -a uname -a exit出口
Find the text covered by a green box in the image below.找到下图中绿框所覆盖的文字。

Posted 1-14-19发表于1-14-19
Troubleshooting tip added 1-16-19故障排除提示已添加1-16-19
Mention of Windows removed 2-20-29 Windows的提及已删除2-20-29
Converted to a CTF 2-28-19转换为CTF 2-28-19


