In a Web browser, go to https://portswigger.net/burp在Web浏览器中,转到https://portswigger.net/burp
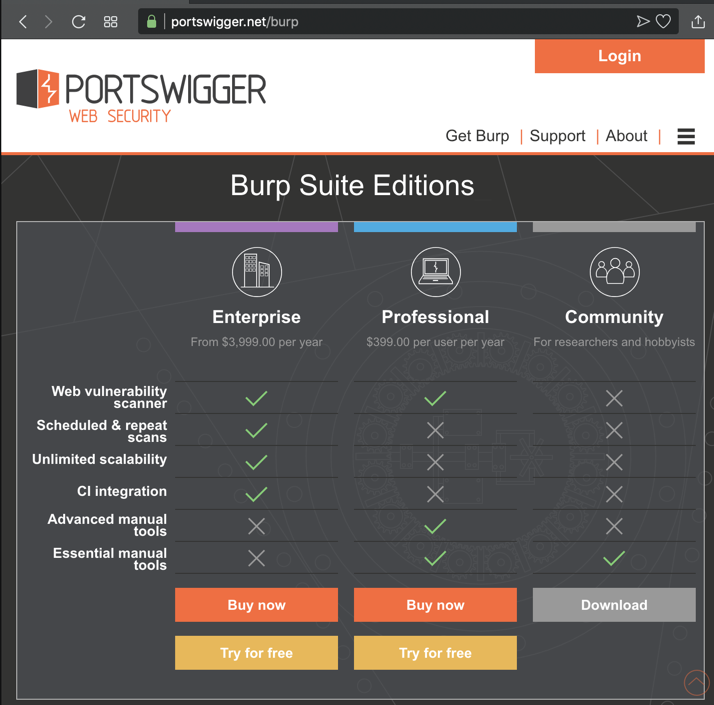
In the "Community Edition" column, click Download ", as shown below.在“社区版”列中,单击“ 下载 ”,如下所示。
Install the software with the default options.使用默认选项安装软件。
Ubuntu Users Ubuntu用户
If you are using Ubuntu, execute these commands:如果您使用的是Ubuntu,请执行以下命令:You should see the name of the downloaded file, which should be something like burpsuite_free_v1.6.01.jar .您应该看到下载文件的名称,该名称应该类似于burpsuite_free_v1.6.01.jar 。 Use that name in the commands below:在以下命令中使用该名称:cd光盘 cd Downloads cd下载 ls -l ls -lcd光盘 cd Downloads cd下载 sudo mkdir /opt/burp sudo mkdir / opt / burp sudo mv burpsuite_free_v1.6.01.jar /opt/burp sudo mv burpsuite_free_v1.6.01.jar / opt / burp cd /opt/burp cd / opt / burp sudo touch burp sudo touch burp sudo chmod 777 burp sudo chmod 777打嗝 sudo echo "java -jar burpsuite_free_v1.6.01.jar" > burp sudo echo“java -jar burpsuite_free_v1.6.01.jar”>打嗝 ./burp ./burp
Warning警告
If you run Burp in Kali, it seems not to properly export the certificate and Chrome on Android refuses to accept it.如果你在Kali中运行Burp,似乎没有正确导出证书,Android上的Chrome拒绝接受它。 It can be imported but Chrome gives an error when opening secure pages anyway.它可以导入,但Chrome在打开安全页面时会出错。We succeeded by running Burp directly on the host system instead (Mac OS).我们成功地直接在主机系统上运行Burp(Mac OS)。
In the next page, click the Start Burp button.在下一页中,单击Start Burp按钮。
The main Burp window opens, as shown below.主Burp窗口打开,如下所示。
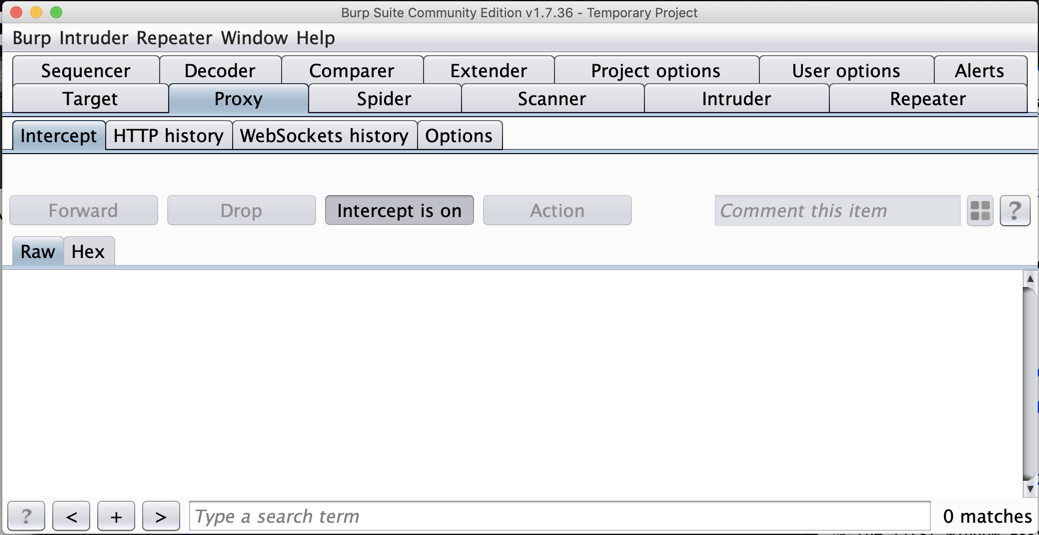
Click the Proxy tab.单击“ 代理”选项卡。 Click the Intercept sub-tab.单击“ 拦截”子选项卡。
The third button says " Intercept is on ", as shown below.第三个按钮显示“ 拦截打开 ”,如下所示。
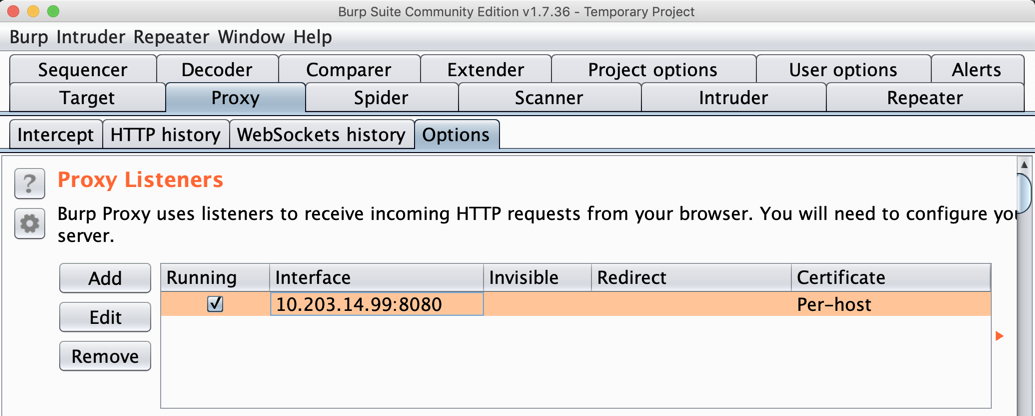
On the Proxy tab, click the Options sub-tab.在“ 代理”选项卡上,单击“ 选项”子选项卡。
In the central box, click the Interface address to highlight it, as shown below.在中央框中,单击接口地址以突出显示它,如下所示。
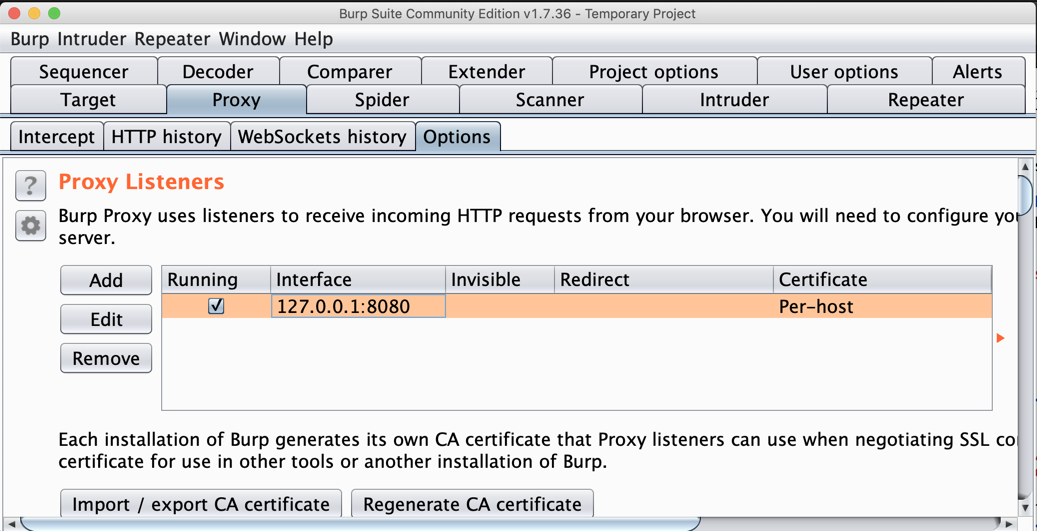
On the left side, click the Edit button.在左侧,单击“ 编辑”按钮。
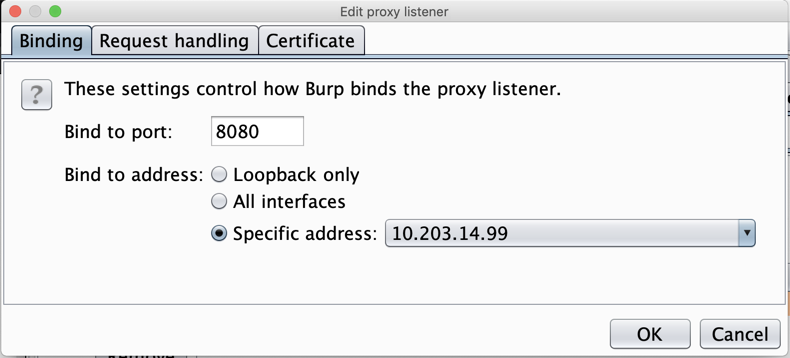
In the "Edit proxy listener" box, click the " Specific address " button, and select your computer's IP address that is used to connect to the Internet, as shown below.在“编辑代理侦听器”框中,单击“ 特定地址 ”按钮,然后选择用于连接到Internet的计算机的IP地址,如下所示。
Click OK .单击确定 。
Burp shows a proxy listener on your IP address and port 8080, as shown below. Burp在您的IP地址和端口8080上显示代理侦听器,如下所示。
Make a note of this address--you will need it below.记下这个地址 - 下面你需要它。
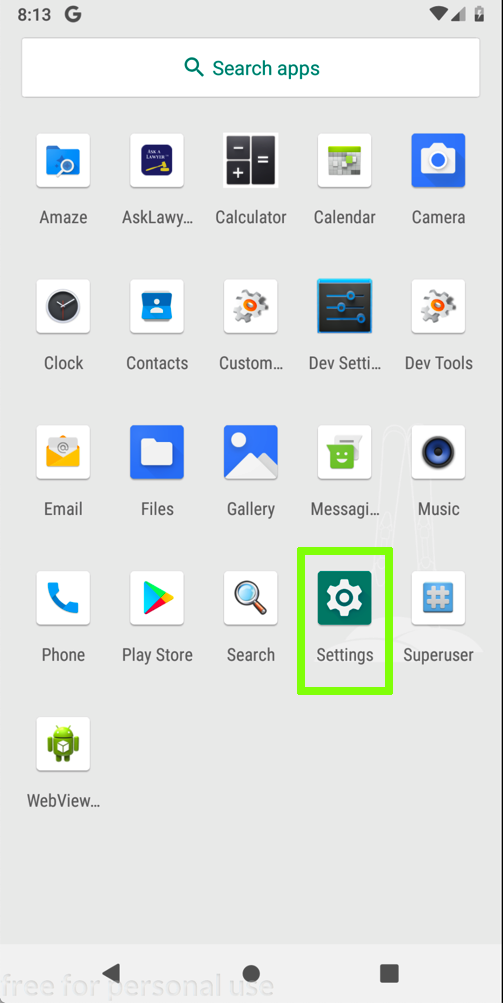
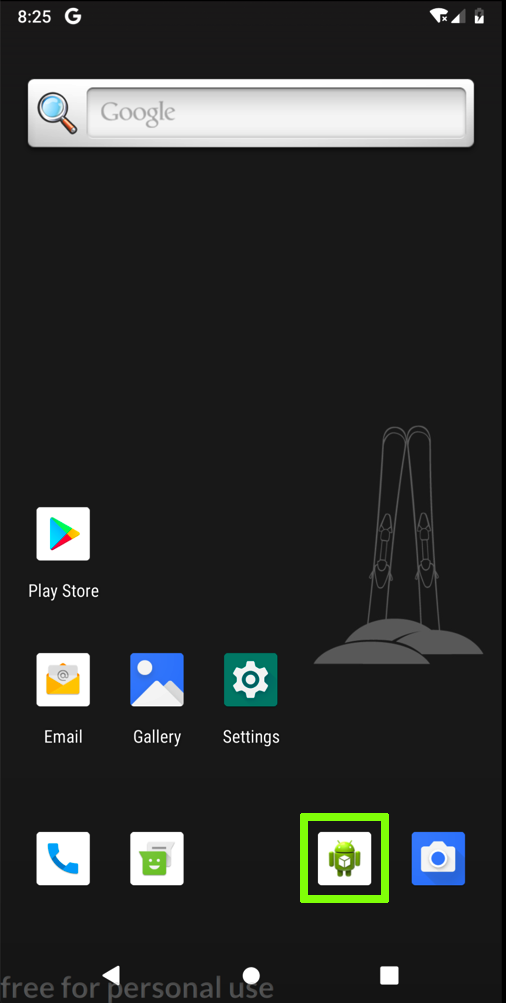
From the Android home screen, click and drag up to show all apps.在Android主屏幕上,单击并向上拖动以显示所有应用。
Click Settings , which is outlined in green in the image below.单击“设置” ,在下图中以绿色标出。
In Settings, click " Network & internet ".在“设置”中,单击“ 网络和Internet ”。
Click Wi-Fi .点击Wi-Fi 。
Click AndroidWiFi .单击AndroidWiFi 。
Click Advanced .单击高级 。
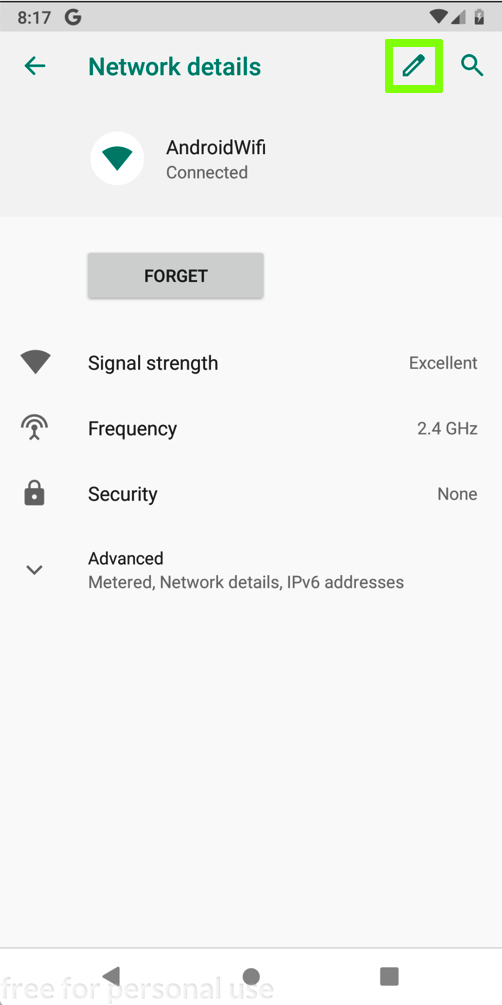
In the "Network details" screen, at the top right, click the Pencil icon, outlined in green in the image below.在“网络详细信息”屏幕的右上角,单击铅笔图标,下图中以绿色标出。
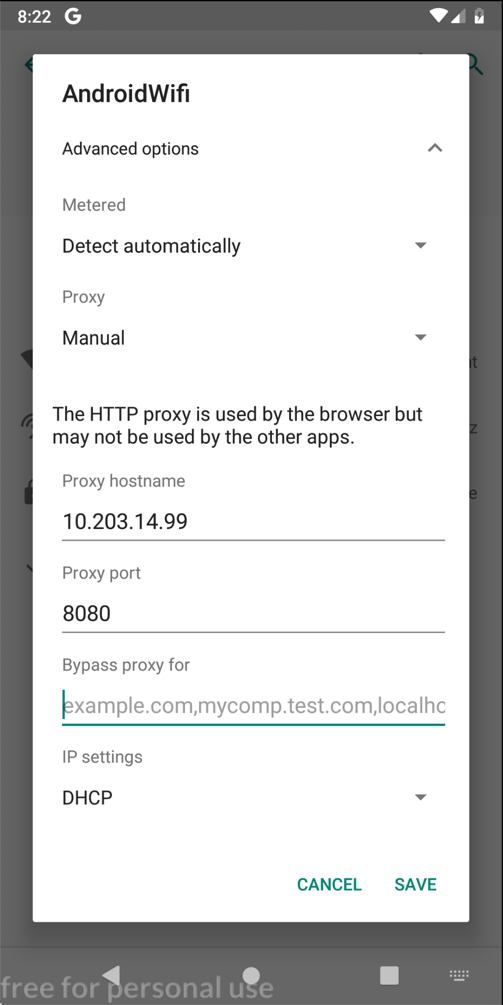
In the "AndroidWifi" box, in the "Advanced options" row, click the down-arrow.在“AndroidWifi”框中的“高级选项”行中,单击向下箭头。
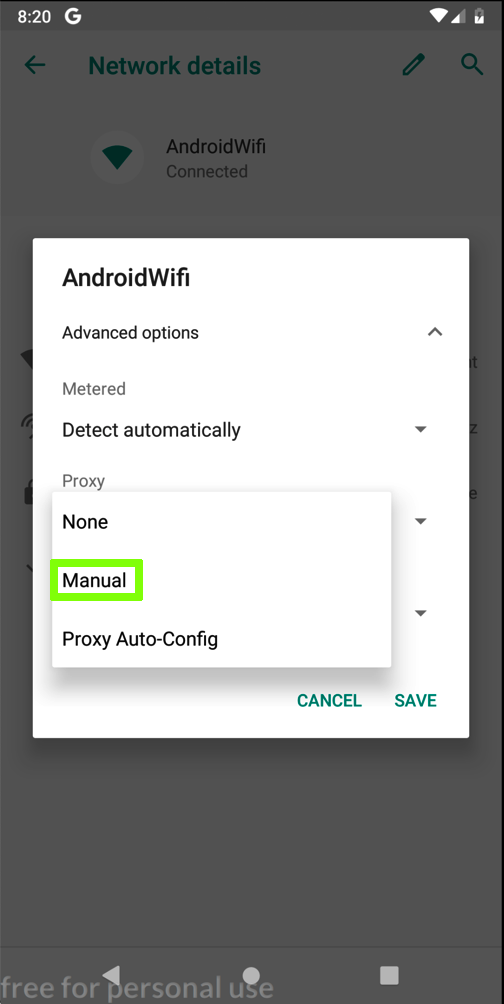
In the "Proxy" field, click the down-arrow.在“代理”字段中,单击向下箭头。
Click Manual , which is outlined in green in the image below.单击手动 ,在下图中以绿色标出。
Enter the IP address and port number of the Burp proxy listener, as shown below.输入Burp代理侦听器的IP地址和端口号,如下所示。
On your Android device, click SAVE .在Android设备上,单击“ 保存” 。
At the bottom center of the device, click the round Home button.在设备的底部中心,单击圆形主页按钮。
In the Browser, and go to在浏览器中,转到
hackazon.samsclass.info hackazon.samsclass.info
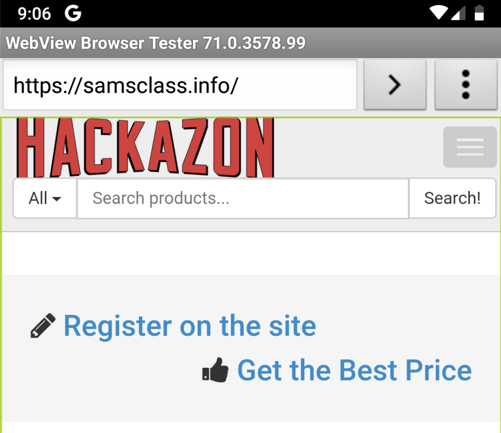
A "Hackazon" shopping site opens, as shown below. “Hackazon”购物网站将打开,如下所示。

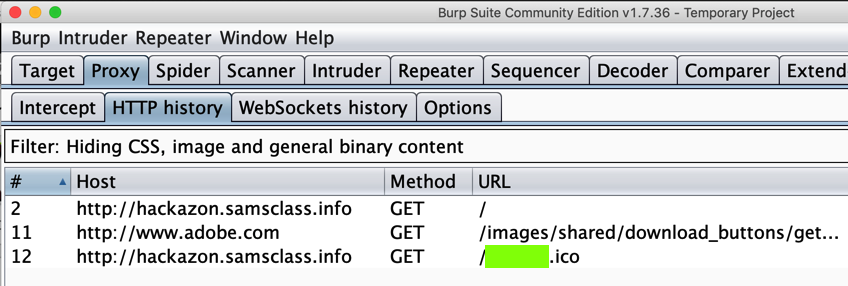
Scroll down and find traffic to hackazon.samsclass.info as shown below.向下滚动并找到hackazon.samsclass.info的流量,如下所示。
https://samsclass.info The browser does nothing, as shown below. https://samsclass.info浏览器不执行任何操作,如下所示。 It's a lousy browser, which is why we installed Chrome.这是一个糟糕的浏览器,这就是我们安装Chrome的原因。
When you see the "Sign in to Chrome" page, click " NO THANKS ".当您看到“登录Chrome”页面时,请点击“ 不要感谢 ”。
In Chrome, go to在Chrome中,转到
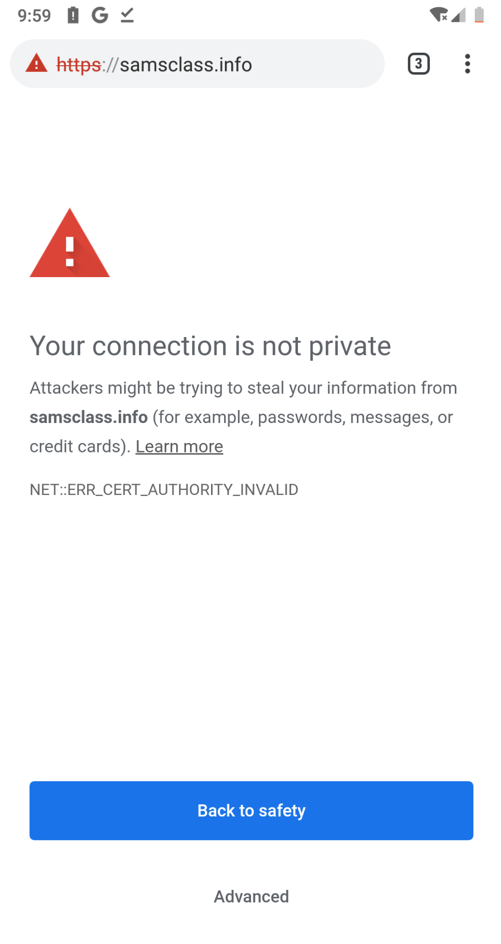
https://samsclass.info https://samsclass.info
A warning message appears, saying "Your connection is not private", as shown below.将显示一条警告消息,指出“您的连接不是私密的”,如下所示。 Notice the specific error shown: NET:ERR_CERT_AUTHORITY_INVALID .请注意显示的特定错误: NET:ERR_CERT_AUTHORITY_INVALID 。 This happens because Burp is performing a man-in-the-middle attack with a self-signed certificate.发生这种情况是因为Burp正在使用自签名证书执行中间人攻击。
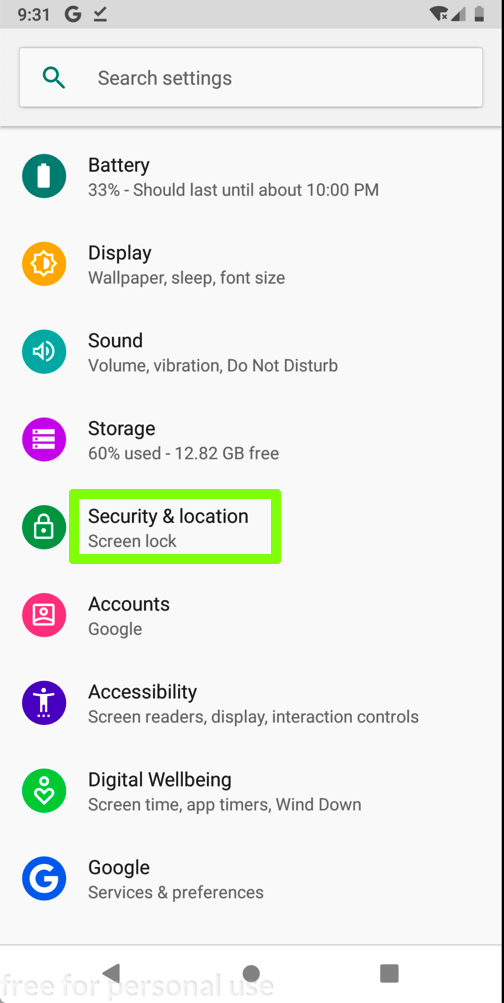
At the bottom center of the device, click the Home button.在设备的底部中心,单击“主页”按钮。 Open Settings .打开设置 。
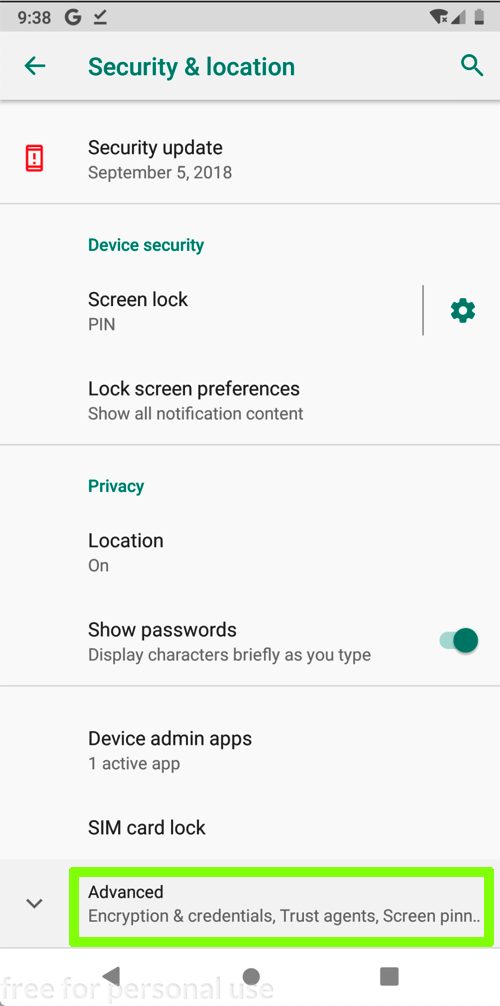
Scroll down and click " Security & location ", as shown below.向下滚动并单击“ 安全性和位置 ”,如下所示。
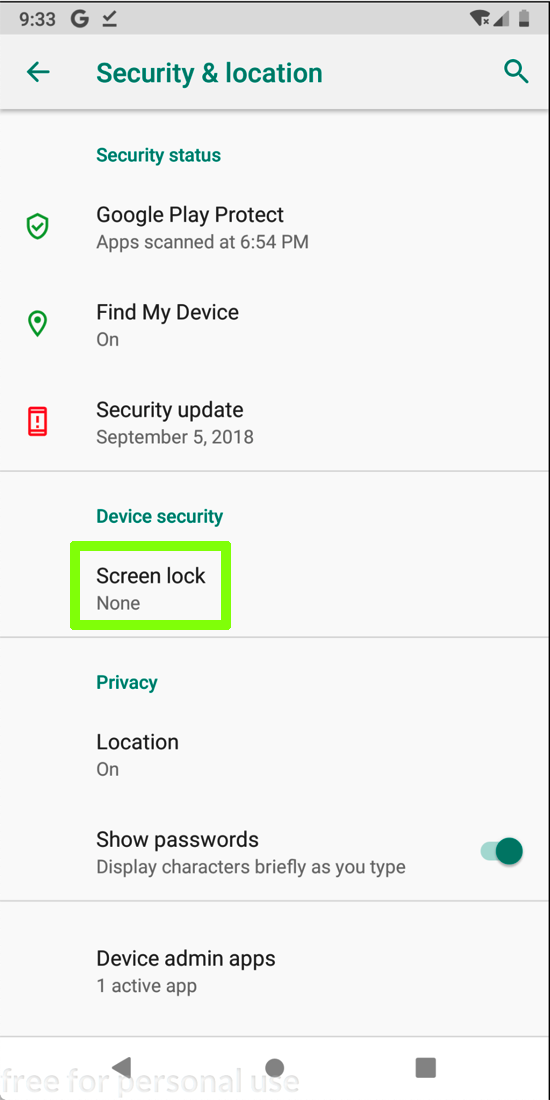
In the "Security & location" screen, click " Screen lock ", as shown below.在“安全和位置”屏幕中,单击“ 屏幕锁定 ”,如下所示。
In the "Choose screen lock" screen, click PIN .在“选择屏幕锁定”屏幕中,单击“ PIN” 。
Enter a simple PIN you can remember, such as 1234 , twice.输入您能记住的简单PIN码,例如1234 ,两次。 Click DONE .单击“ 完成” 。
We want to add PortSwigger as a trusted certificate authority to get rid of these messages.我们希望将PortSwigger添加为可信证书颁发机构以删除这些消息。
In Burp, click the Proxy tab.在Burp中,单击“ 代理”选项卡。
Click the Options sub-tab.单击“ 选项”子选项卡。
Click the " Import /export CA certificate... " button.单击“ 导入/导出CA证书... ”按钮。
In the "CA Certificate" box, in the Export setion, click the " Certificate in DER format " button, as shown below.在“CA证书”框中的“导出”选项中,单击“ DER格式的证书 ”按钮,如下所示。
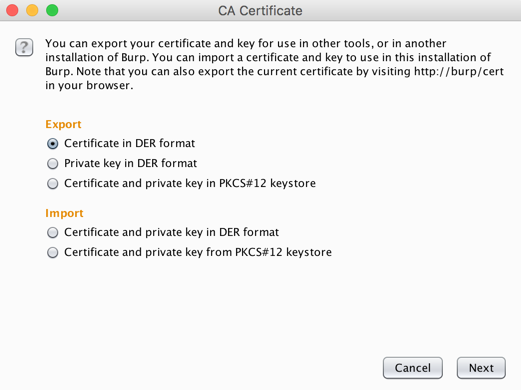
Click Next .单击下一步 。
On the next page, click the " Select file... " button.在下一页上,单击“ 选择文件... ”按钮。 Navigate to a folder you can find, such as your Desktop.导航到您可以找到的文件夹,例如桌面。
Give the file a name of portswigger.cer , as shown below.为文件命名为portswigger.cer ,如下所示。
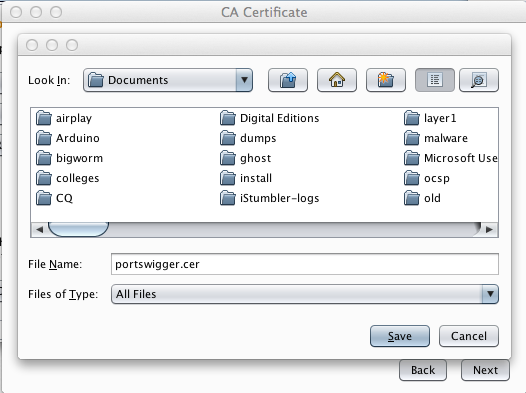
Click Save .单击保存 。
Click Next .单击下一步 。 Click Close .单击关闭 。
A message appears, saying "Files successfully copied to sdcard/Download", as shown below.将显示一条消息,指出“文件已成功复制到sdcard / Download”,如下所示。
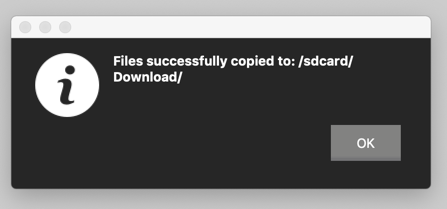
Click OK .单击确定 。
On your Android device, in Settings,在Android设备上的“设置”中
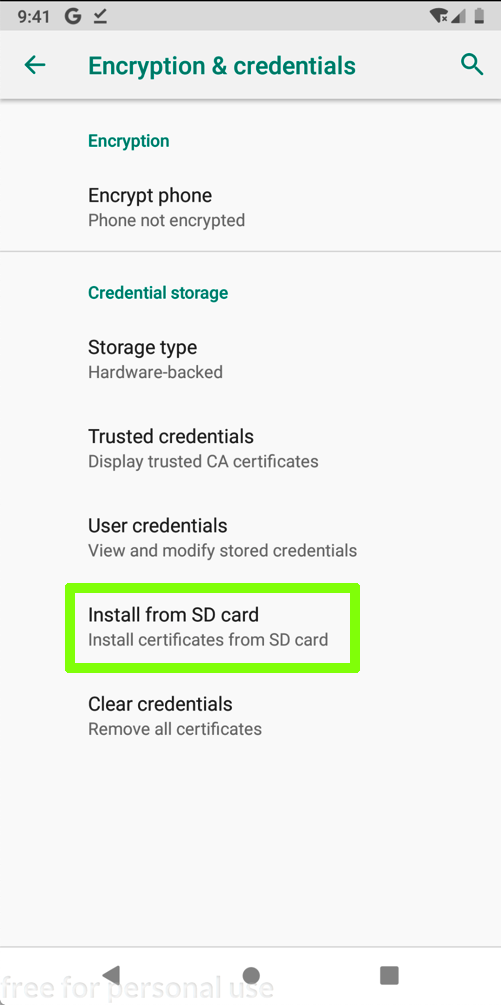
Click " Encryption & credentials ".单击“ 加密和凭据 ”。
Click " Install from SD card ", as shown below.单击“ 从SD卡安装 ”,如下所示。
In the next screen, at the top left, click the three-bar icon.在下一个屏幕的左上角,单击三栏图标。 Click Downloads .单击下载 。
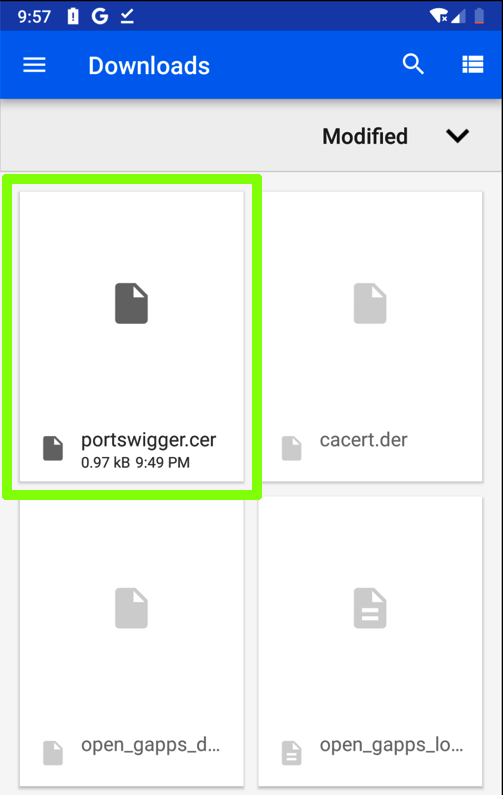
In the Downloads window, click portswigger.cer , as shown below.在“下载”窗口中,单击“ portswigger.cer” ,如下所示。
Enter your PIN.输入您的PIN码。
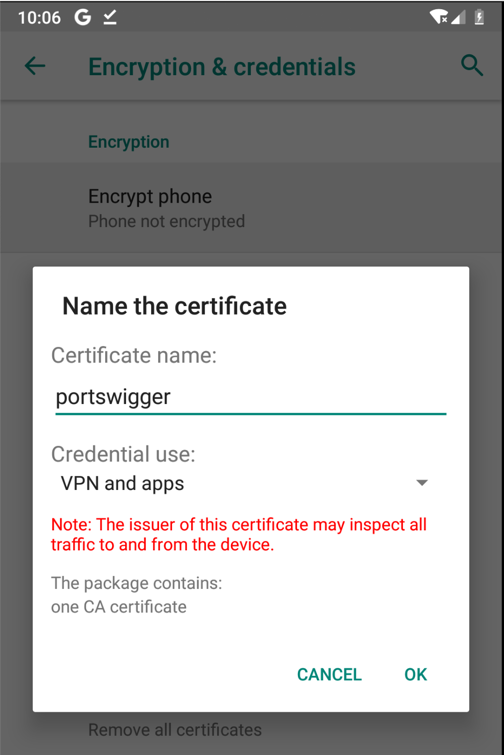
Enter a name of portswigger , as shown below, and click OK .输入portswigger的名称,如下所示,然后单击“ 确定” 。
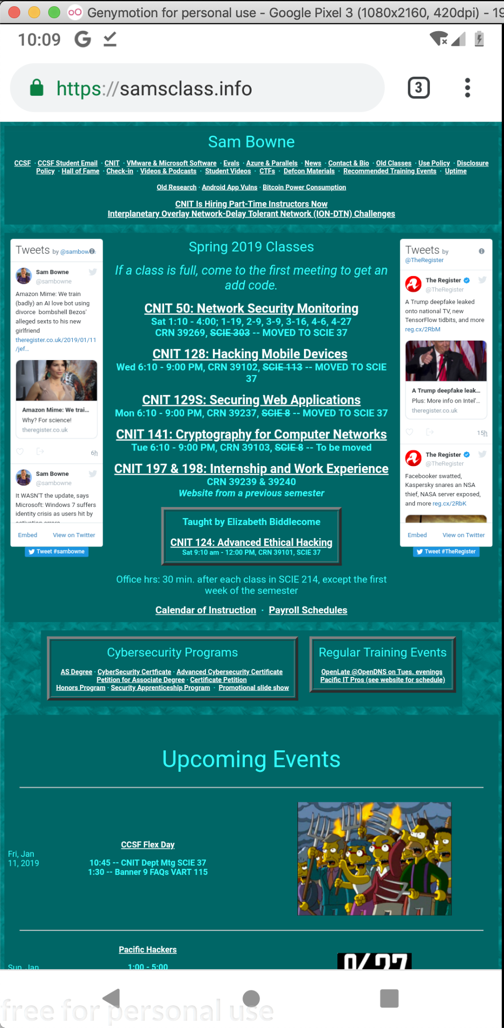
https://samsclass.info The page opens, as shown below. https://samsclass.info页面打开,如下所示。
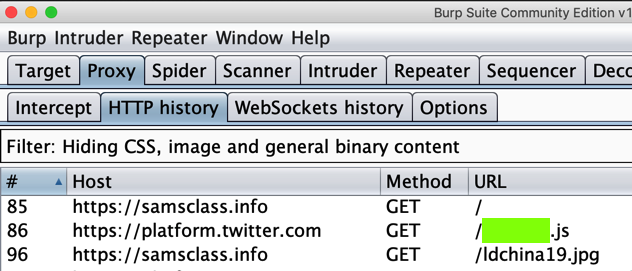
Find the line that shows the https://samsclass.info page loading, as shown below.找到显示https://samsclass.info页面加载的行,如下所示。
From the Android home screen, click the circle at the bottom center.在Android主屏幕中,单击底部中心的圆圈。
Open Settings .打开设置 。
In Settings, click " Network & internet ".在“设置”中,单击“ 网络和Internet ”。
Click Wi-Fi .点击Wi-Fi 。
Click AndroidWiFi .单击AndroidWiFi 。
Click Advanced .单击高级 。
In the "Network details" screen, at the top right, click the Pencil icon.在“网络详细信息”屏幕的右上角,单击铅笔图标。
In the "Proxy" field, click the down-arrow.在“代理”字段中,单击向下箭头。
Click None .单击“ 无” 。
Then click Save .然后单击“ 保存”


