If you are using some other machine, get it here:如果您正在使用其他机器,请在此处获取:
https://samsclass.info/127/proj/putty.exe https://samsclass.info/127/proj/putty.exe
If PuTTY won't start, right-click it, click Properties , and click Unblock .如果PuTTY无法启动,请右键单击它,单击“ 属性” ,然后单击“ 取消阻止” 。
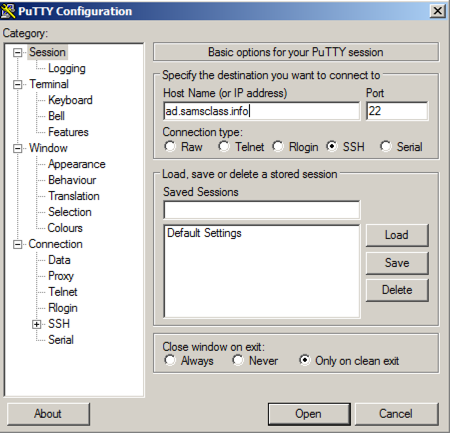
In the "Host Name (or IP address)" box, type在“主机名(或IP地址)”框中,键入
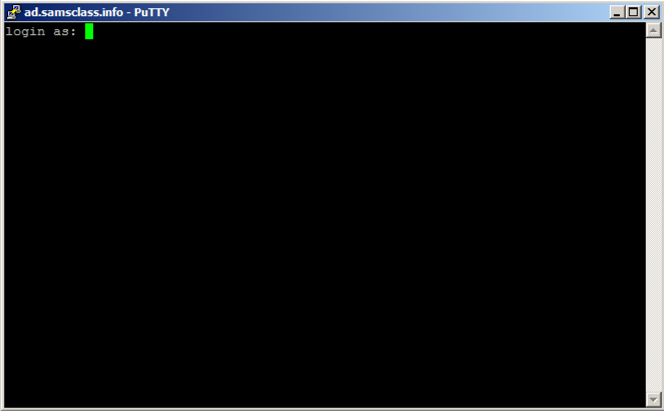
ad.samsclass.info At the bottom, click the Open button.在底部,单击“ 打开”按钮。 A black box opens, and shows a " login as: " prompt, as shown below.将打开一个黑框,并显示“ login as: ”提示,如下所示。
You could connect to a server at this point, but that's not the point of this project.此时您可以连接到服务器,但这不是此项目的重点。 We will alter this program to do other things instead of printing "login as".我们将更改此程序以执行其他操作,而不是打印“login as”。
Close the Putty window.关闭Putty窗口。
In Ollydbg, from the menu bar, click File , Open .在Ollydbg中,从菜单栏中单击“ 文件” ,“ 打开” 。 Navigate to putty.exe and open it.导航到putty.exe并打开它。
Ollydbg opens, as shown below. Ollydbg打开,如下所示。 If your screen doesn't look like this, click View , CPU and maximize the CPU window.如果您的屏幕看起来不像这样,请单击“ 查看” ,“ CPU”并最大化CPU窗口。
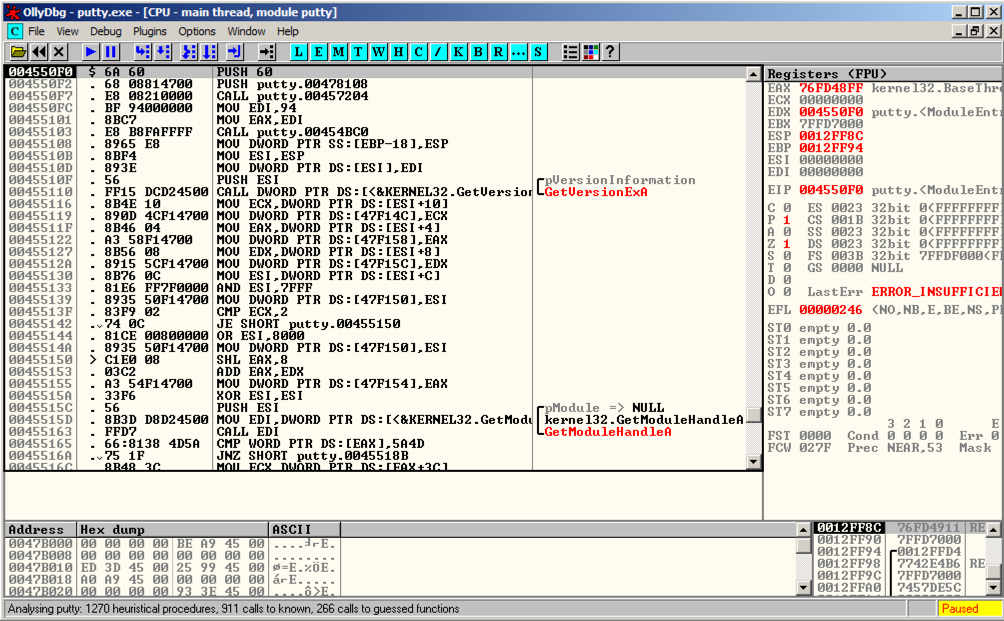
Ollydbg shows you a lot of data, but for now just notice the Assembly Code in the top left pane, and the Paused message in the lower right. Ollydbg向您显示了大量数据,但现在只需注意左上方窗格中的Assembly Code和右下方的Paused消息。
When you load a program into Ollydbg, it starts in a "Paused" state, with the Assembly Code window showing the first instruction.将程序加载到Ollydbg时,它将以“Paused”状态启动,Assembly Code窗口显示第一条指令。
A Putty window opens, but it's behind the Olly window. Putty窗口打开,但它位于Olly窗口后面。 At the bottom of the screen, in the taskbar, click the " PuTTY Configuration " button to bring the PuTTY window to the front, as shown below.在屏幕底部的任务栏中,单击“ PuTTY Configuration ”按钮将PuTTY窗口置于前面,如下所示。
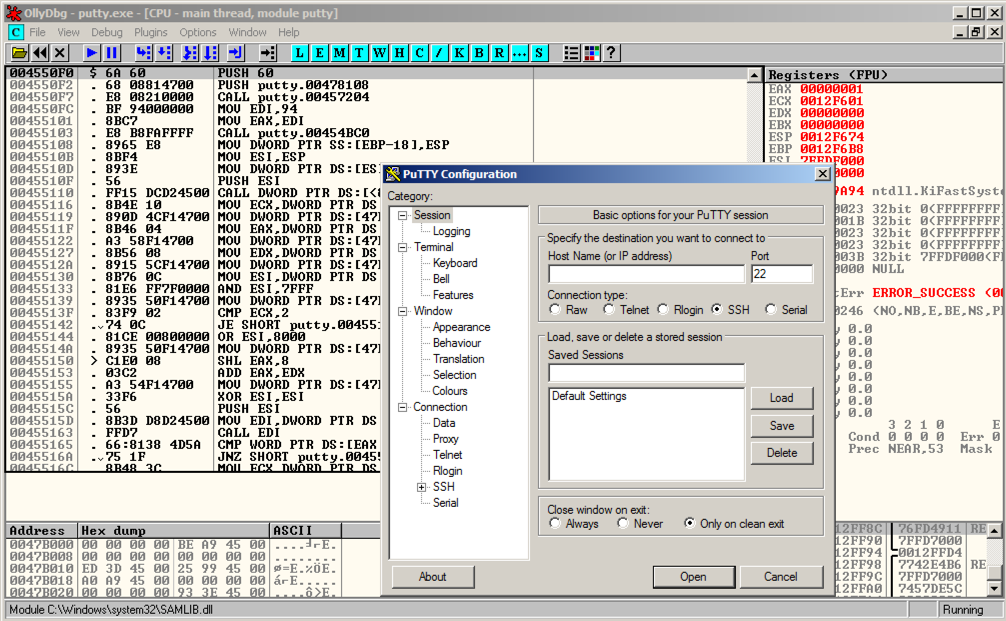
Click in the Putty window.单击Putty窗口。 In the "Host Name (or IP address)" box, type在“主机名(或IP地址)”框中,键入
ad.samsclass.info At the bottom, click the Open button.在底部,单击“ 打开”按钮。 The "login as" message appears, as shown below.出现“登录为”消息,如下所示。
Putty is running, but it's under the control of Ollydbg, so we can modify its execution. Putty正在运行,但它在Ollydbg的控制之下,所以我们可以修改它的执行。
In Ollydbg, from the menu bar, click Debug , Restart .在Ollydbg中,从菜单栏中单击“ 调试” ,“ 重新启动” 。
In Ollydbg, in the "Assembly Code" pane, right-click.在Ollydbg的“汇编代码”窗格中,右键单击。 Point to " Search for ".指向“ 搜索 ”。 Click " All referenced text strings ", as shown below.单击“ 所有引用的文本字符串 ”,如下所示。
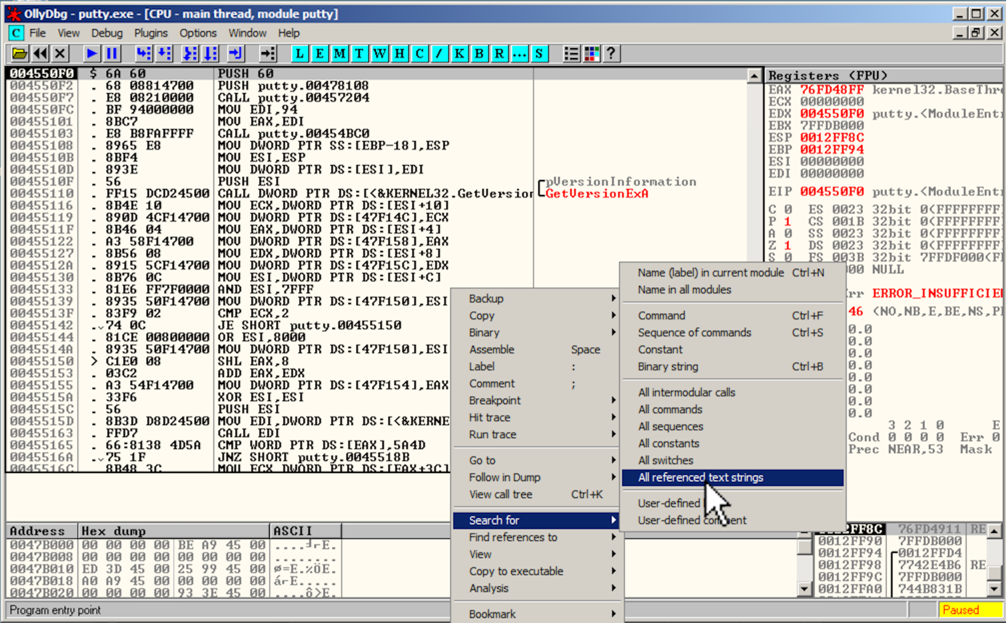
A "Text strings referenced in putty:.text" window opens, showing all the strings in the program.将打开“putty:.text中引用的文本字符串”窗口,显示程序中的所有字符串。
To make this text easier to read, right-click, point to Appearance , Font , and click " OEM Fixed Font ".要使此文本更易于阅读,请右键单击,指向“ 外观” ,“ 字体” ,然后单击“ OEM固定字体 ”。
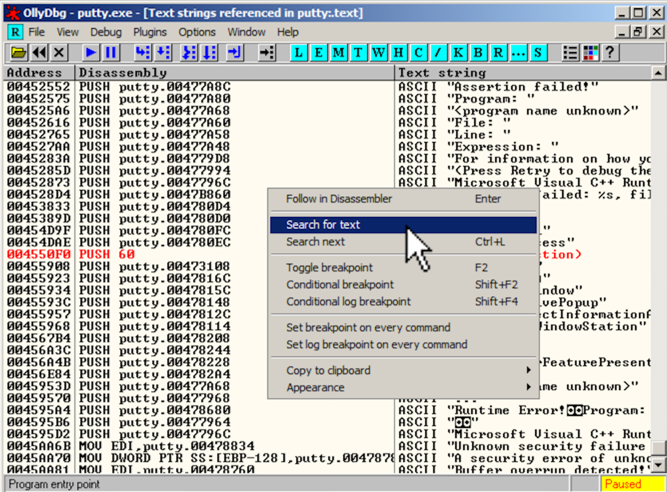
Right-click in that window, and click " Search for text ", as shown below.在该窗口中单击鼠标右键,然后单击“ 搜索文本 ”,如下所示。
In the "Enter text to search for" box, type在“输入要搜索的文本”框中,键入
login as as shown below.如下所示。 Check the " Entire scope " box.选中“ 整个范围 ”框。 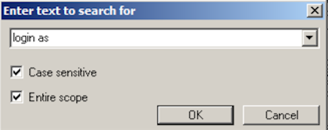
Click OK .单击确定 。
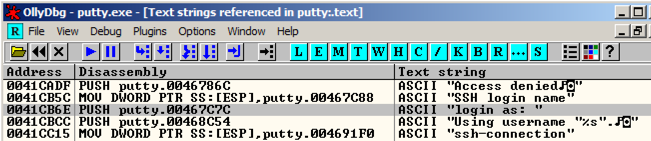
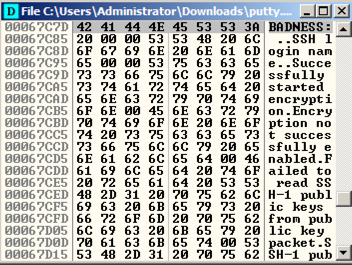
Ollydbg finds the ASCII string "login as", and the instruction that uses it, as shown below. Ollydbg找到ASCII字符串“login as”,以及使用它的指令,如下所示。 This instruction is at address 00417053.该指令位于地址00417053。

Right-click again, and click " Search next ".再次单击鼠标右键,然后单击“ 下一步搜索 ”。
Ollydbg finds another line of code that uses this string, as shown below. Ollydbg找到使用此字符串的另一行代码,如下所示。 This instruction is at address 0041CB6E.该指令位于地址0041CB6E。
Right-click again, and click " Search next ".再次单击鼠标右键,然后单击“ 下一步搜索 ”。
A message appears at the bottom of the window saying "Item not found".窗口底部会显示一条消息,说“找不到项目”。 There are only two commands in the program that use this string.程序中只有两个命令使用此字符串。
In the "Text strings referenced in putty:.text" window, right-click again, and click " Search text ".在“putty:.text中引用的文本字符串”窗口中,再次右键单击,然后单击“ 搜索文本 ”。 In the "Enter text to search for" box, click OK .在“输入要搜索的文本”框中,单击“ 确定” 。
The instruction at 00417053 appears again. 00417053处的指令再次出现。 Right-click this instruction and click " Toggle breakpoint ", as shown below.右键单击该指令,然后单击“ 切换断点 ”,如下所示。
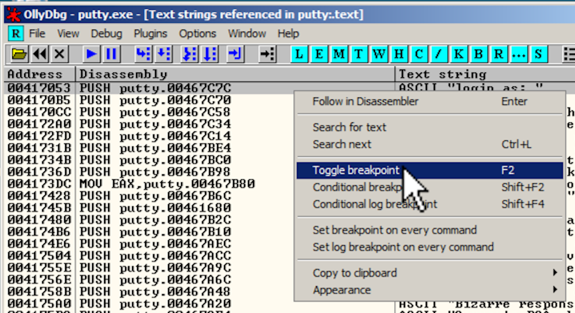
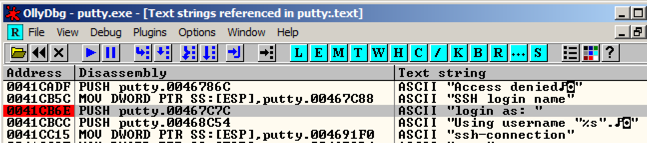
The address turns red, as shown below, to indicate that there's a breakpoint here.地址变为红色,如下所示,表示此处有断点。

Right-click again, and click " Search next ".再次单击鼠标右键,然后单击“ 下一步搜索 ”。 The instruction at address 0041CB6E appears.出现地址0041CB6E的指令。 Right-click it and click " Toggle breakpoint ".右键单击它,然后单击“ 切换断点 ”。
The address turns red, as shown below.地址变为红色,如下所示。
In Ollydbg, from the menu bar, click Debug , Restart .在Ollydbg中,从菜单栏中单击“ 调试” ,“ 重新启动” 。
A box pops up warning you that "Process 'putty' is active".弹出一个方框,警告您“处理'油灰'处于活动状态”。 Click Yes .单击是 。
In Ollydbg, from the menu bar, click Debug , Run .在Ollydbg中,从菜单栏中单击“ 调试” , “运行” 。
A Putty window opens. Putty窗口打开。 Bring it to the front, as shown below.将它带到前面,如下图所示。
Click in the Putty window.单击Putty窗口。 In the "Host Name (or IP address)" box, type在“主机名(或IP地址)”框中,键入
ad.samsclass.info At the bottom, click the Open button.在底部,单击“ 打开”按钮。 A black window opens and closes quickly, and the program stops, as shown below.黑色窗口快速打开和关闭,程序停止,如下所示。

The program stopped at instruction 0041CB6E, as shown in the image above.程序在0041CB6E指令处停止,如上图所示。
We'll use this instruction to hijack the program's execution.我们将使用此指令来劫持程序的执行。
In Ollydbg, from the menu bar, click View , Breakpoints .在Ollydbg中,从菜单栏中单击“ 查看” ,“ 断点” 。
A "Breakpoints" window opens, showing two breakpoints.将打开“断点”窗口,显示两个断点。
Right-click the first breakpoint and click Remove , as shown below.右键单击第一个断点,然后单击“ 删除” ,如下所示。
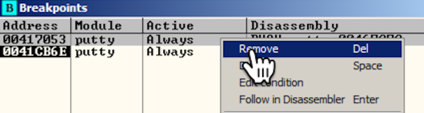
Repeat the process to remove the other breakpoint.重复此过程以删除其他断点。 Close the "Breakpoints" window.关闭“断点”窗口。
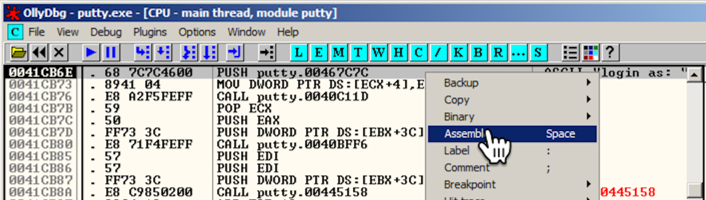
An "Assemble at 0041CB6E" box appears, as shown below.将出现“在0041CB6E处组装”框,如下所示。
This shows the command at this location.这显示了此位置的命令。 It's a PUSH instruction, placing the address 467C7C onto the stack.这是一条PUSH指令,将地址467C7C放入堆栈。 That address points to the letter "l" in the ASCII string "login as: ", as shown on the right side of the instruction line, outlined in green in the image below.该地址指向ASCII字符串“login as:”中的字母“l”,如指令行右侧所示,在下图中以绿色标出。
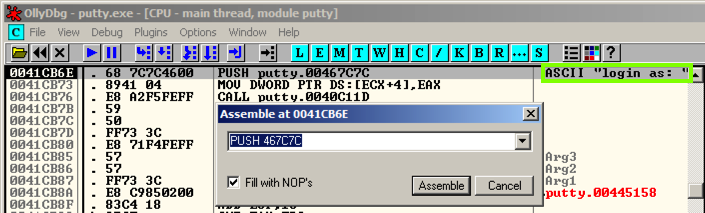
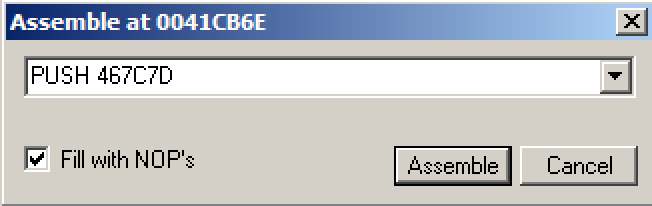
In the "Assemble at 0041CB6E" box, change the last character to D , as shown below.在“在0041CB6E组装”框中,将最后一个字符更改为D ,如下所示。 This will move the pointer from the "l" to the "o" in the string "login as: ".这会将指针从“l”移动到字符串“login as:”中的“o”。
Click the Assemble button.单击“ 装配”按钮。
Click the Cancel button.单击“ 取消”按钮。
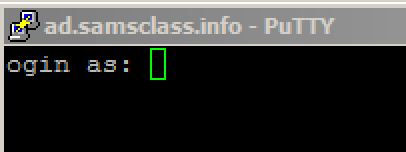
The message on the right now says "ogin as: ", as shown below.右边的消息现在说“ogin as:”,如下所示。

The black login window appears, with the message "ogin as: ", as shown below.出现黑色登录窗口,消息“ogin as:”,如下所示。
When I did it, an error box also popped up saying "Server unexpectedly closed network connection".当我这样做时,还会弹出一个错误框,说“服务器意外关闭了网络连接”。 If that happens, just close the error box.如果发生这种情况,只需关闭错误框即可。
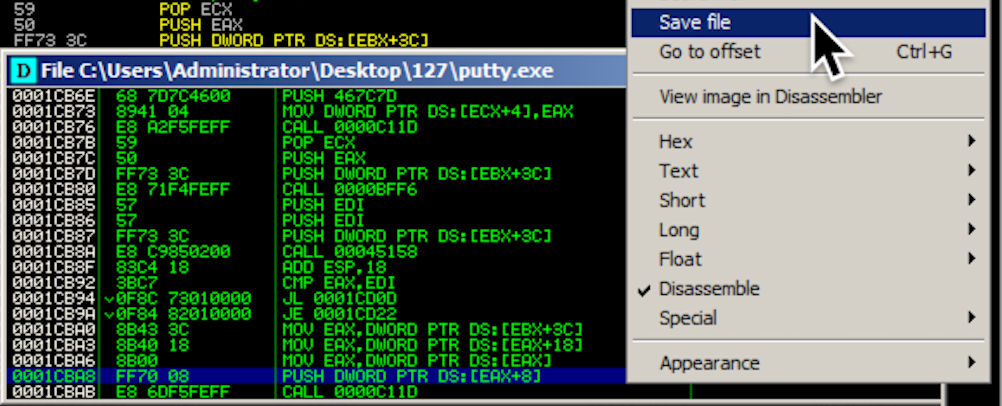
In Ollydbg, in the top left pane of the CPU window, right-click, point to " Copy to Executable ", and click " All modifications ", as shown below.在Ollydbg中,在CPU窗口的左上窗格中,右键单击,指向“ 复制到可执行文件 ”,然后单击“ 所有修改 ”,如下所示。
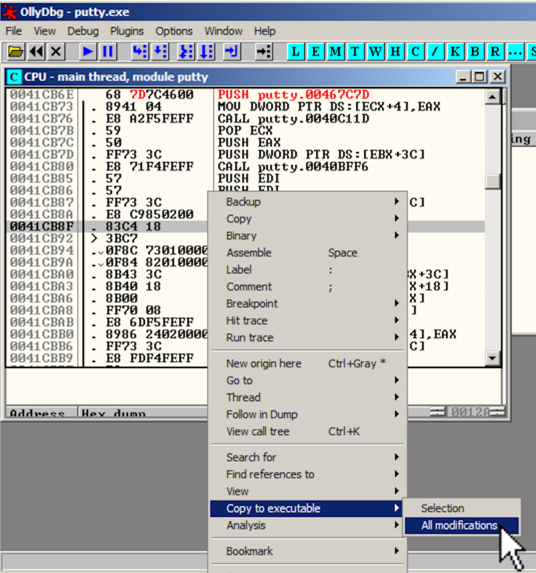
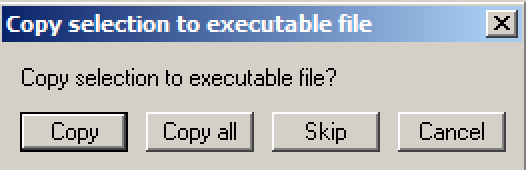
A "Copy selection to executable file" box pops up, as shown below.弹出“复制选择到可执行文件”框,如下所示。 Click the " Copy all " button.单击“ 全部复制 ”按钮。
A new window pops up, with a title ending in "putty.exe", as shown below.弹出一个新窗口,标题以“putty.exe”结尾,如下所示。
Right-click in the new window and click " Save file ".在新窗口中单击鼠标右键,然后单击“ 保存文件 ”。
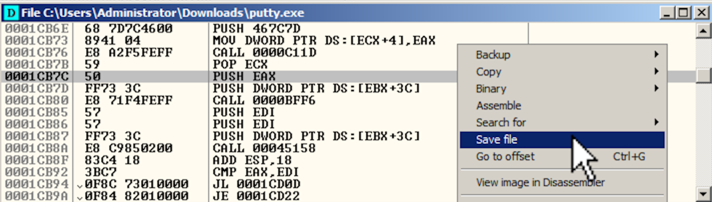
Save the file as puttymod.exe .将文件另存为puttymod.exe 。
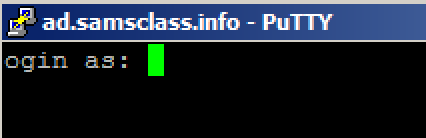
Double-click puttymod.exe .双击puttymod.exe 。
In the "Host Name (or IP address)" box, type在“主机名(或IP地址)”框中,键入
ad.samsclass.info At the bottom, click the Open button.在底部,单击“ 打开”按钮。 A black box opens, and shows a " ogin as: " prompt, as shown below.将打开一个黑框,并显示“ ogin as: ”提示,如下所示。
In the top left pane of the CPU window, right-click, point to " Go to ", and click Expression , as shown below.在CPU窗口的左上窗格中,右键单击,指向“ 转到 ”,然后单击“ 表达式” ,如下所示。
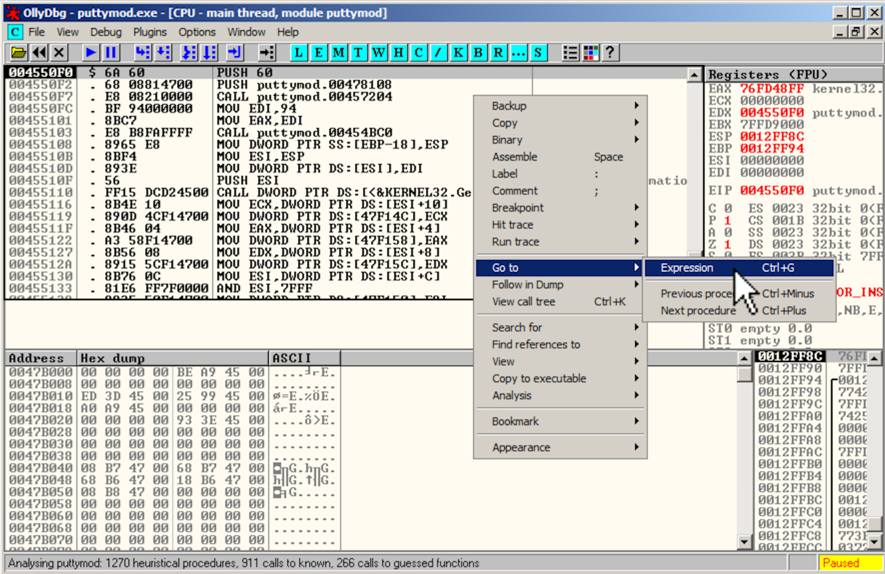
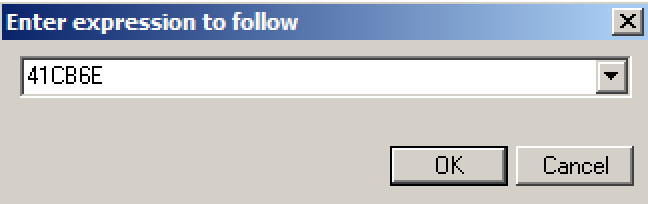
In the "Enter expression to follow" box, enter在“输入要跟随的表达式”框中,输入
41CB6E 41CB6Eas shown below.如下所示。 Click OK .单击确定 。
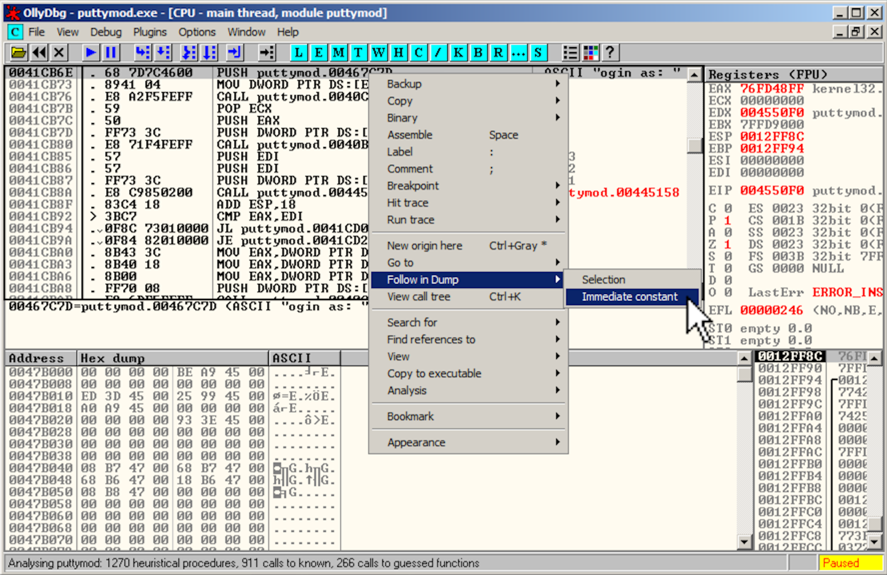
The Hex Dump pane, in the lower left, shows the text " ogin as: ", as shown below.左下角的Hex Dump窗格显示文本“ ogin as: ”,如下所示。
In the Hex Dump pane, highlight " ogin as: ", as shown below.在Hex Dump窗格中,突出显示“ ogin as: ”,如下所示。 Right-click the highlighted text.右键单击突出显示的文本。 Point to Binary .指向二进制 。 Click Edit .单击编辑 。
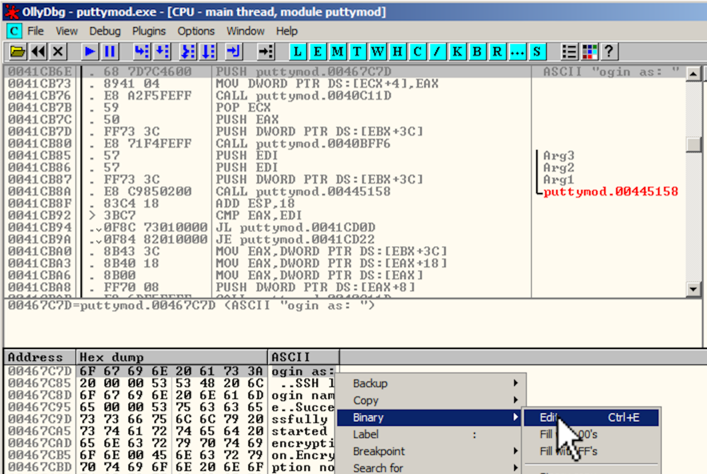
An "Edit data at 00467C7D" box opens, as shown below.将打开“在00467C7D处编辑数据”框,如下所示。
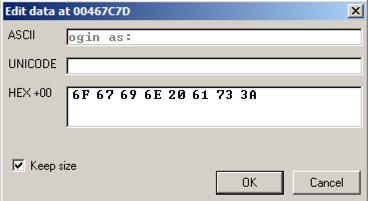
Click in the ASCII field, press Backspace to move back to the start, and overwrite the message with this text, as shown below:单击ASCII字段,按Backspace返回到开头,然后用此文本覆盖该消息,如下所示:
BADNESS 恶
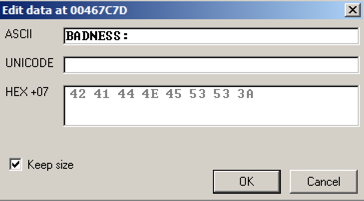
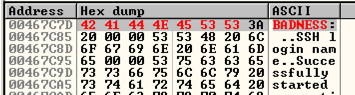
Click OK .单击确定 。 The modified text appears in red letters in the Dump, as shown below.修改后的文本在转储中以红色字母显示,如下所示。
A box with a long title ending in "puttymod.exe" appears showing the modified file, as shown below.将出现以“puttymod.exe”结尾的长标题的框,其中显示已修改的文件,如下所示。 Click the X in the top right of that box to close it.单击该框右上角的X将其关闭。
A "File changed" box appears, as shown below.将出现“文件已更改”框,如下所示。 Click Yes .单击是 。

A "Copy selection to executable file" box pops up.弹出“复制选择到可执行文件”框。 Click the " Copy all " button.单击“ 全部复制 ”按钮。
A new window pops up, with a title ending in "putty.exe", as shown below.弹出一个新窗口,标题以“putty.exe”结尾,如下所示。
Right-click in the new window and click " Save file ".在新窗口中单击鼠标右键,然后单击“ 保存文件 ”。
Save the file as "puttymod2.exe".将文件另存为“puttymod2.exe”。
Double-click puttymod2.exe .双击puttymod2.exe 。
In the "Host Name (or IP address)" box, type在“主机名(或IP地址)”框中,键入
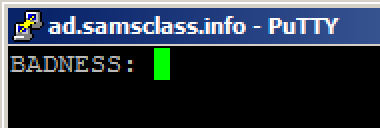
ad.samsclass.info At the bottom, click the Open button.在底部,单击“ 打开”按钮。 A black box opens, and shows a " BADNESS: " prompt, as shown below.将打开一个黑框,并显示“ BADNESS: ”提示,如下所示。
The flag is that hash like this: 07b01710标志就是这样的哈希: 07b01710

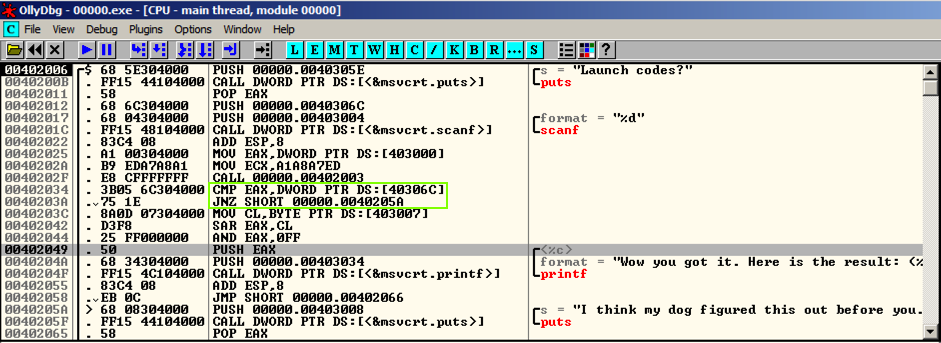
Look at the rightmost section, and you can easily see what the program does;看看最右边的部分,你可以很容易地看到程序的功能; it prints out "Launch codes?", reads in a decimal number (%d), and then chooses to print either a winning message with a result, or an insult.它打印出“启动代码?”,读取十进制数字(%d),然后选择打印带结果的获胜消息或侮辱。
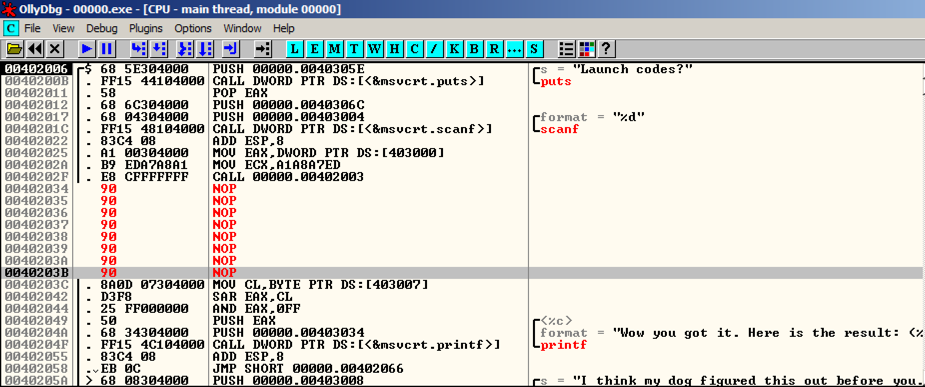
The choice is performed by two instructions: CMP (Compare) and JNZ (Jump if Not Zero), outlined in green in the image below.选择由两个指令执行:CMP(比较)和JNZ(如果不为零则跳转),在下图中以绿色标出。
Replace those instructions with NOP (No Operation), as shown below.用NOP(无操作)替换这些指令,如下所示。 Save the patched file.保存修补文件。

That value is the flag, like this:该值是标志,如下所示:
07b01710
The actual results are different, of course.当然,实际结果是不同的。
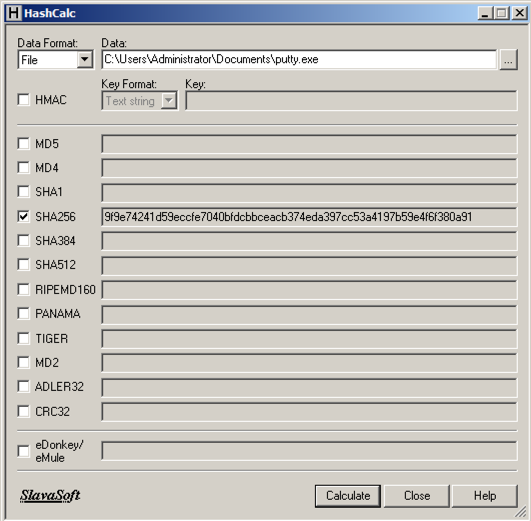
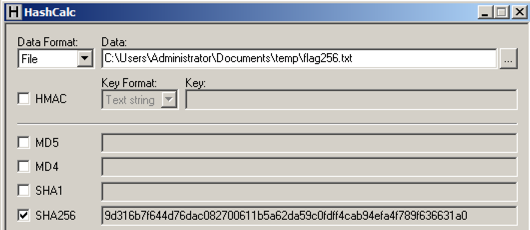
CAT标志是结果,三个字符如下: CAT Impenetrable!Cyber!标志是结果,19个字符是这样的: Impenetrable!Cyber! Calculate the SHA256 hash of that file.计算该文件的SHA256哈希值。 It should match the value shown below.它应该与下面显示的值匹配。
Calculate the CRC32 of that file to win.计算该文件的CRC32以获胜。


