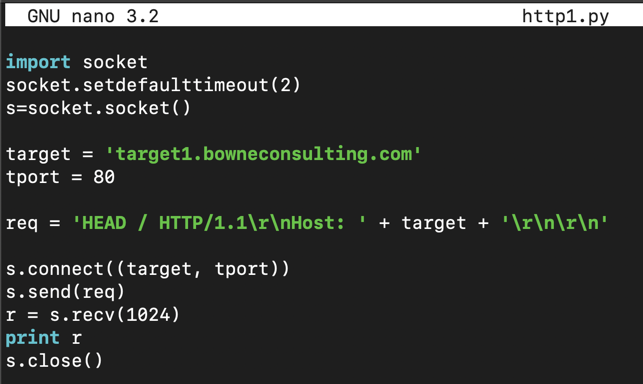
nano http1.py
import socket
socket.setdefaulttimeout(2)
s=socket.socket()

target = 'target1.bowneconsulting.com'
tport = 80

req = 'HEAD / HTTP/1.1\r\nHost: ' + target + '\r\n\r\n'

s.connect((target, tport))
s.send(req)
r = s.recv(1024)
print r
s.close()
Save the file with Ctrl+X, Y, Enter.
Explanation
This code connects on TCP port 80 just like the scanner you made in a previous project, but once it connects, it sends an HTTP request like this:The HEAD method grabs only the HTTP header, without getting any Web page from the server.
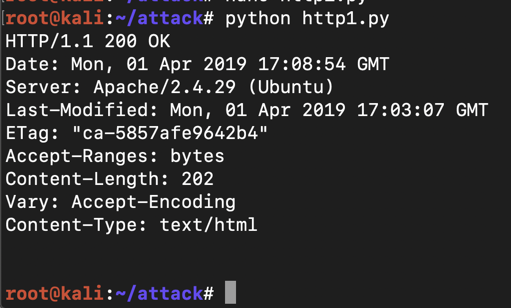
python http1.py
http://target1.bowneconsulting.com/php/login1.php
It's a simple login form. Test it with any username and password you like.
Now run Wireshark, and start it sniffing traffic. At the top left of the Wireshark window, in the Filter box, type http and press Enter.
Try to log in with a username of a and a password of b
In Wireshark, stop the capture.
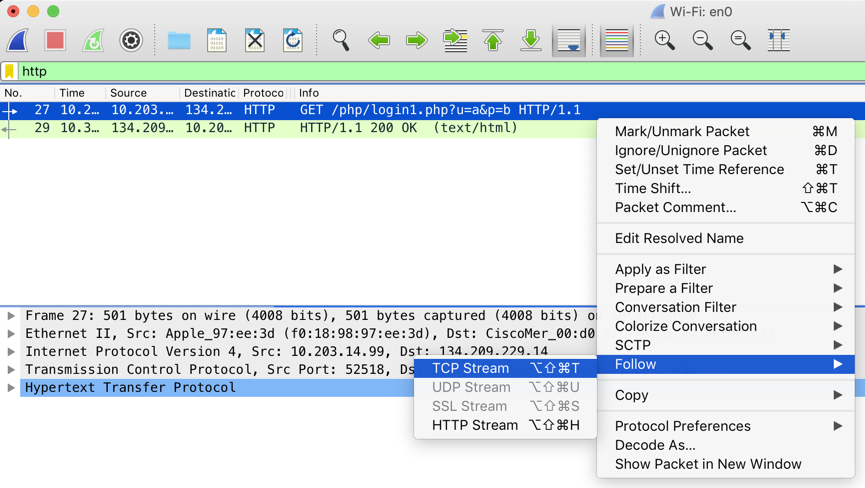
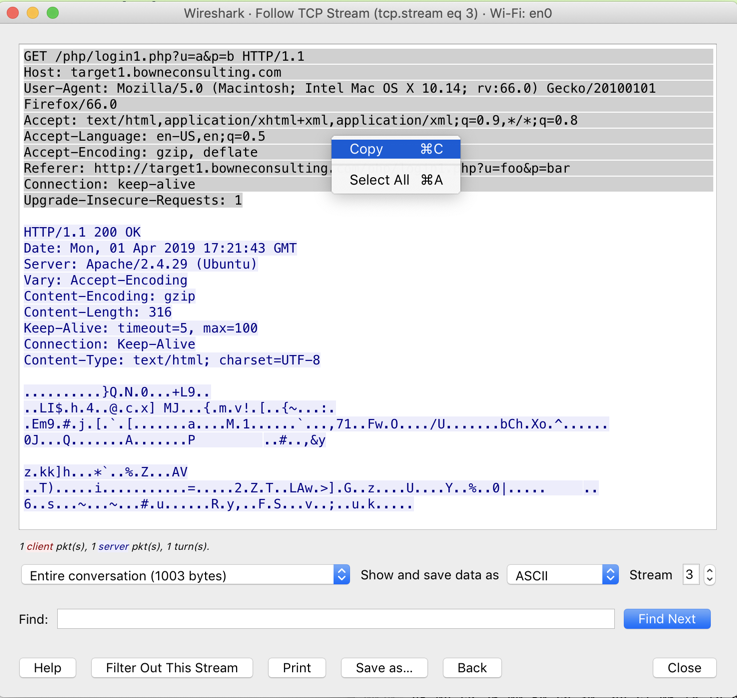
Find the packet in Wireshark with an "Info" column of "POST /php/login1.php HTTP/1.1". Right-click that line and click Follow, "TCP Stream", as shown below:
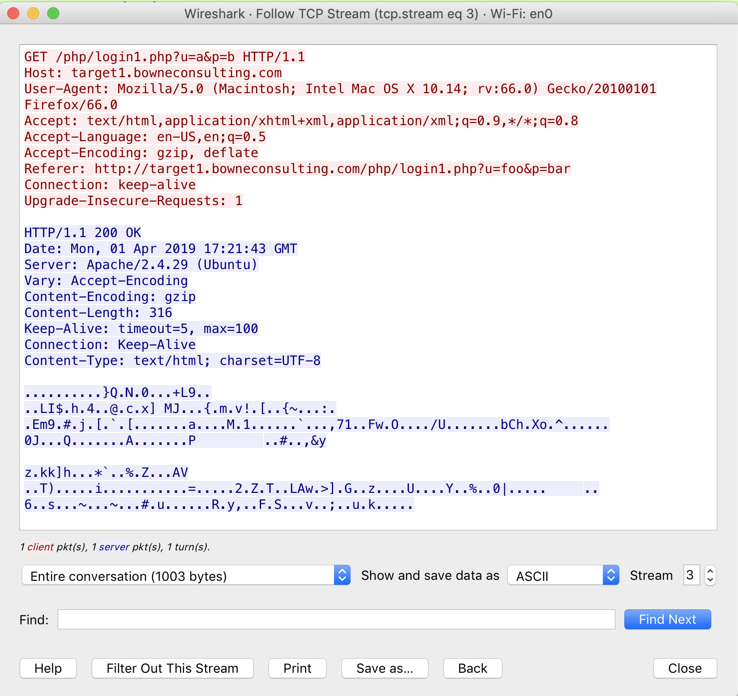
The POST request appears, as shown below. The red text shows the HTTP request your browser sent to the server, and the blue text shows the server's reply.
With the mouse, highlight the entire red request, right-click it, and click Copy, as shown below.
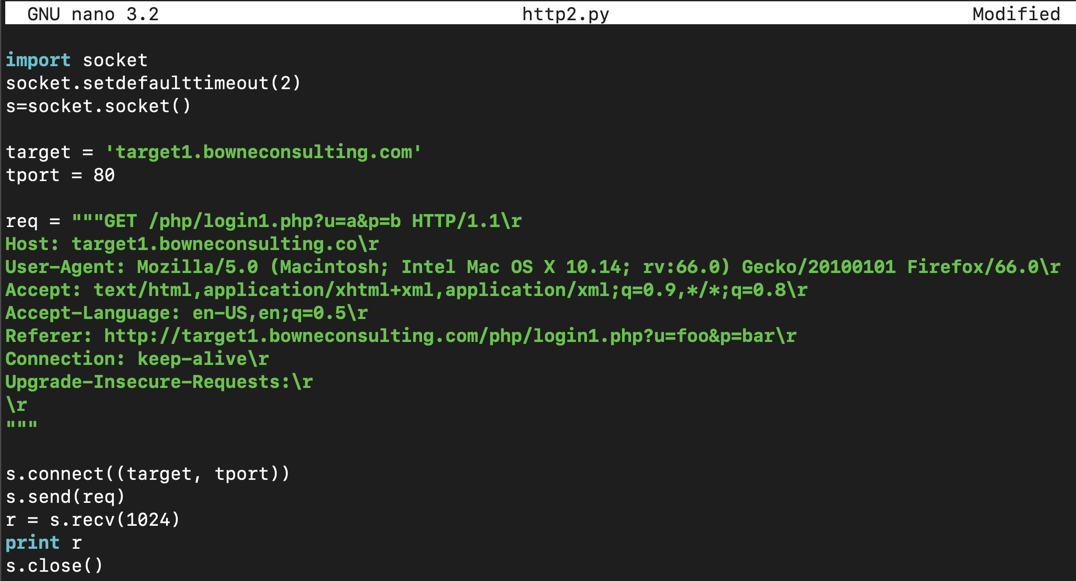
cp http1.py http2.py
nano http2.py
req = 'HEAD / HTTP/1.1\r\nHost: ' + target + '\r\n\r\n'
Make sure the request ends two carriage returns, producing a blank line, as shown below.
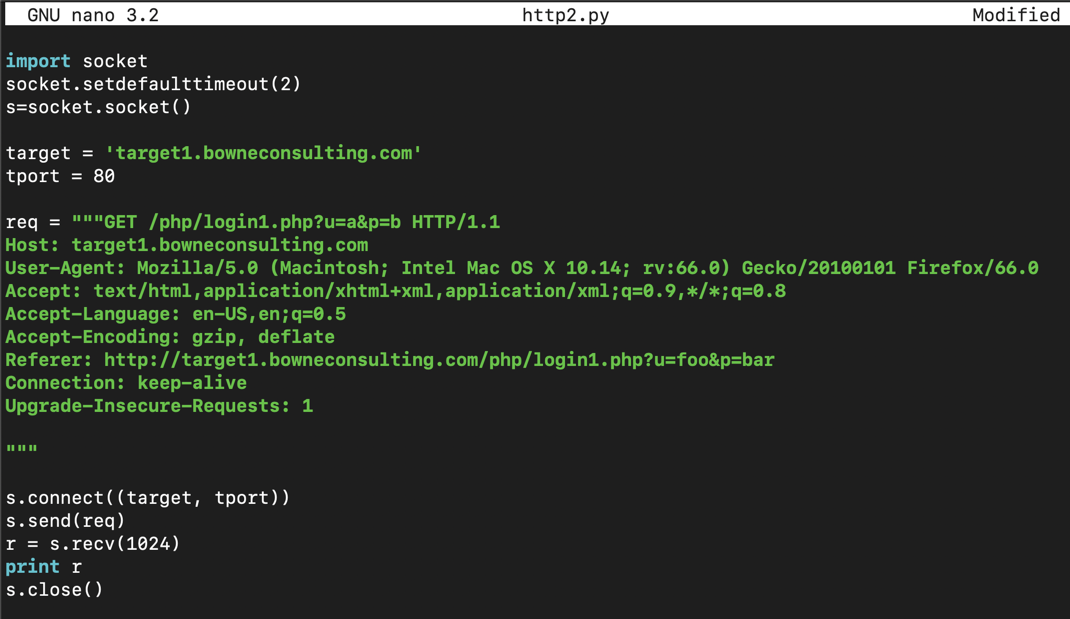
Save the file with Ctrl+X, Y, Enter.
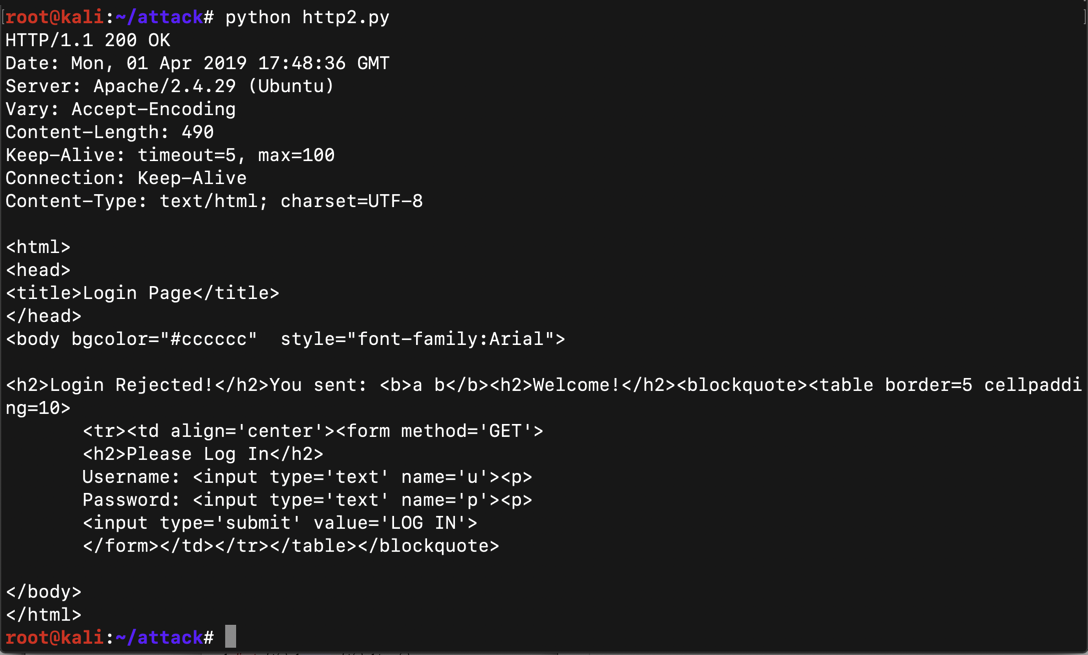
python http2.py
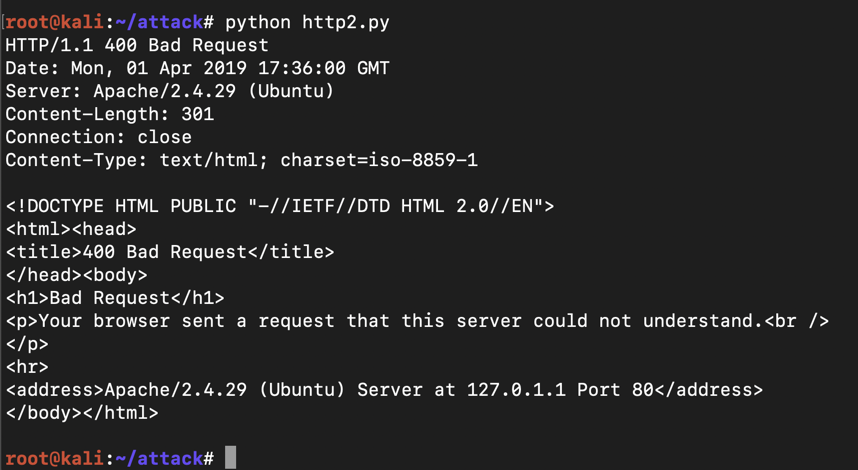
The problem is that the lines are terminated by line feeds, but modern version of Apache requires both a carriage return and a line feed at the end of each line.
To fix this, edit the file again and add
\r
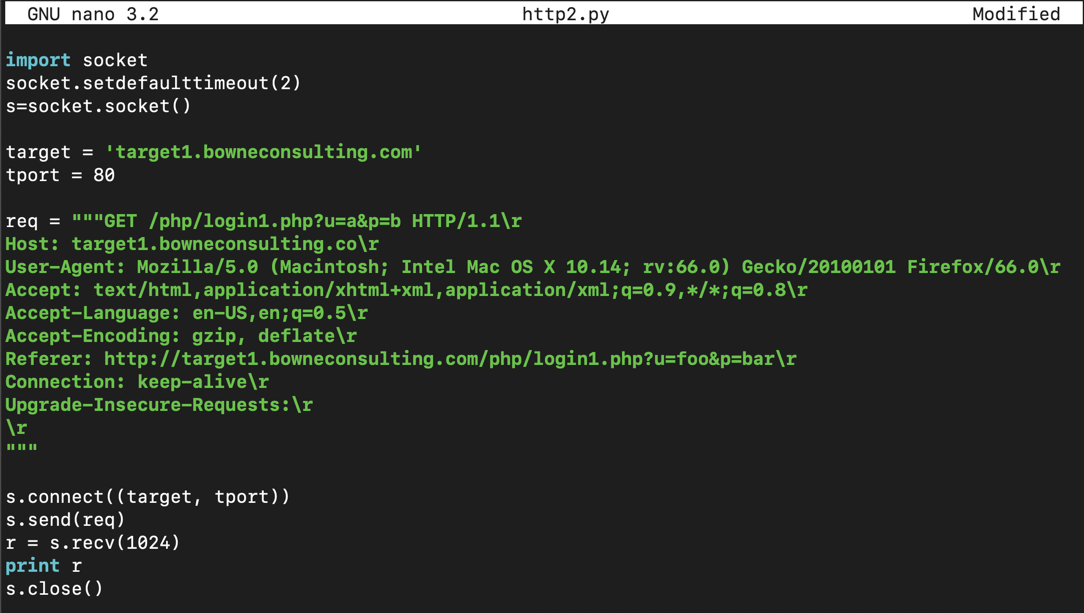
Save the script and run it again.
You should see an "HTTP 1.1 200 OK" message, followed by some readable text, and some unreadable garbage, as shown below.

The unreadable stuff is binary zipped content, which the request permits because of the "Accept-Encoding: gzip" line in the request.
Edit the program and remove that line, as shown below.
Save the script and run it again.
You should see an "HTTP 1.1 200 OK" message, and all the text below it should be readable, as shown below.
The standard practice is to use POST requests instead.
Open this page in another browser window:
http://target1.bowneconsulting.com/php/login2.php
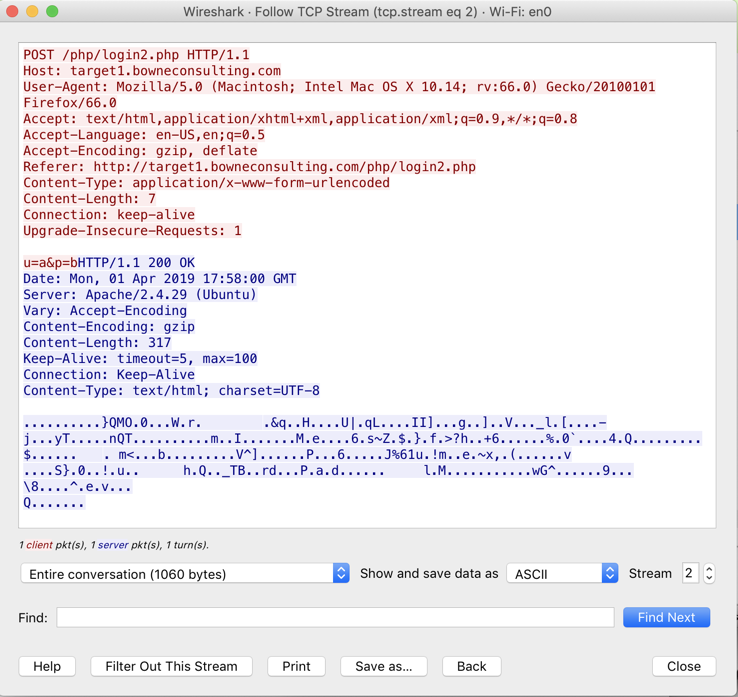
Try logging in, and capture the request in Wireshark, as shown below.
Notice that the username and password now appear on a separe line after the blank line at the end of the headers, and that a "Content-Length" header must be set to specify the total number of characters in the POST data. In the image below, the POST data is seven characters long:
u=a&p=b
http://target1.bowneconsulting.com/php/login2.php
with these parameters:
http://target1.bowneconsulting.com/php/login3.php
with these parameters:
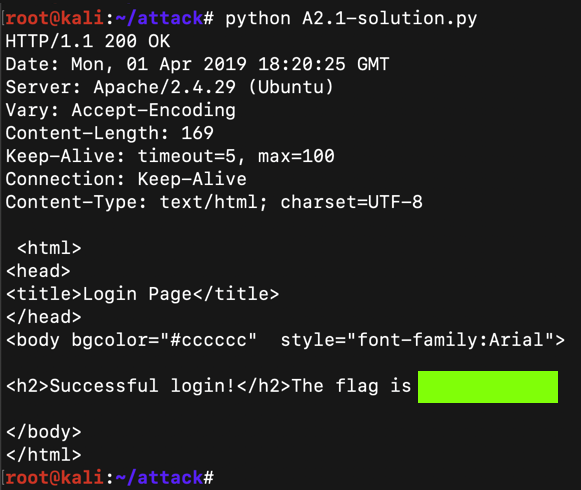
The server will reply with a flag, as shown below.
Then open this page:
http://target1.bowneconsulting.com/protected/dumbo
A login box appears. Log in with a username of dumbo and a password of dumbo
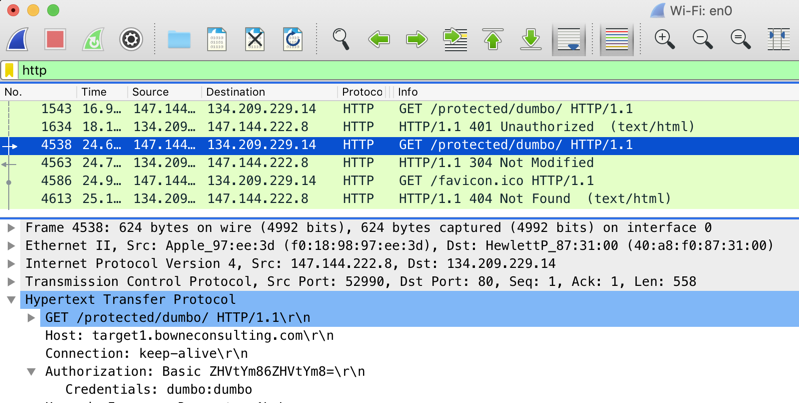
Wireshark shows two GET requests for a URL in the "protected" directory, as shown below.
The first request fails with a "401 Unauthorized" status, but the second one succeeds.
In the top pane, click the successful GET request. In the middle pane, expand the "Hypertext Transfer Protocol" section.
The Basic authentication string is shown, and decoded by Wireshark to show the credentials
dumbo:dumbo
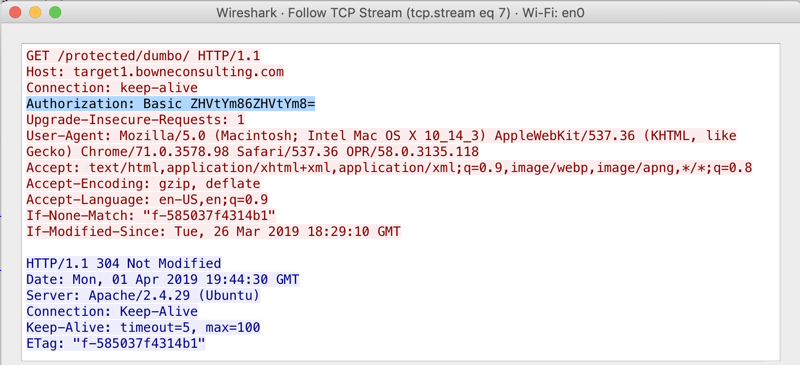
In the top pane of Wireshark, right-click the successful GET request and click Follow, "TCP Stream".
The request contains an "Authorization" header line, as shown below:
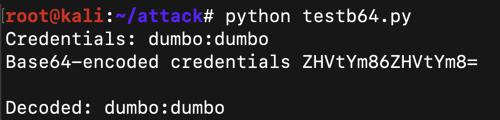
cred = "dumbo:dumbo"
print "Credentials:", cred

auth = cred.encode("base64")
print "Base64-encoded credentials", auth

decoded = auth.decode("base64")
print "Decoded:", decoded
http://target1.bowneconsulting.com/protected/A2.3/index.php
with these parameters:
http://target1.bowneconsulting.com/protected/A2.4
with these parameters:
https://bowneconsultingcontent.com/A2.5/index.php
with these parameters:
Hint: use requests.