Log in to Kali with:
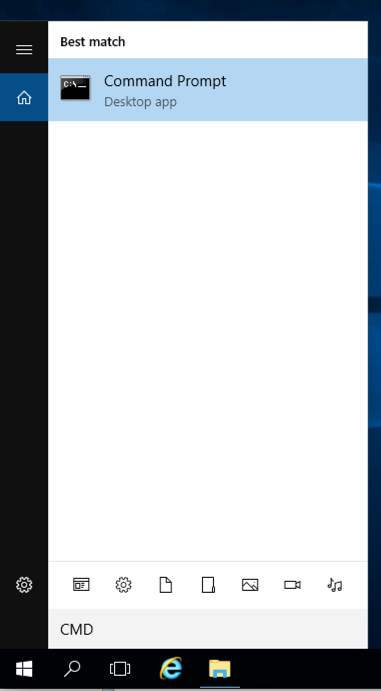
"Command Prompt" is found, as shown below.
Click "Command Prompt".
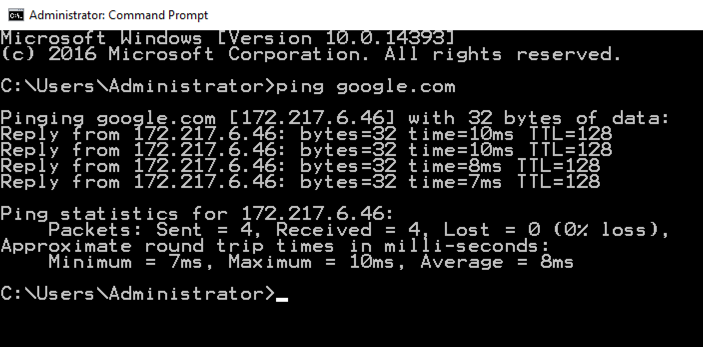
In the Command Prompt window, execute this command, as shown below.
ping google.com
Troubleshooting VM Networking
In VMware Workstation Player, at the top left, click Player, Manage, "Virtual Machine Settings", as shown below.
In the "Virtual Machine Settings" window, on the left side, click "Network Adapter", as shown below.
On the right side, check that these settings are correct:
- Connected box checked
- "Connect at power on" box checked
- NAT selected
Turning Off Windows Firewall
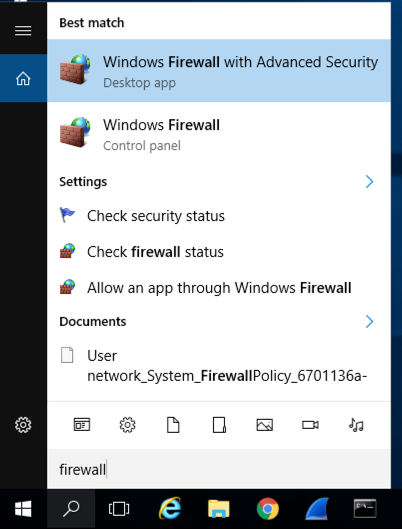
At the lower left of the Windows desktop, click the magnifying glass icon.Type FIREWALL.
In the Search results, click "Windows Firewall", the second result in the image below.
In the Windows Firewall box, on the left side, click "Turn Windows Firewall on or off".
Check both of the boxes labelled "Turn off Windows Firewall (not recommended)", as shown below.
Click OK.
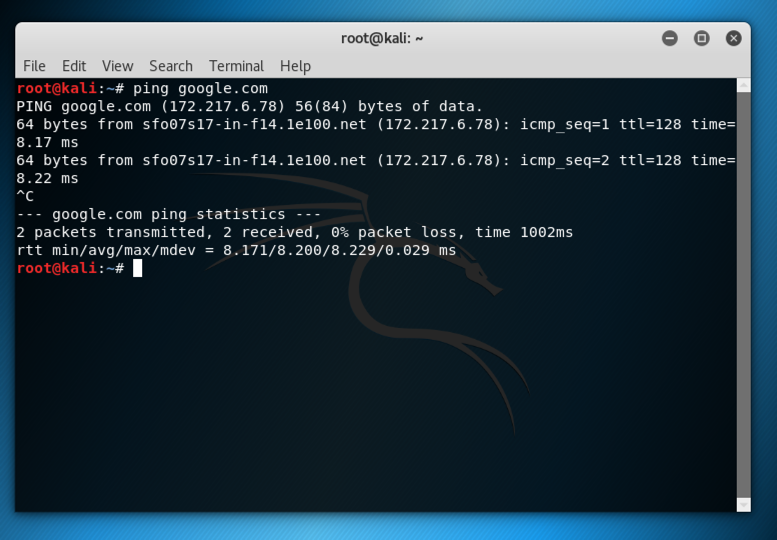
In the Terminal window, execute this command, as shown below.
ping google.com
You should see replies, as shown below. If you do not, perform the "Troubleshooting" steps in the box above.
ipconfig
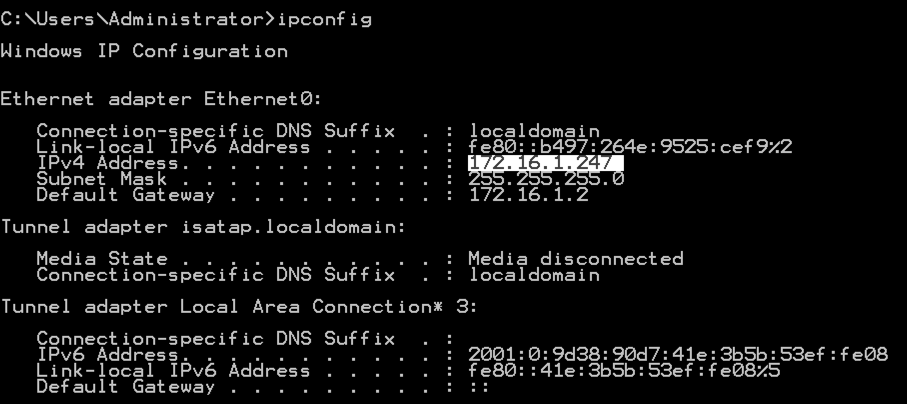
On your Kali Linux machine, in the Terminal window, execute this command, as shown below, replacing the IP address with the IP address of your Windows Server 2016 machine.
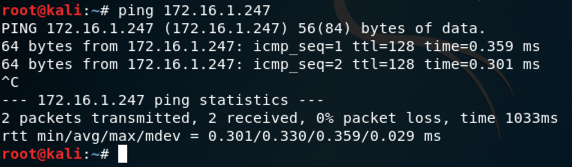
ping 172.16.1.247
You should see replies, as shown below. If you do not, perform the "Troubleshooting" steps in the box above. You should also make sure the Windows firewall is off, as explained in an earlier project.
Type Control. Open Control Panel.
In Control Panel, in the "Programs" section, click "Turn Windows features on or off".
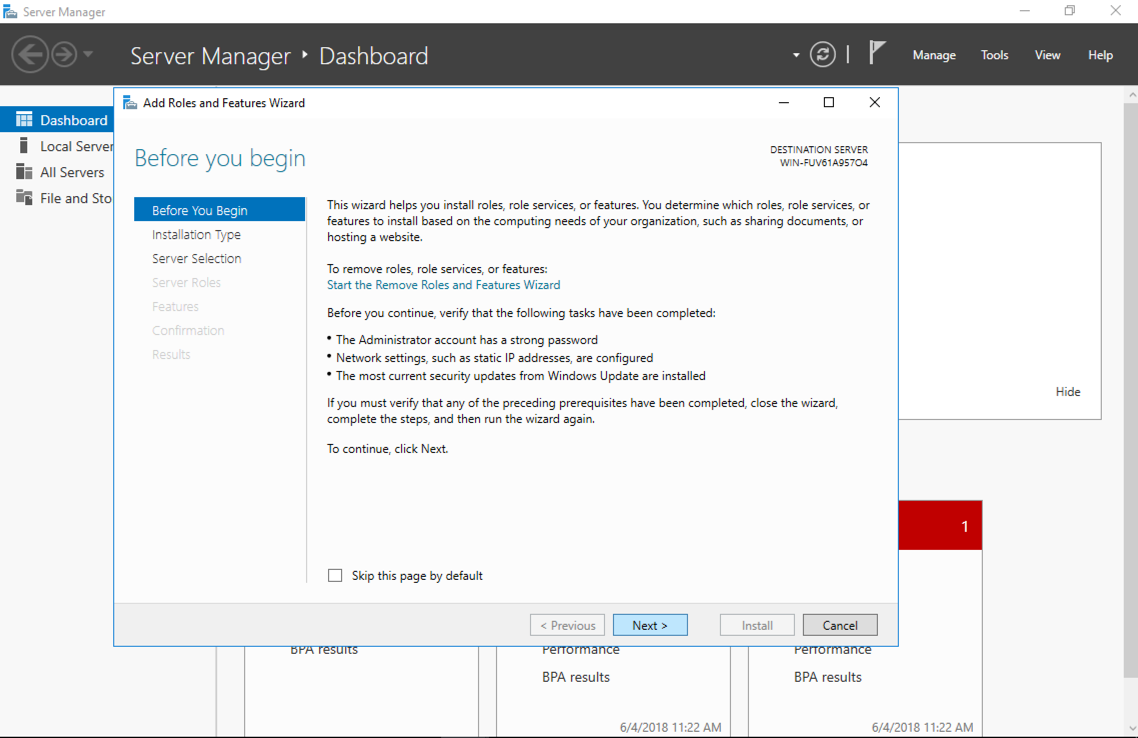
Server Manager launches, as shown below.
In the "Before you begin" box, click Next.
In the "Select installation type" box, click Next.
In the "Select destination server" box, click Next.
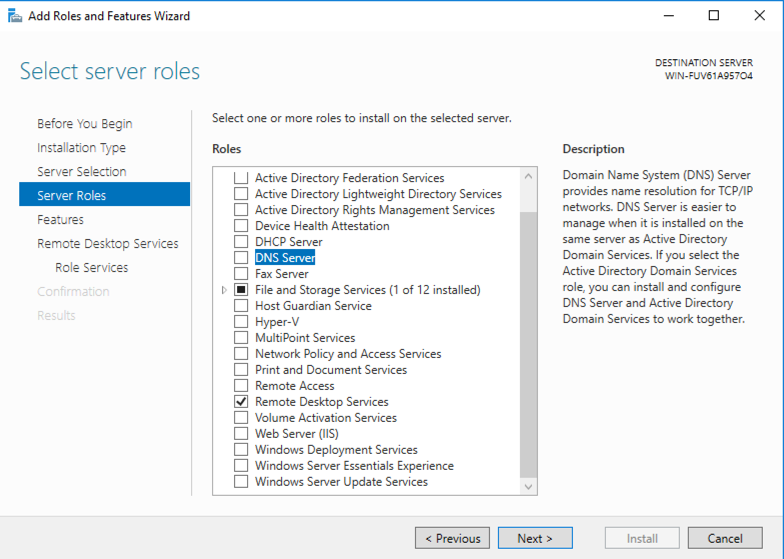
In the "Select server roles" box, check "Remote Desktop Services", as shown below.
Check "DNS Server".
A box pops up, asking "Add features that are required for DNS Server?". Click "Add Features". Click Continue.
In the "Select server roles" box, click Next.
In the "Features" box, click Next.
In the "Remote Desktop services" box, click Next.
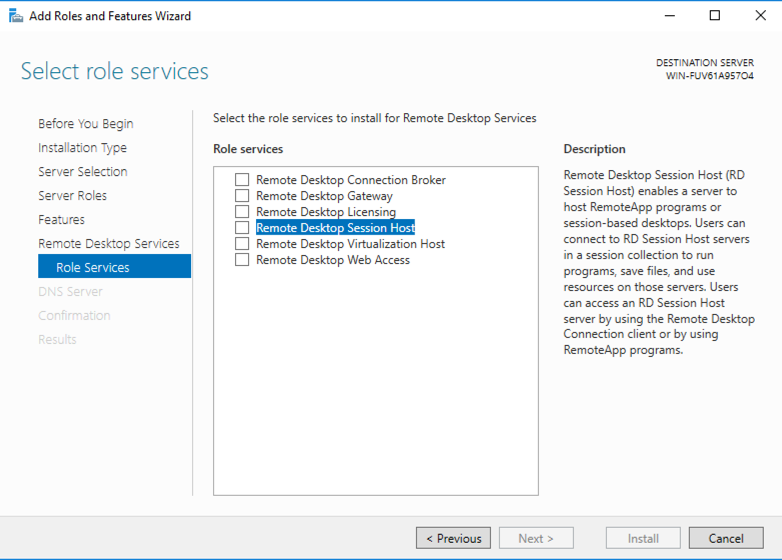
In the "Select role services" box, check "Remote Desktop Session Host", as shown below.
A box pops up, asking "Add features that are required for Remote Desktop Session Host?". Click "Add Features".
In the "Select role services" box, click Next.
In the "DNS Server" box, click Next.
In the "Confirm installation selections" box, click Install.
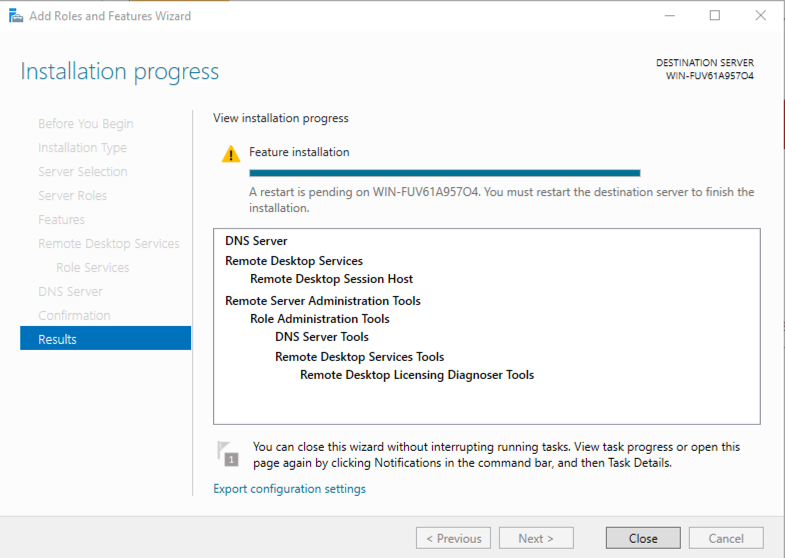
Wait for the "Installation progress" to finish, as shown below. Then click Close.
At the lower left of the Windows desktop, right-click the Start button, point to "Shut down or sign out", and click "Update and restart", as shown below.
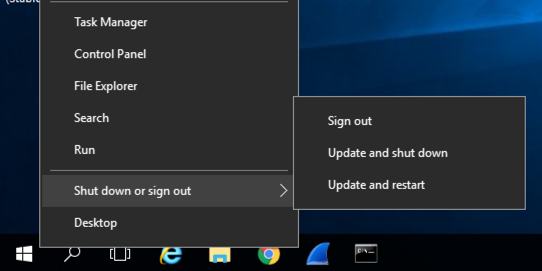
In the "Choose a reason..." box, click Continue.
When your server restarts, log in as Administrator with a password of P@ssw0rd
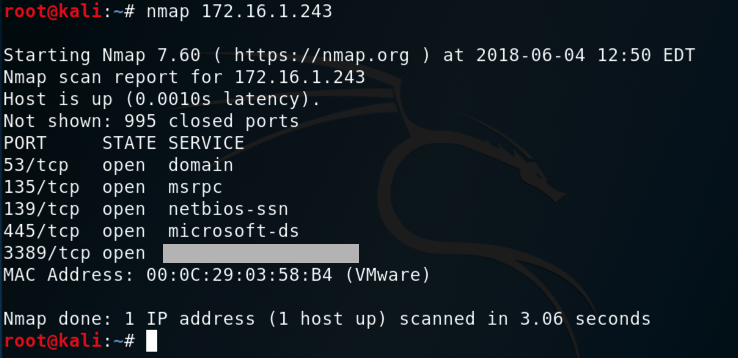
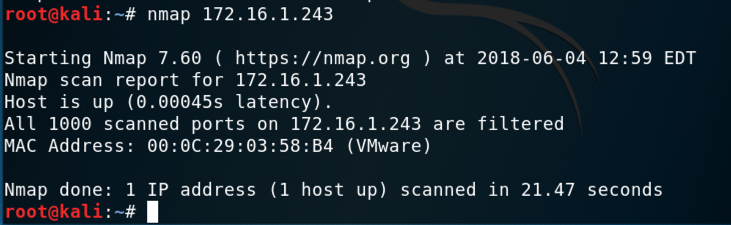
nmap 172.16.1.243
Type FIREWALL.
In the Search results, click "Windows Firewall", the second result in the image below.
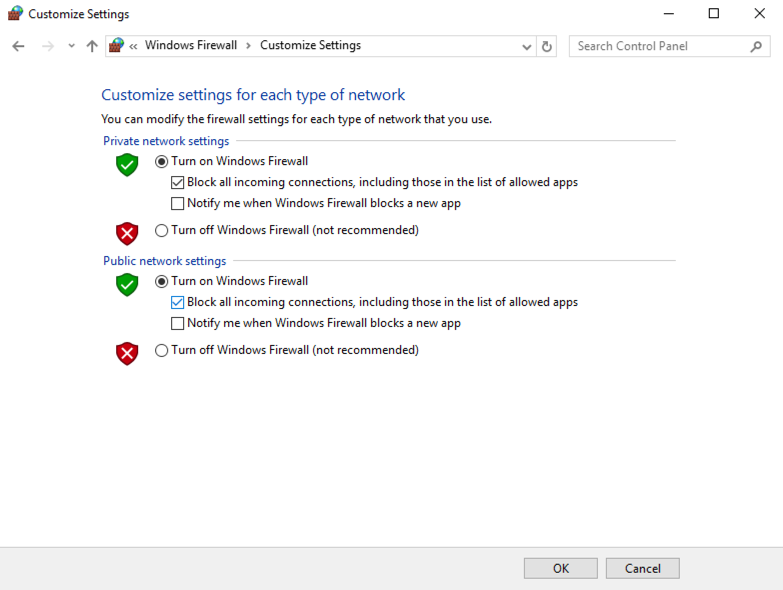
In the Windows Firewall box, on the left side, click "Turn Windows Firewall on or off".
Check both of the buttons labelled "Turn on Windows Firewall", and both the boxes labelled "Block all incoming connections...", as shown below.
Click OK.
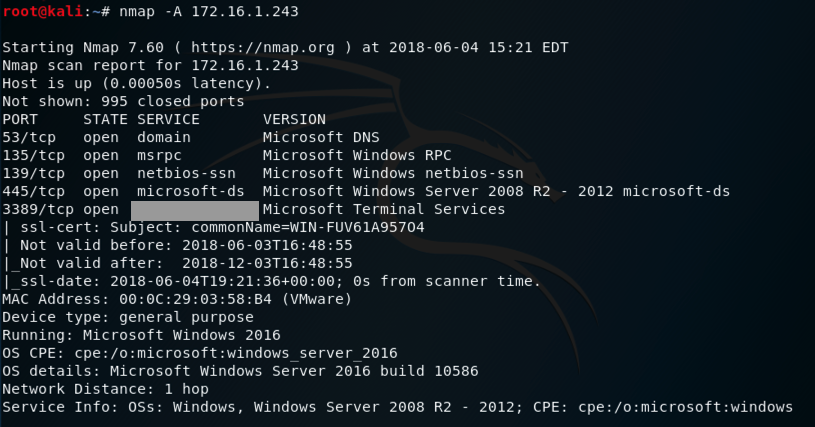
nmap 172.16.1.243
https://svn.nmap.org/nmap/docs/nmap.usage.txt
These are the most important ones:
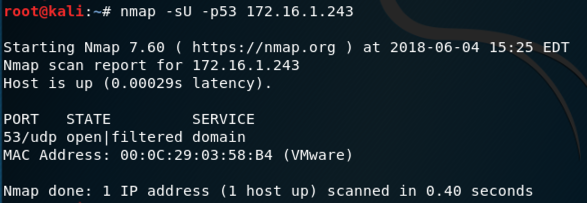
Scan your Windows server with operating system detection, and then scan UDP port 53.
Your results should be similar to those shown below.
That port number is the flag.
That port number is the flag.
Moved to local server 3-21-19
Forms removed 7-9-19


